JAMESTOWN DISTRIBUTORS, BRISTOL, RHODE ISLAND
COMMERCIAL SOLAR CONTRACTOR IN RI
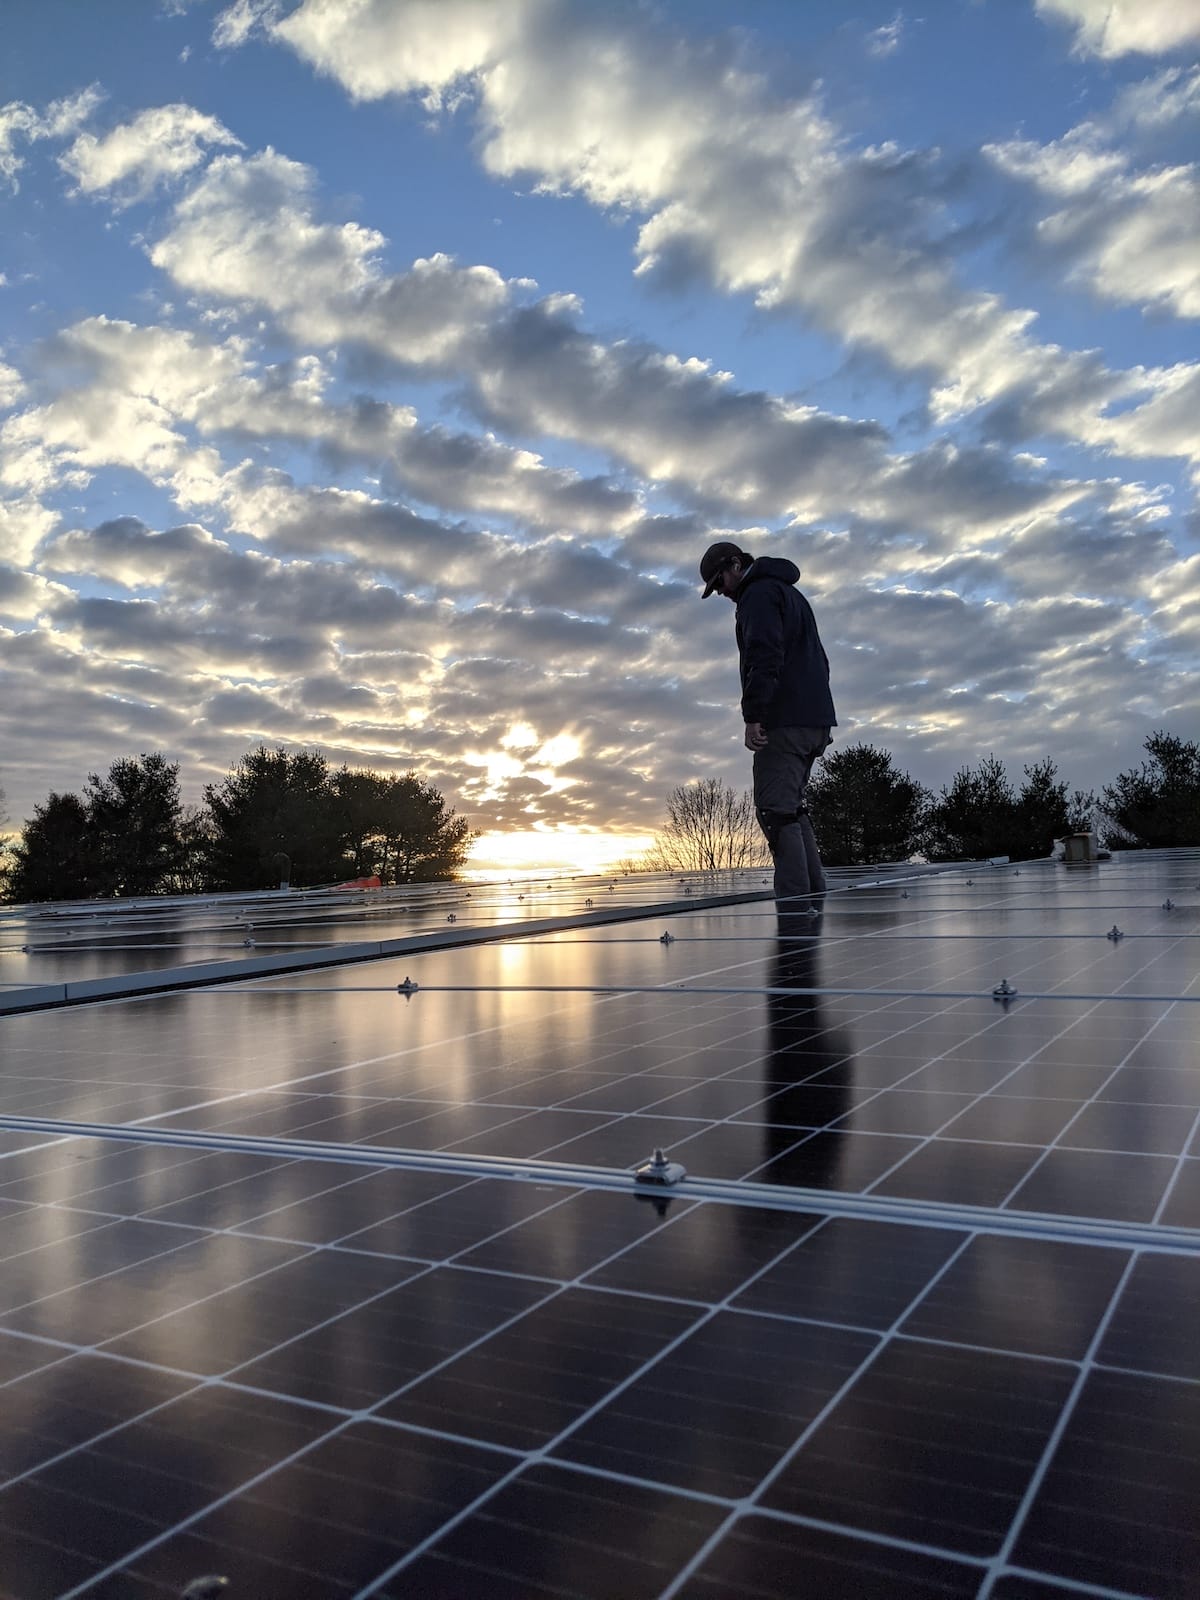
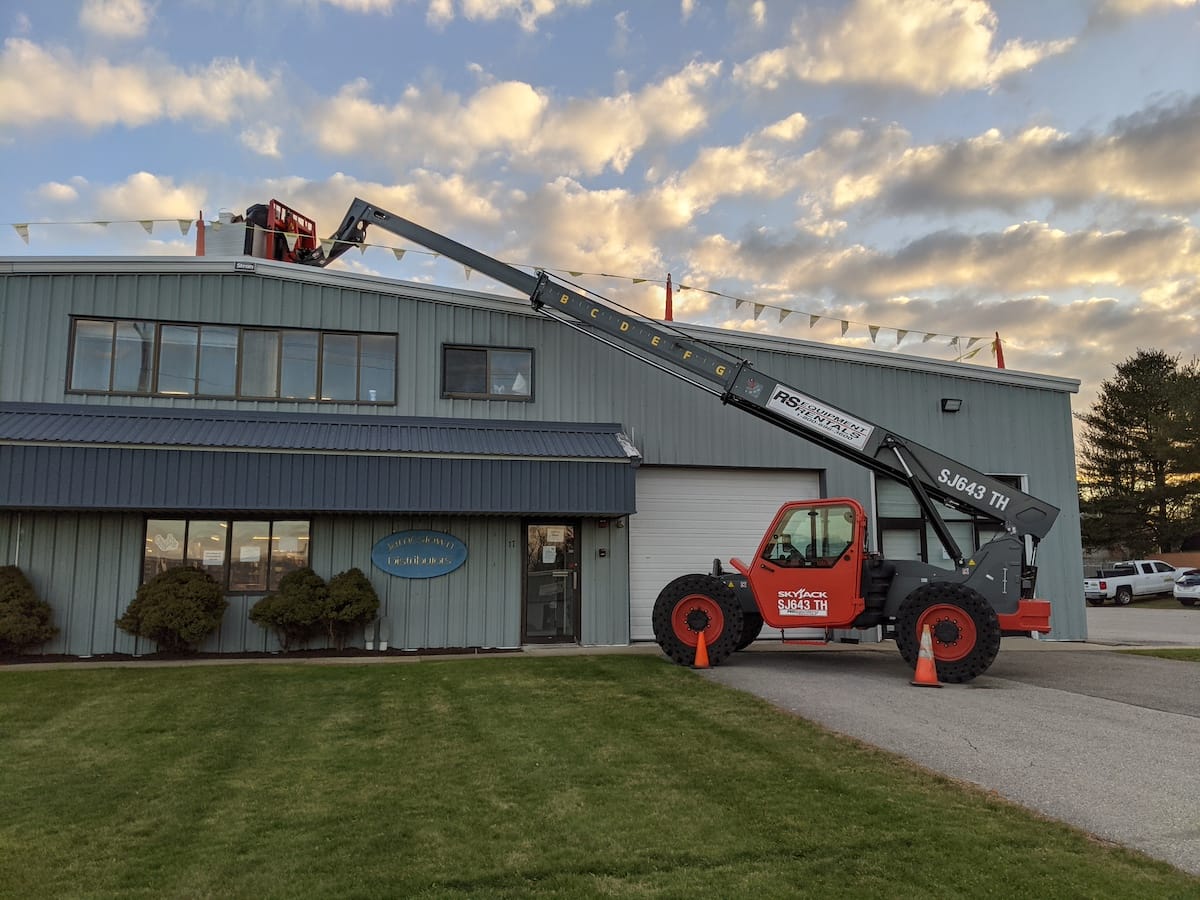
Join us on a tour of our recent project at Jamestown Distributors in Bristol, Rhode Island. This real-world commercial solar install by CommercialSolarGuy showcases our design and construction expertise, from selecting the right components to executing the project with precision. We use our decades of experience sourcing and integrating top-quality hardware to tailor each project to our client’s specific needs.
Next, we’ll delve into the decisions and technical details that are essential for a successful commercial solar install. Our support doesn’t stop at installation; we provide comprehensive operations and maintenance to enhance the performance and extend the lifespan of your solar investment. Whether you are new to solar or looking to upgrade, this guide will provide valuable insights into improving your property’s energy efficiency and overall value with solar power.
Experience
As seasoned construction professionals, we’ve built roads, bridges, homes, and businesses. We now channel this vast experience into delivering robust and efficient commercial solar install solutions, custom-tailored for each project.
Quality Hardware
We understand that the success of a commercial solar install hinges on the quality of each component. Our expert team carefully selects each piece of hardware, creating a synchronized system that maximizes electricity generation and ensures reliability.
Price Competitive
Our pricing is transparent and detailed, calculated for each component, task, and hour spent. If you have any questions about our pricing, please contact us. We are here to provide clarity and ensure you understand the value of your investment.
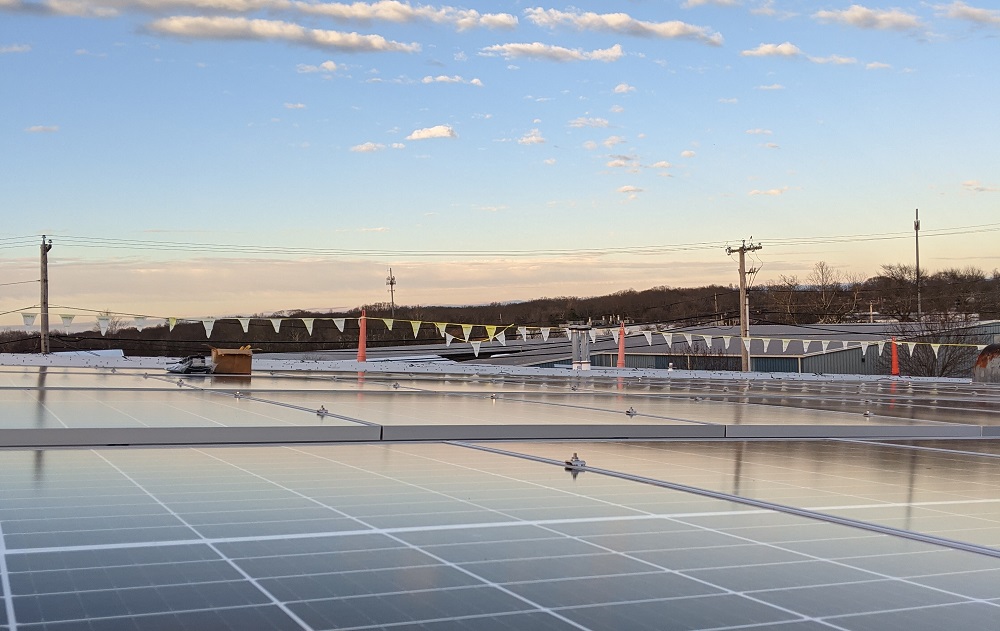
Commercial Rooftop Install by RI Solar Contractor
Project Highlight: Jamestown Distributors Commercial Solar Install
Constructed in the late 1990s, Jamestown Distributors faced challenges with a 25-year-old leaking corrugated steel roof. The decision to overlay this with a white thermoplastic (TPO) roofing product, coupled with modern insulation, provided an opportunity to enhance the building’s functionality by adding a commercial solar installation on top.
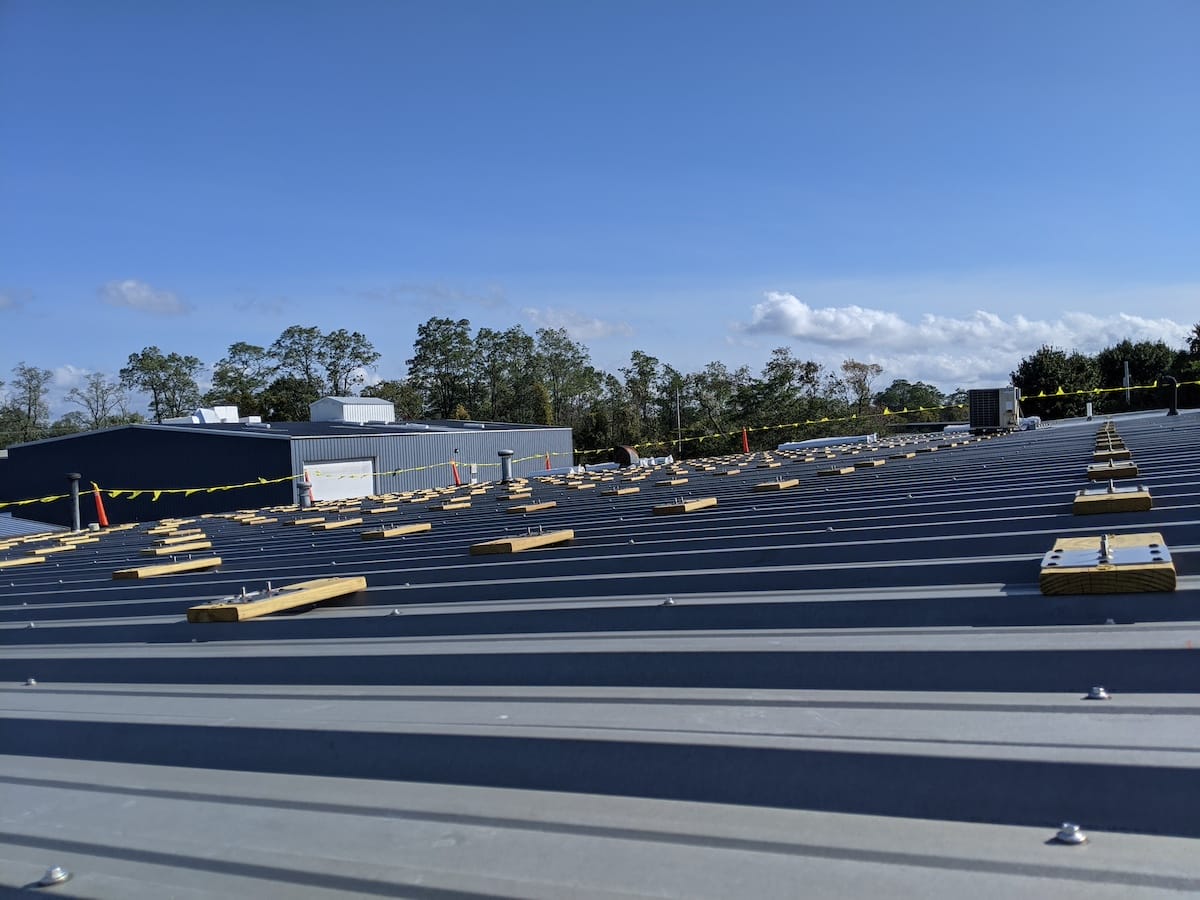
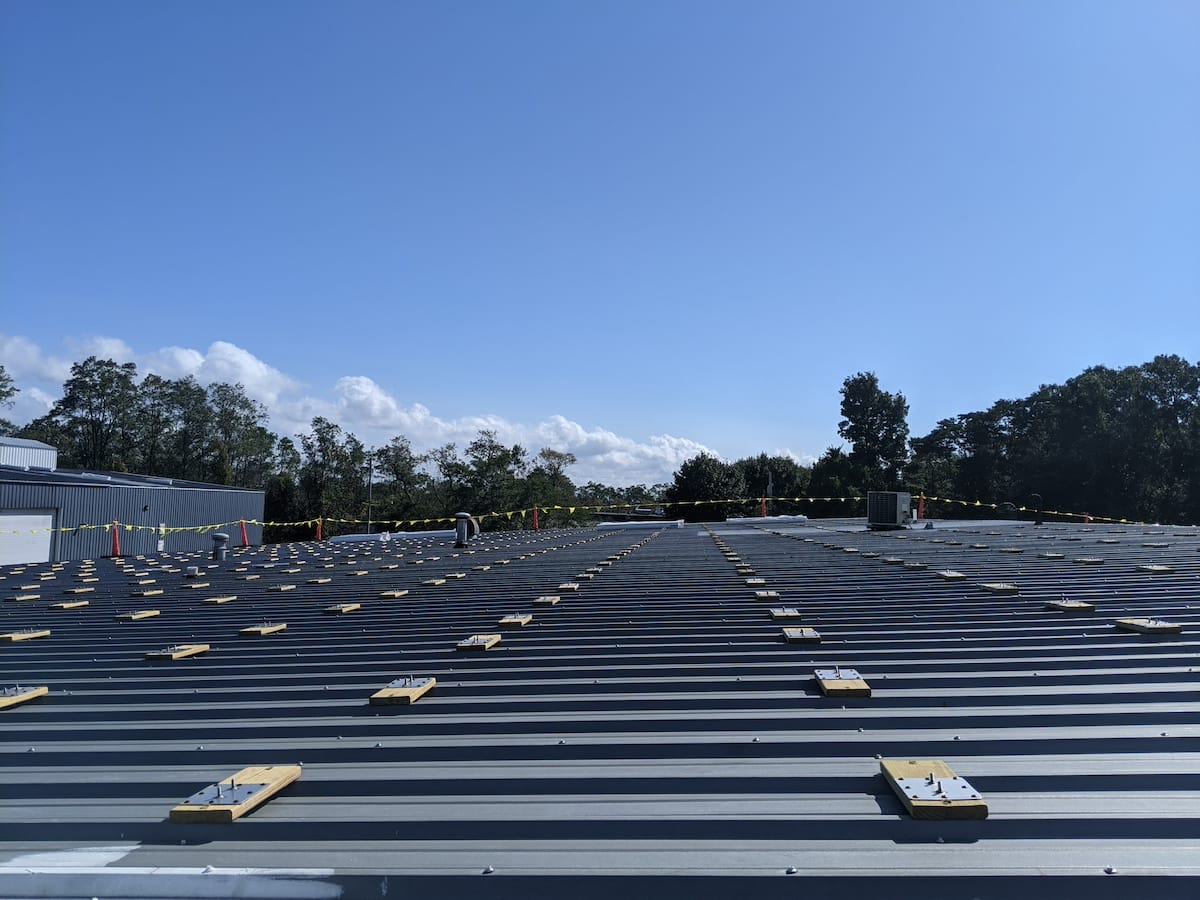
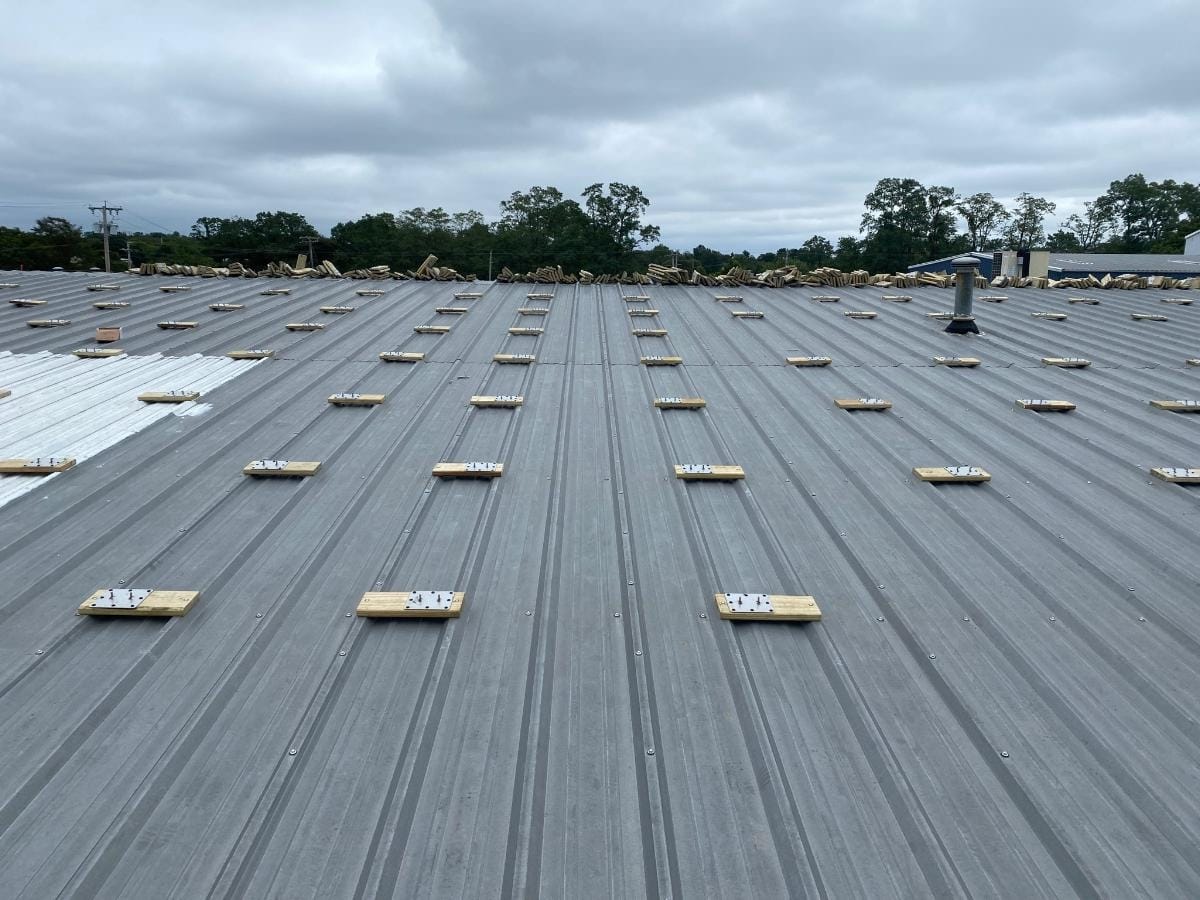
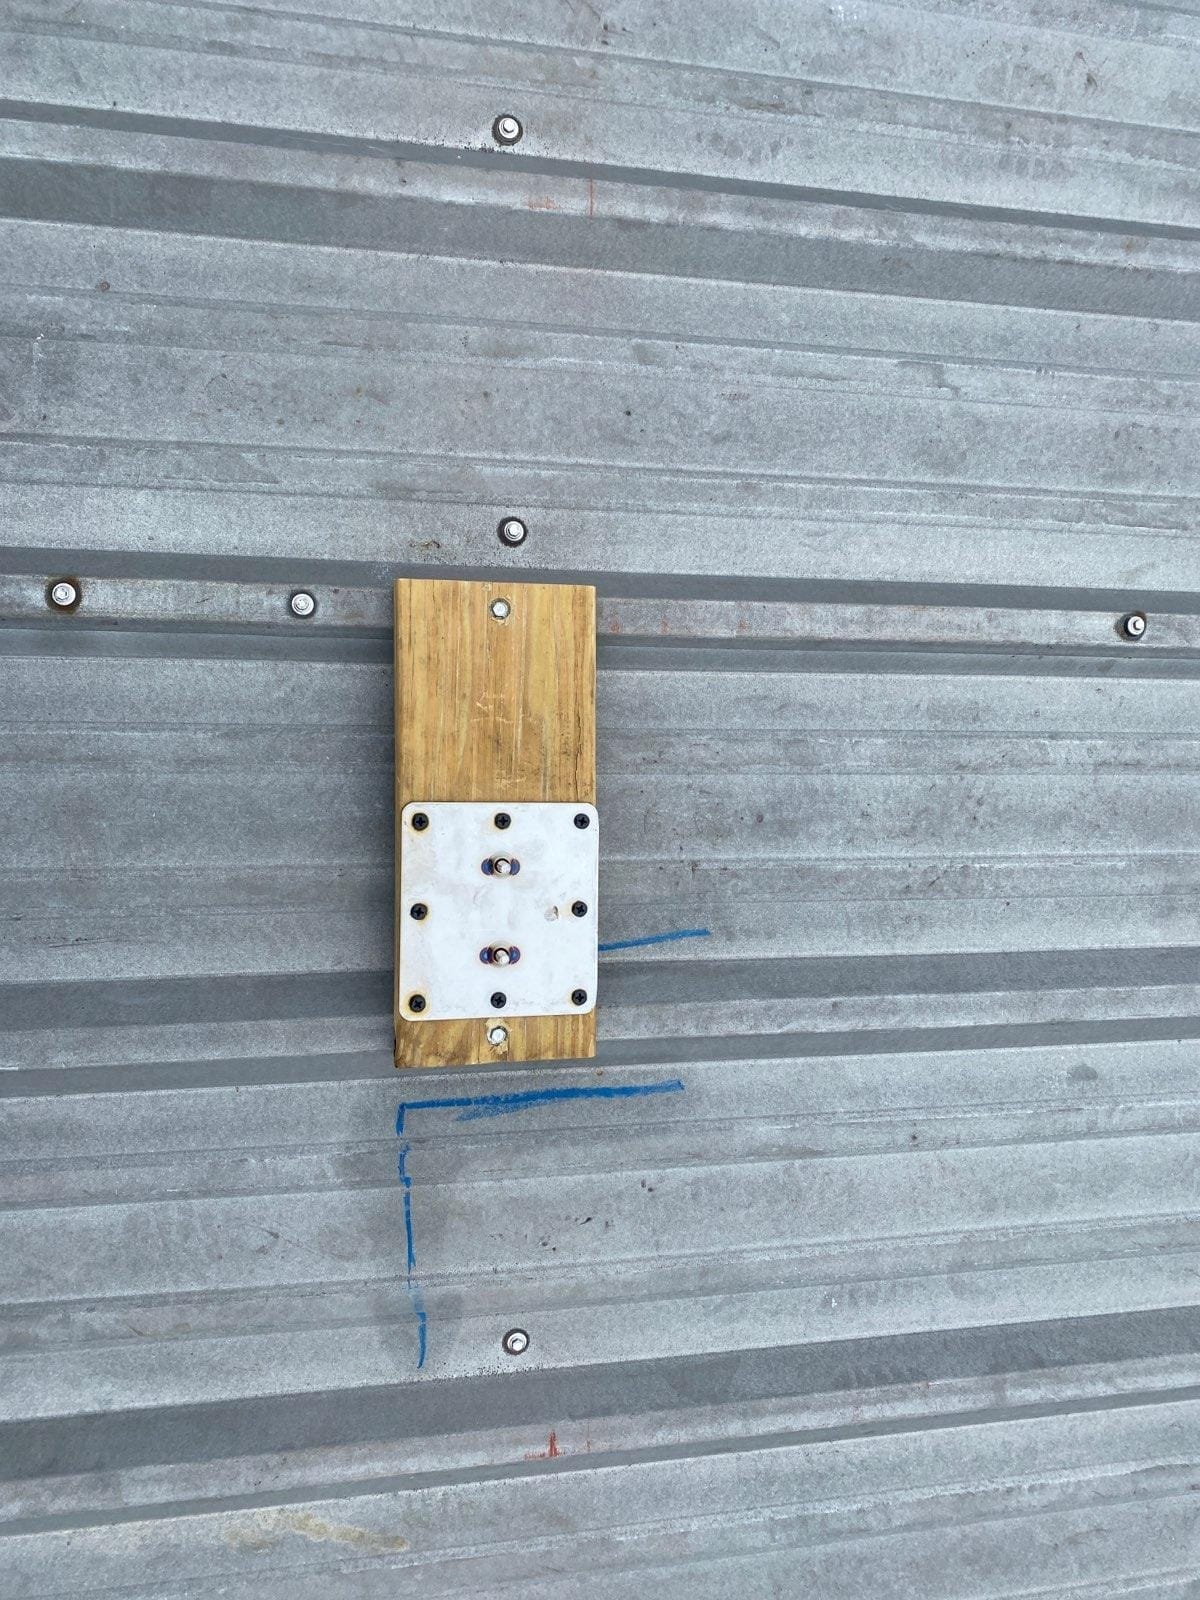
To ensure a secure installation, the solar panels were directly connected to the metal roof, soon to be covered by the newly installed TPO. The TPO layer, along with the insulation, is approximately one inch thick. We meticulously installed wooden footings with integrated metal plates directly into the corrugated steel surface. These footings were sealed under the TPO layer to ensure both durability and effective waterproofing.
Hundreds of wooden planks were fastened to the steel roof, using 5/16” bolts protruding upward to serve as solid attachment points for our solar racking system. During the installation, the roofing company added further layers of insulation and TPO, and precisely cut out squares from the insulation to ensure that the solar connections fit seamlessly within the roofing system. Additionally, the roofer warrantied our bolt penetrations and performed specialized heat weld work to seal these penetrations.
Different types of metal corrugated rooftops require different types of attachments. We can generally estimate what it will take to connect, but sometimes, the complexities and peculiarities within the construction process force us to figure things out. Leveraging decades of construction experience and collaborating with engineers and seasoned contractors who have faced similar issues ensures we consistently deliver the best outcomes for commercial solar installations.
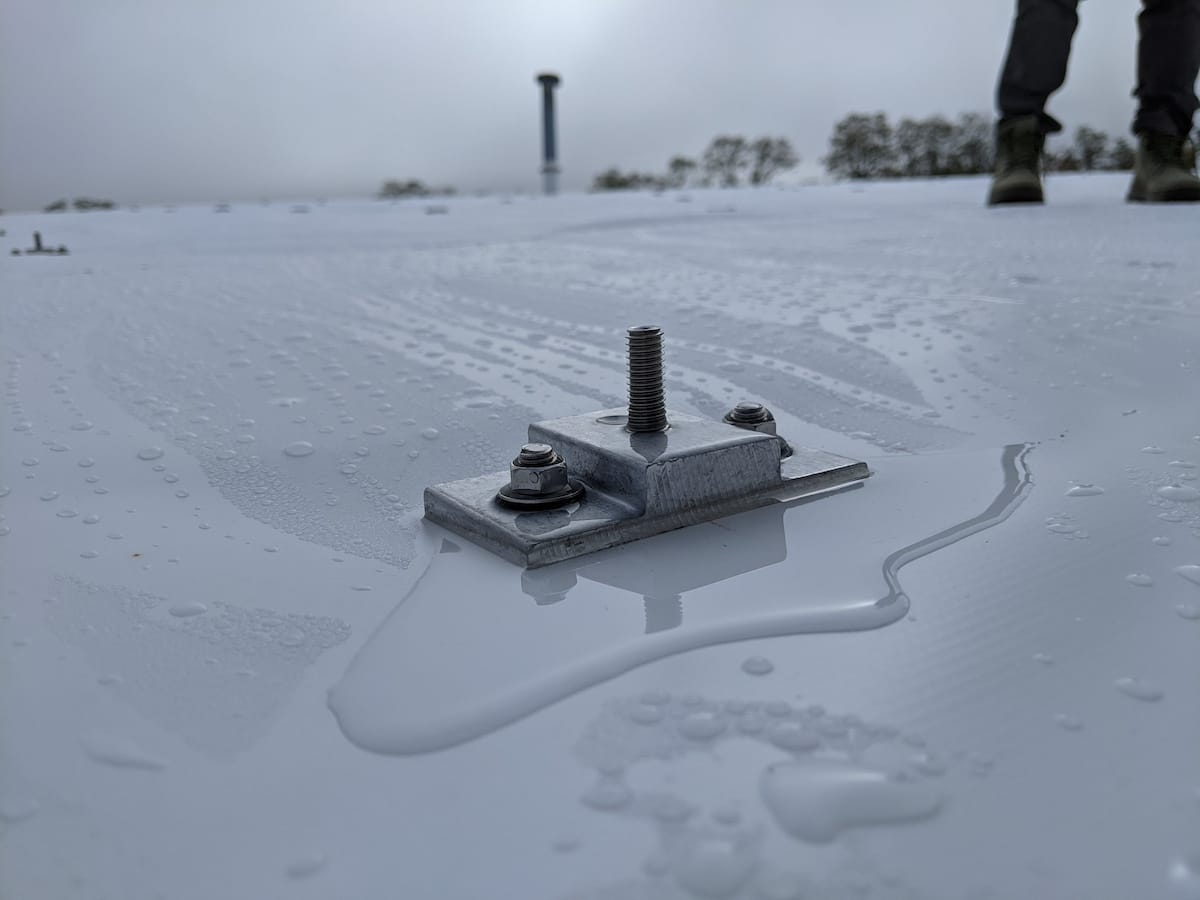
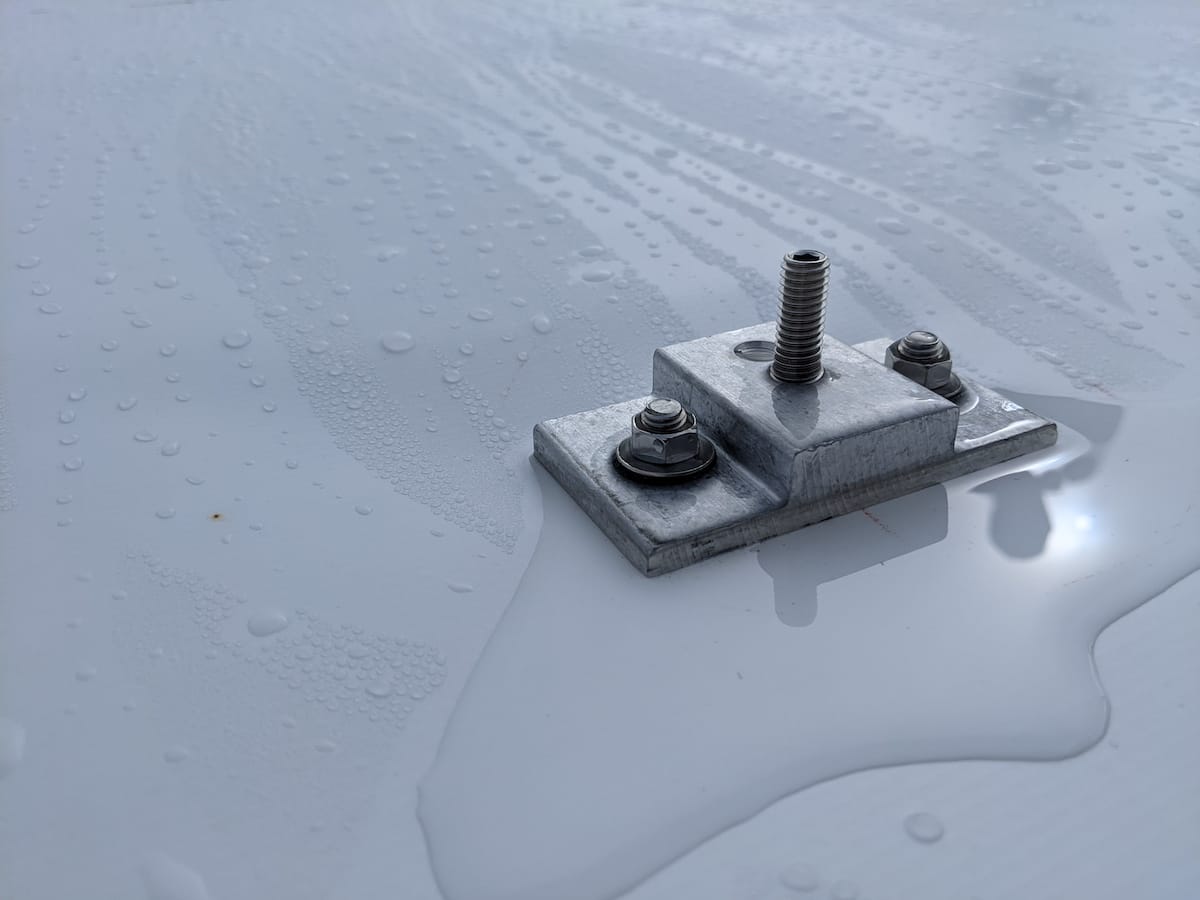
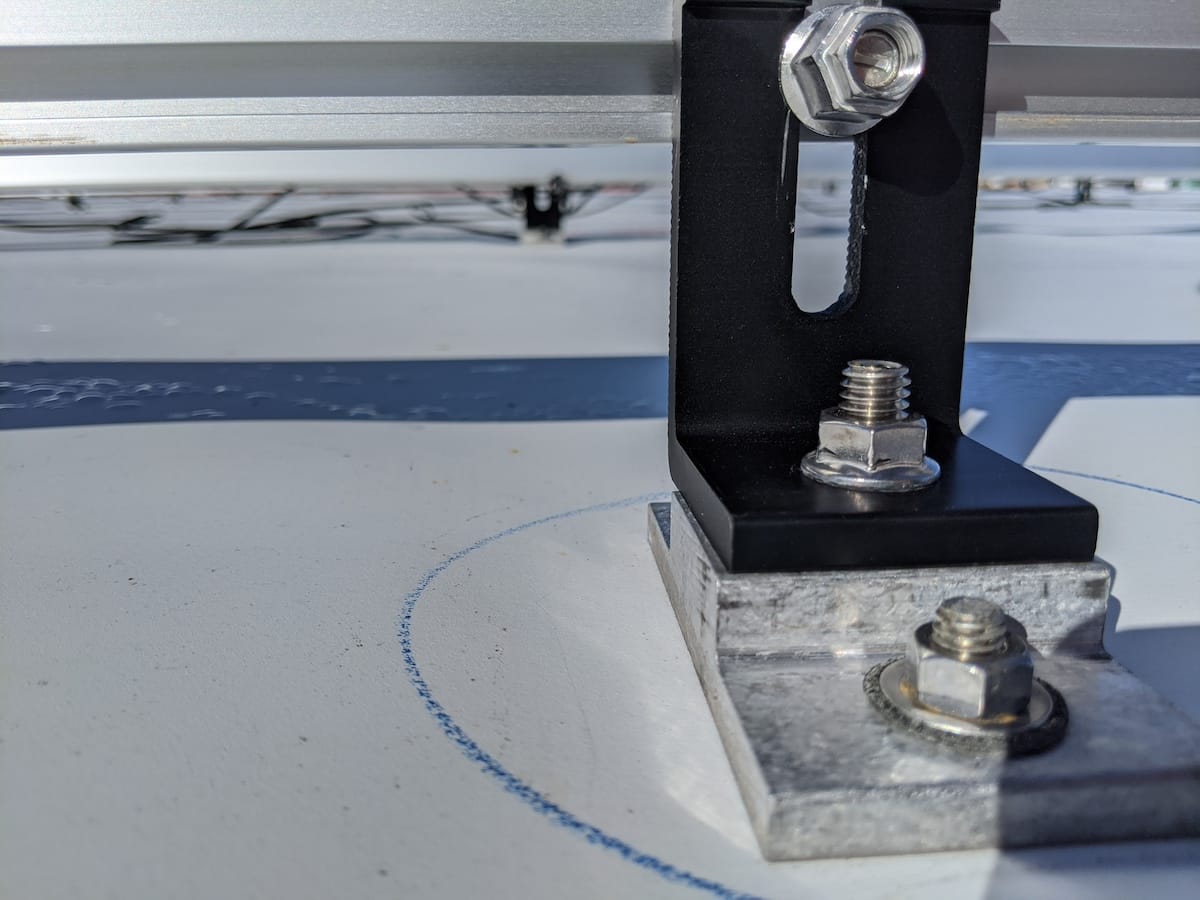
After attaching the wooden footings, the roofing company put down their layers of insulation and white TPO material, as shown in the surrounding images. During this process, CommercialSolarGuy technicians precisely shaped the insulation at each attachment point, allowing our metal bolts, part of the flashing system, to protrude. The roofers then made precise incisions in the TPO material and performed heat welding to ensure a tight seal at each attachment point that can be warrantied.
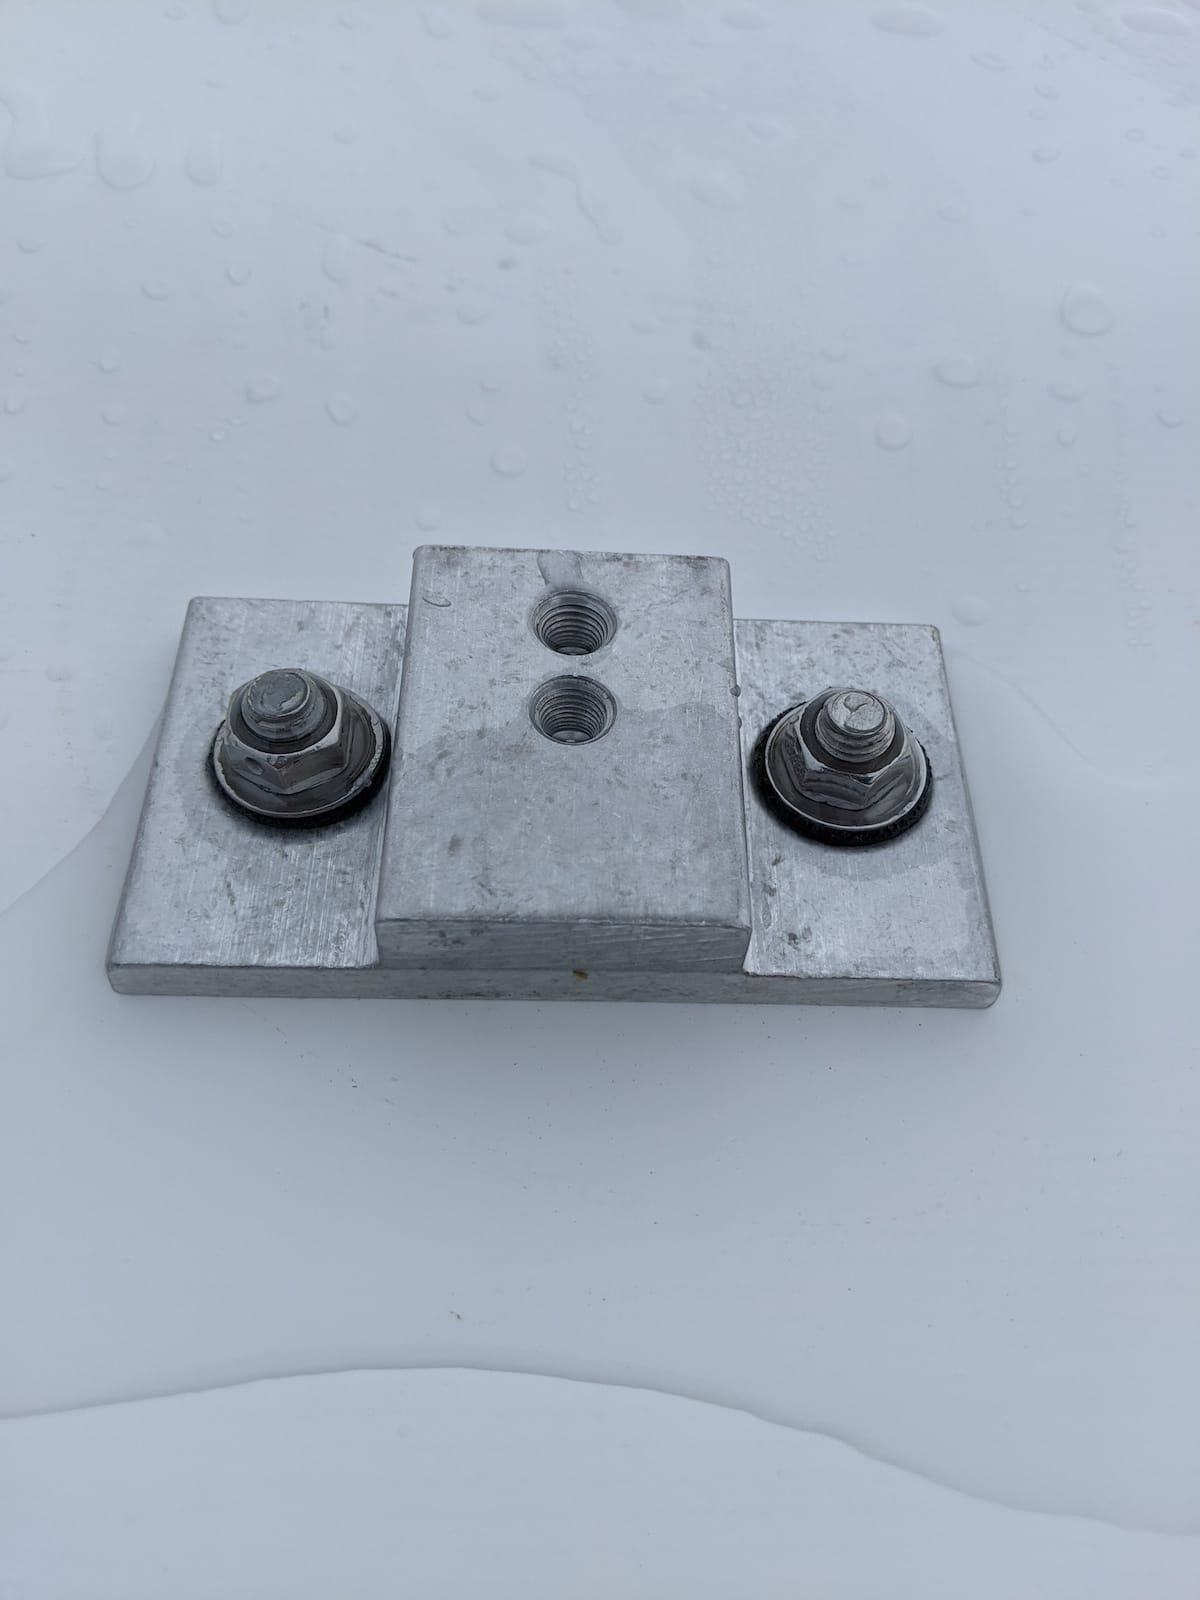
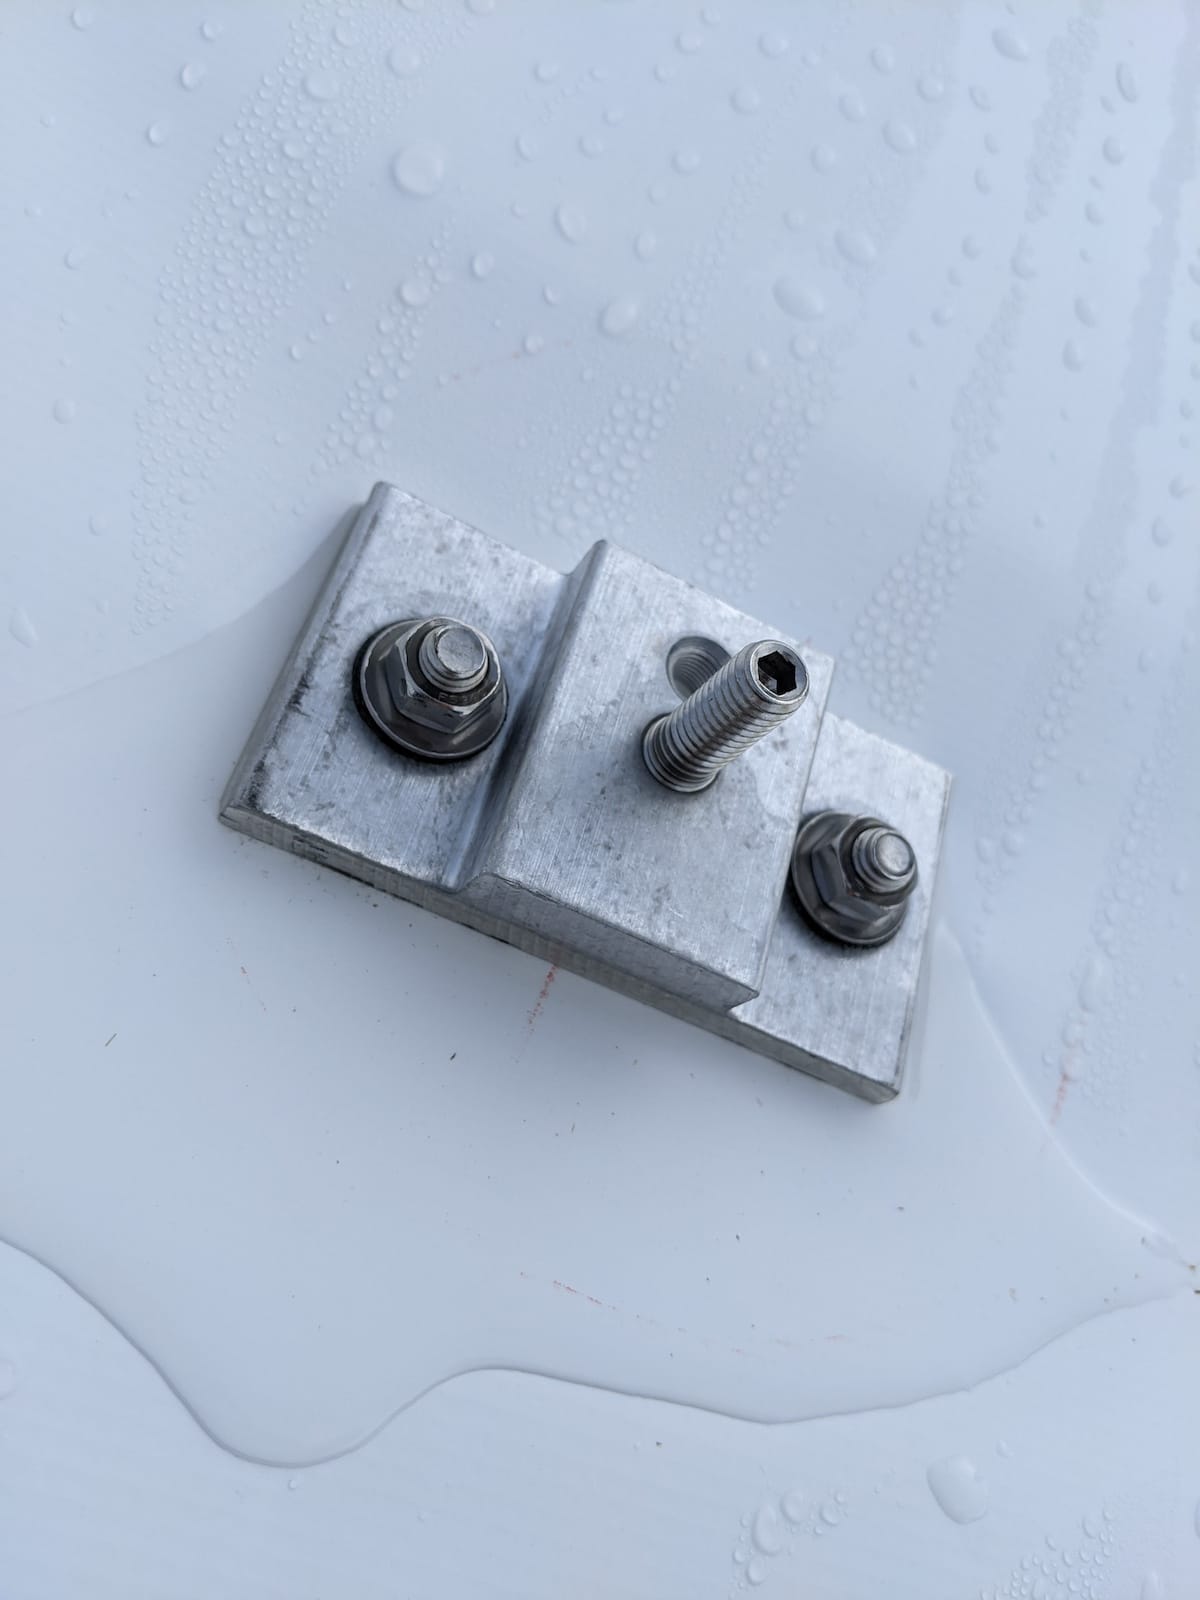
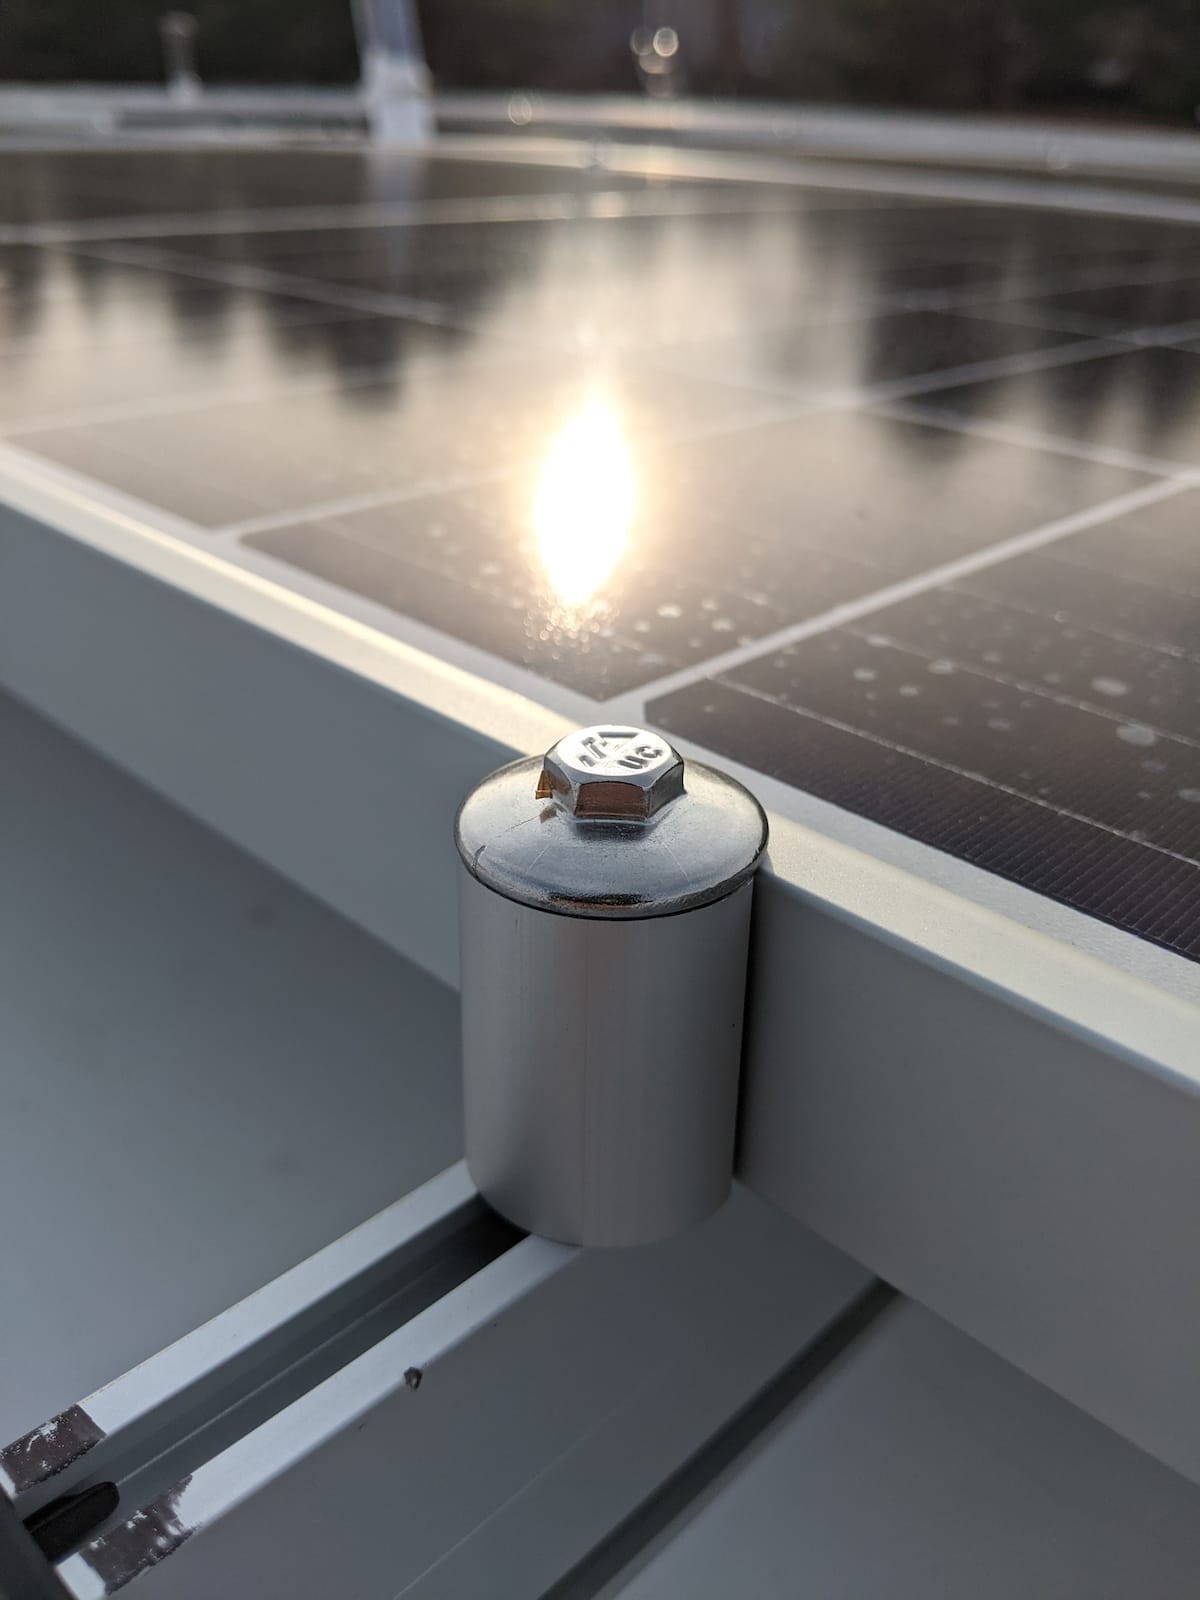
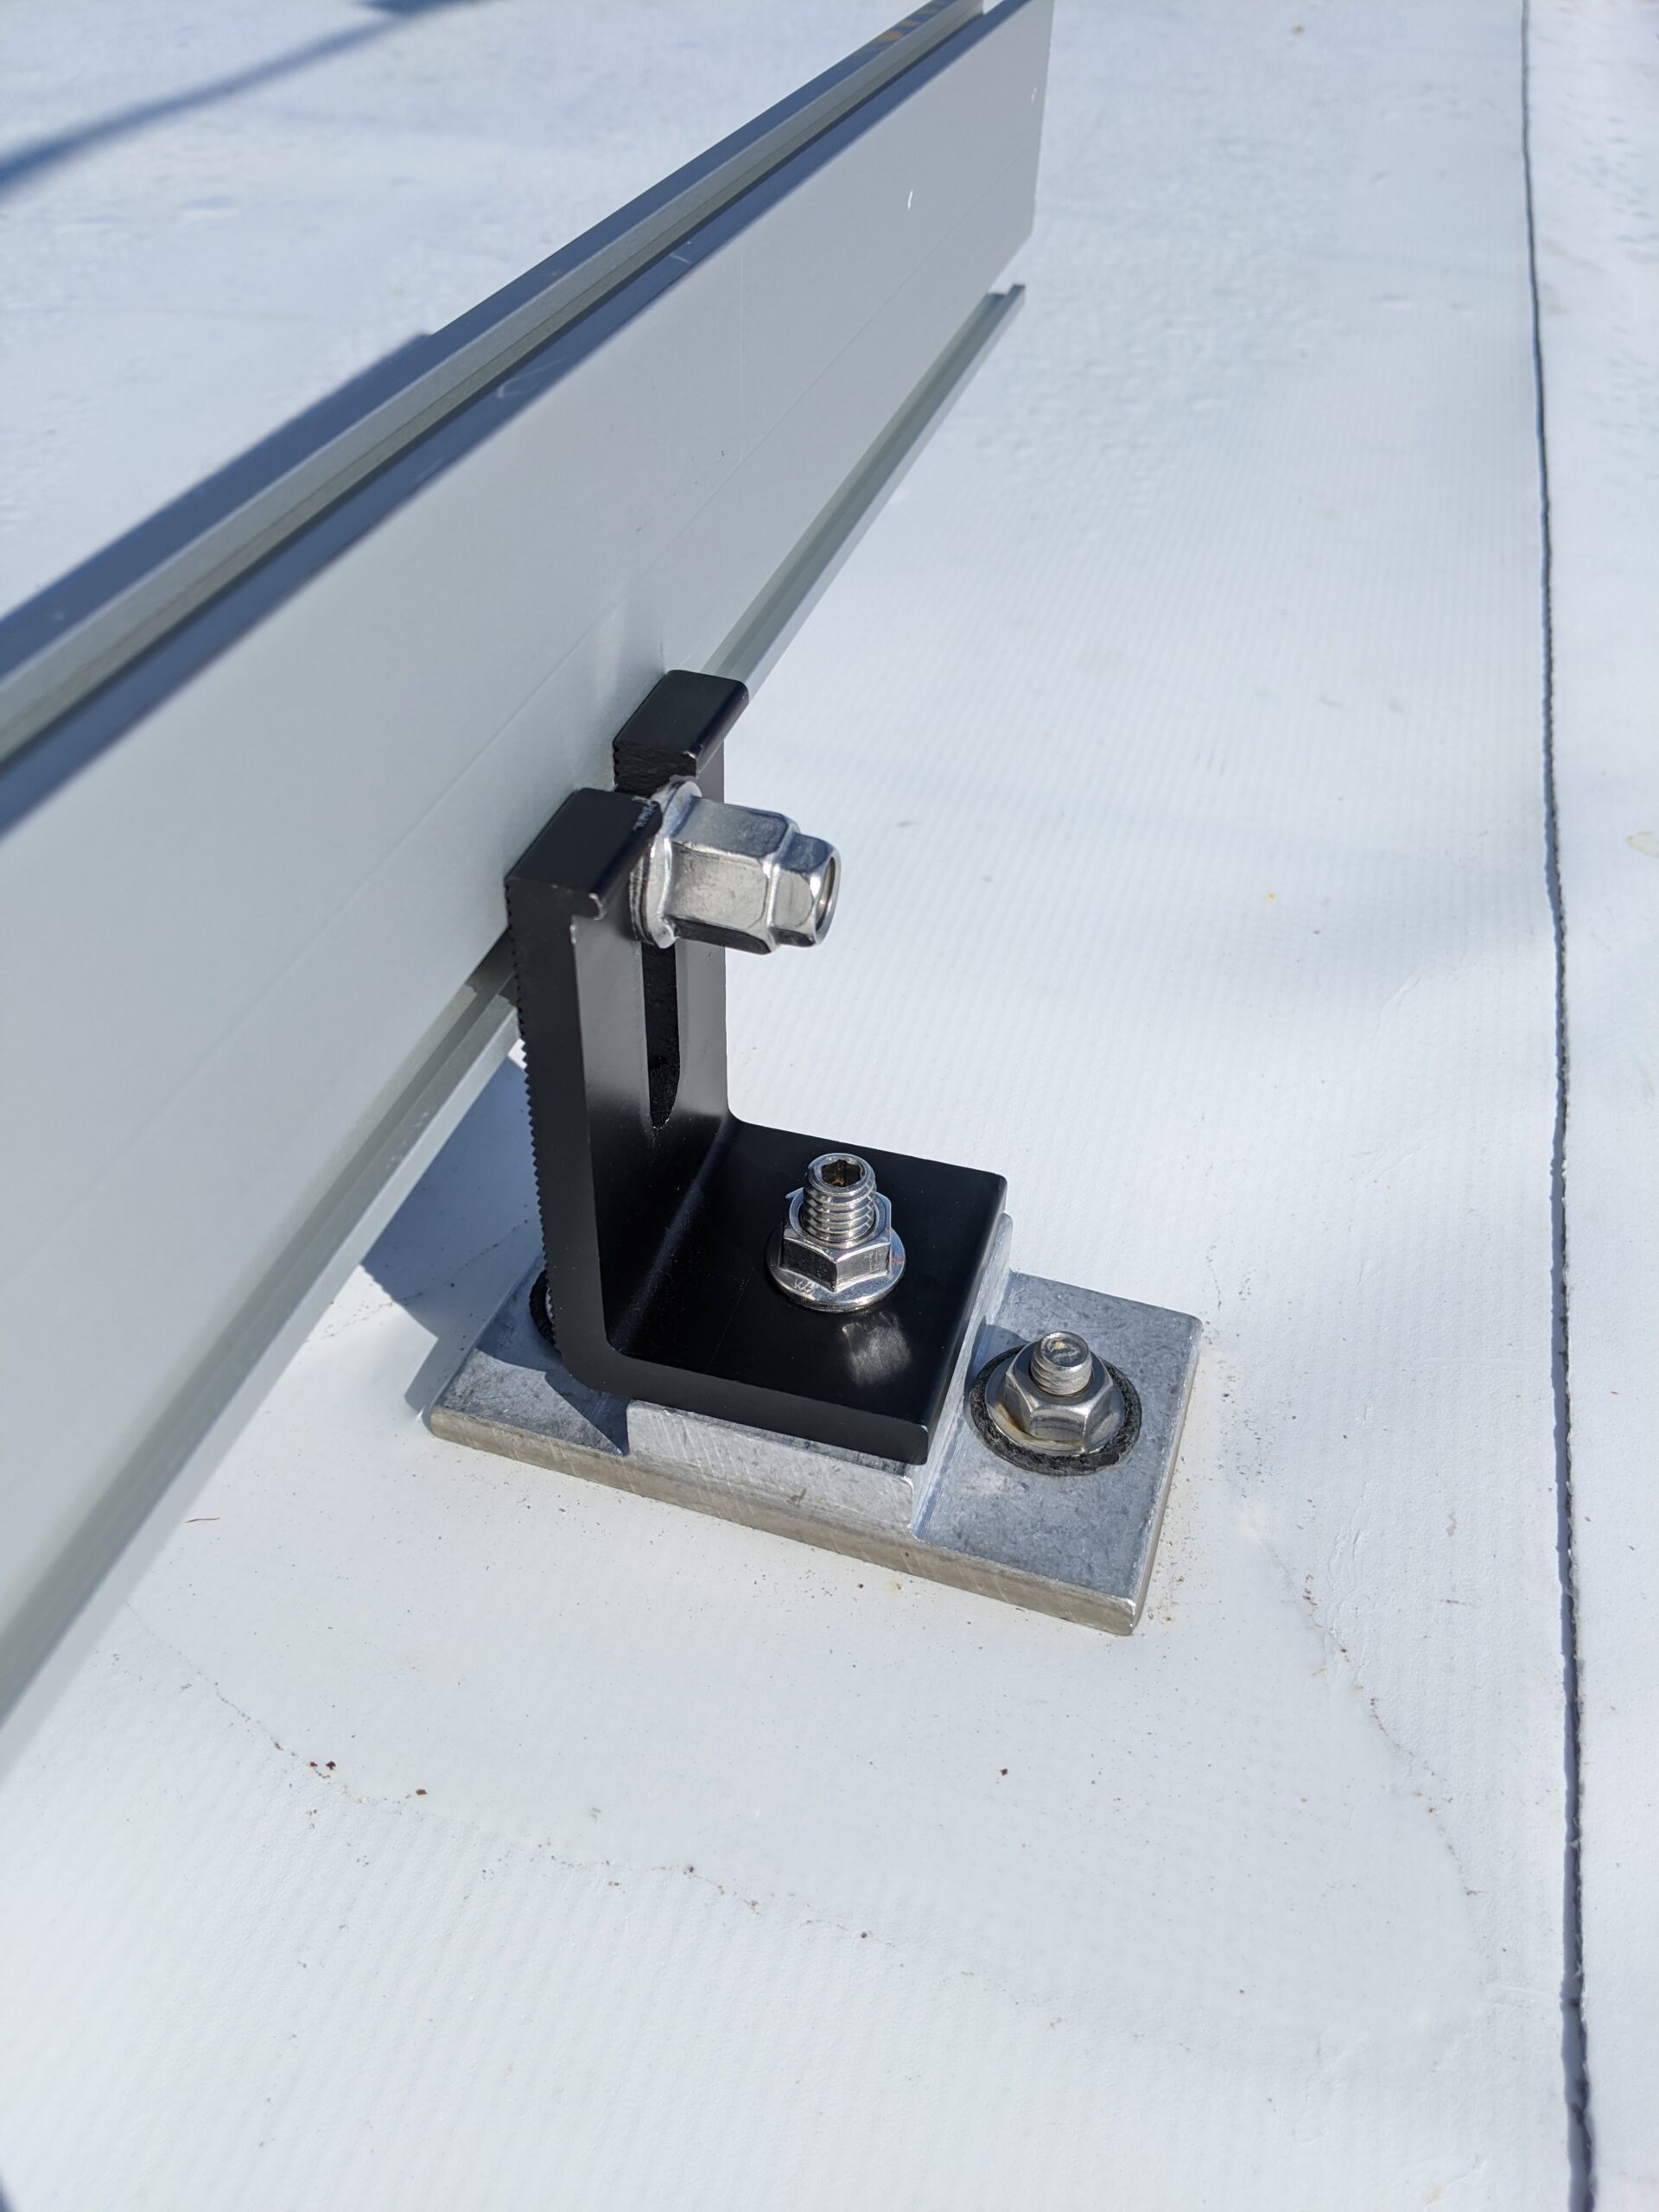
Once the TPO is heat welded, our team assembles the flashing systems, preparing them for decades of service. Each component is anchored with two bolts, providing a reliable attachment point for the aluminum solar racking hardware that supports the panels. The setup, crafted from durable metal, is built to endure the harsh temperature fluctuations experienced on commercial rooftops across many seasons.

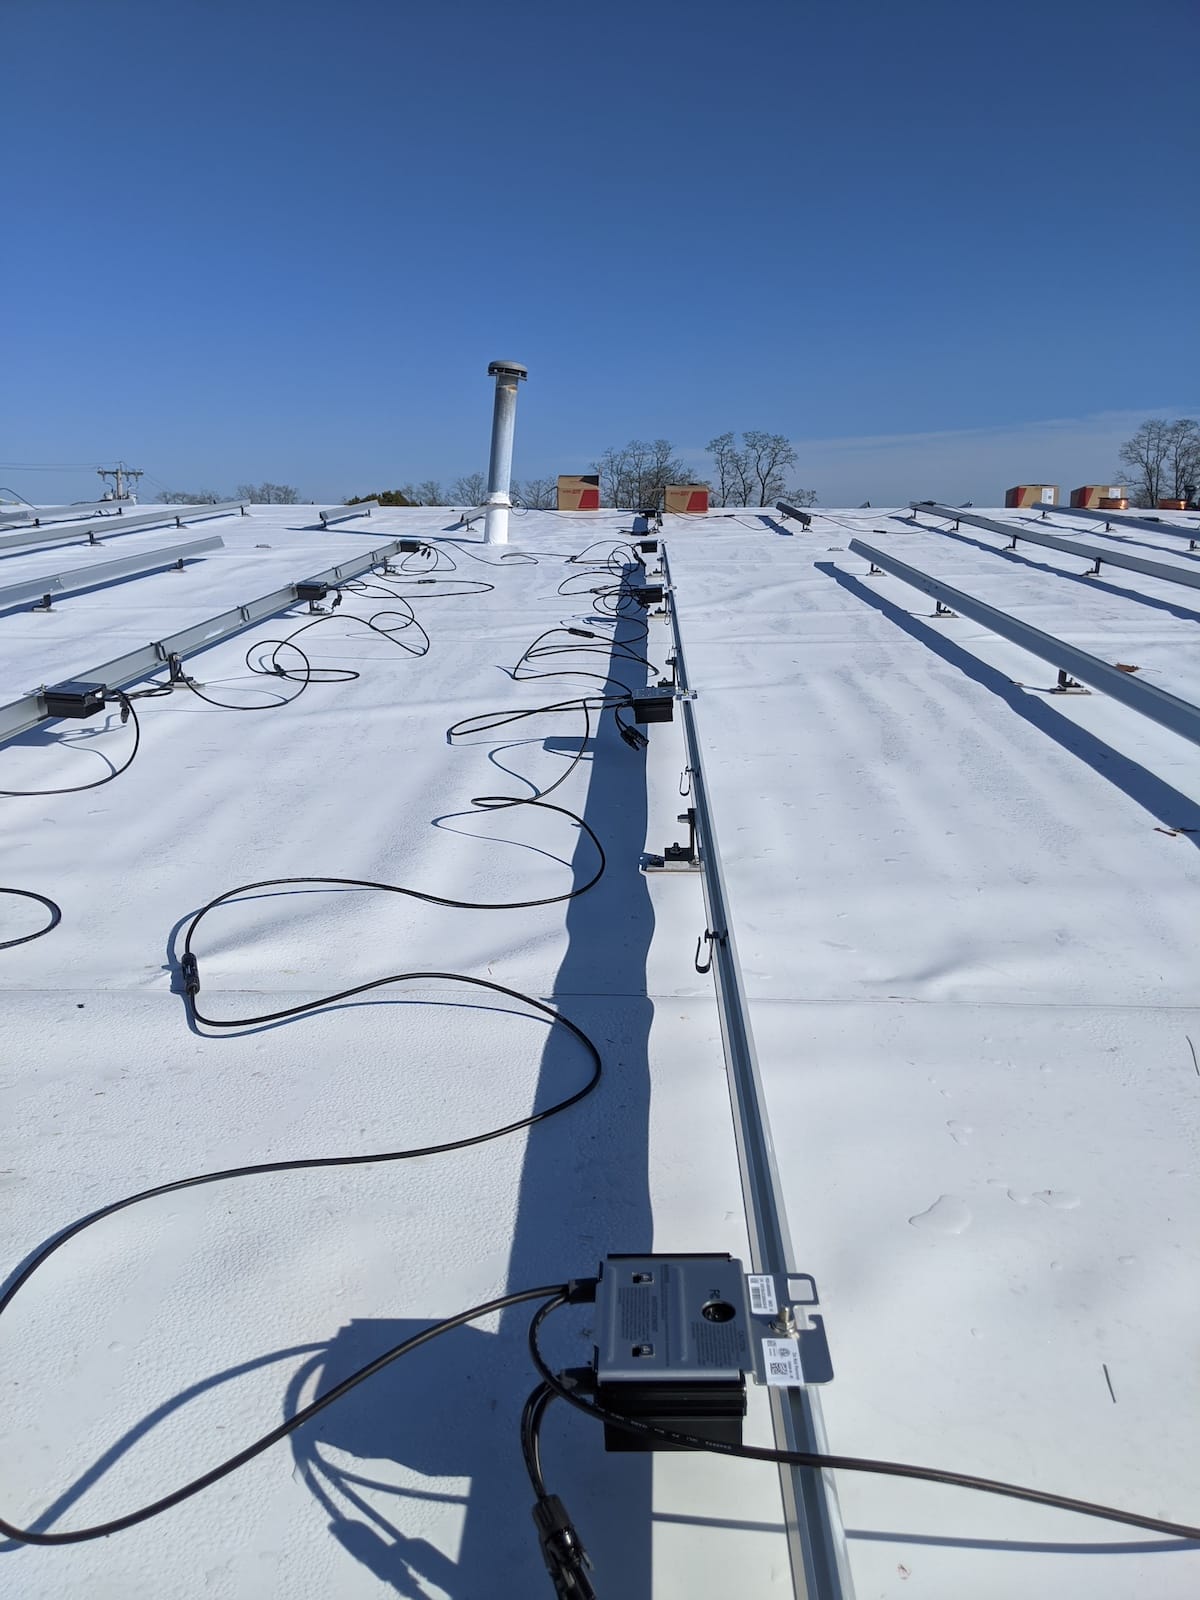
Solar Racking and Mounting Essentials
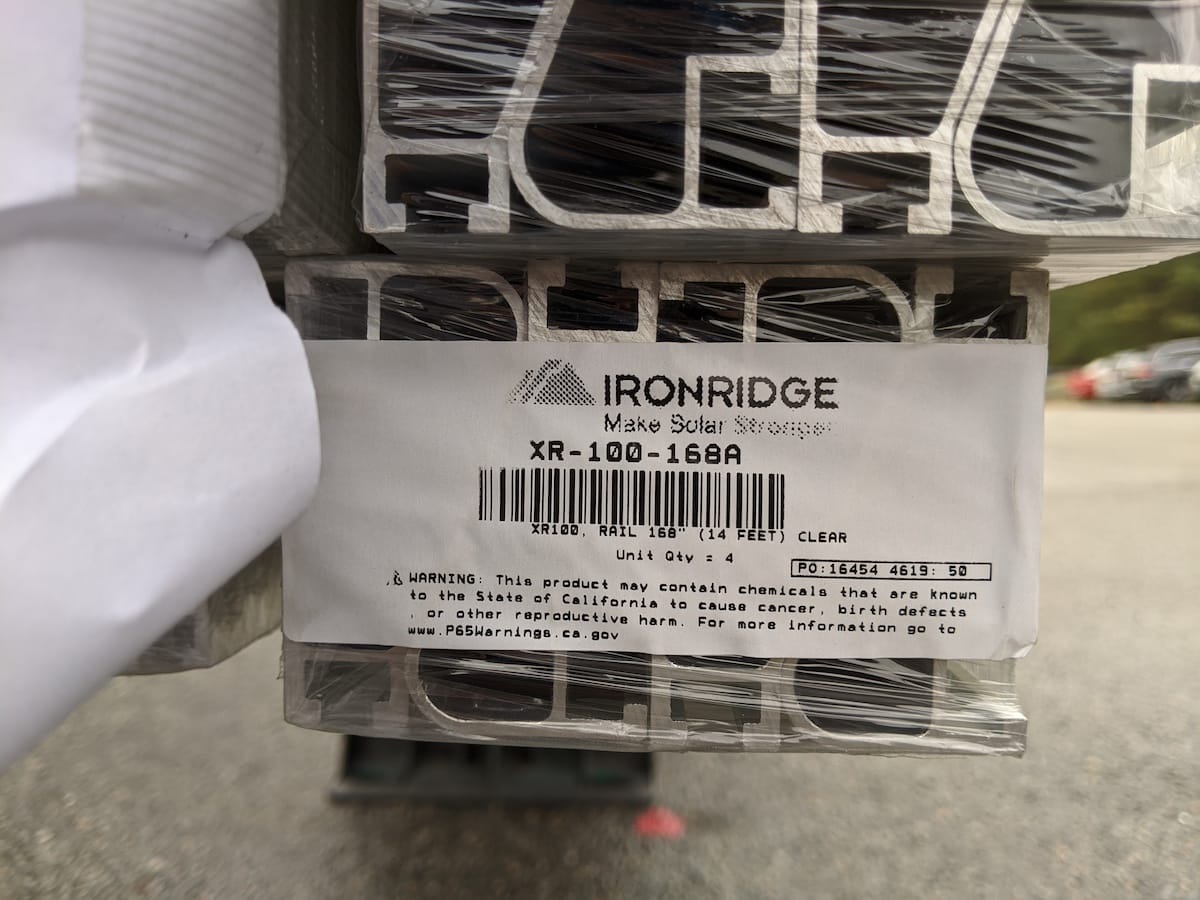
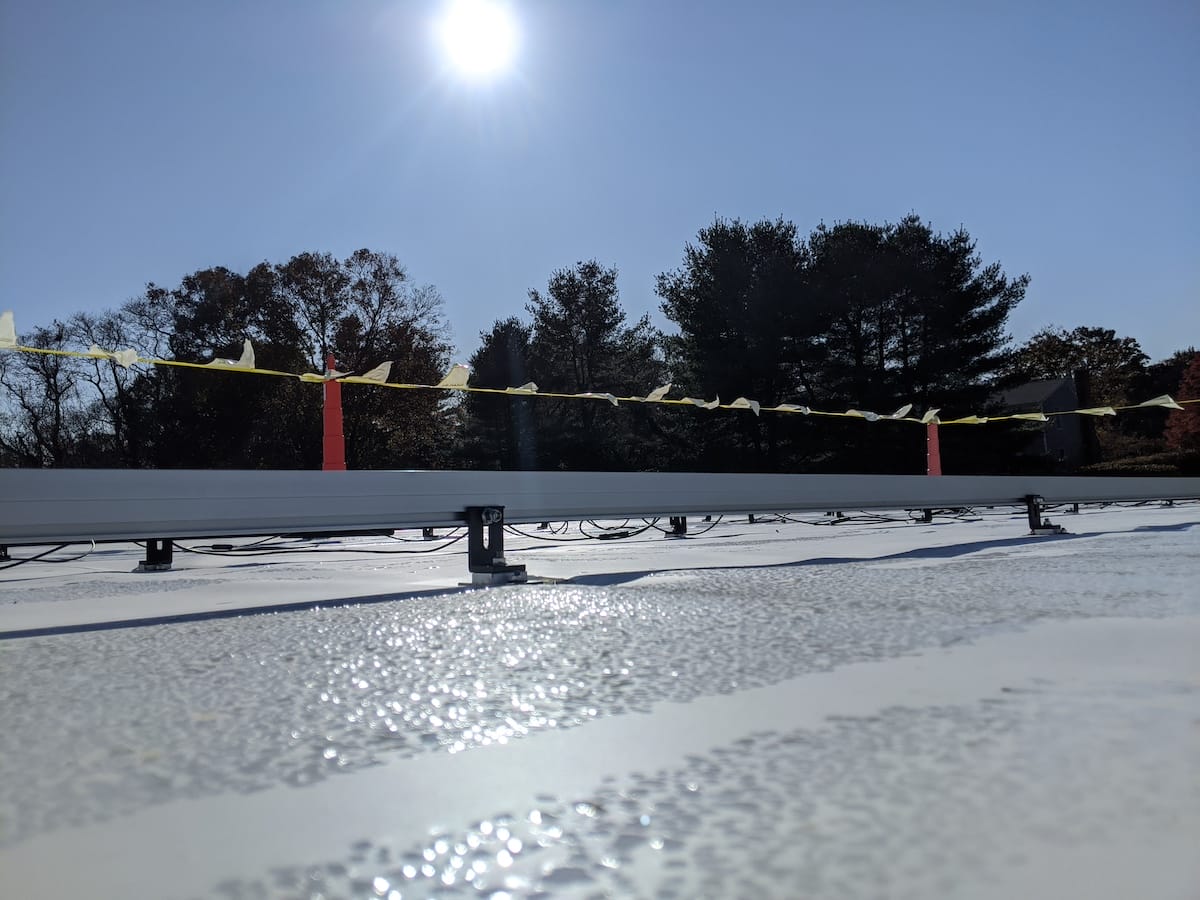
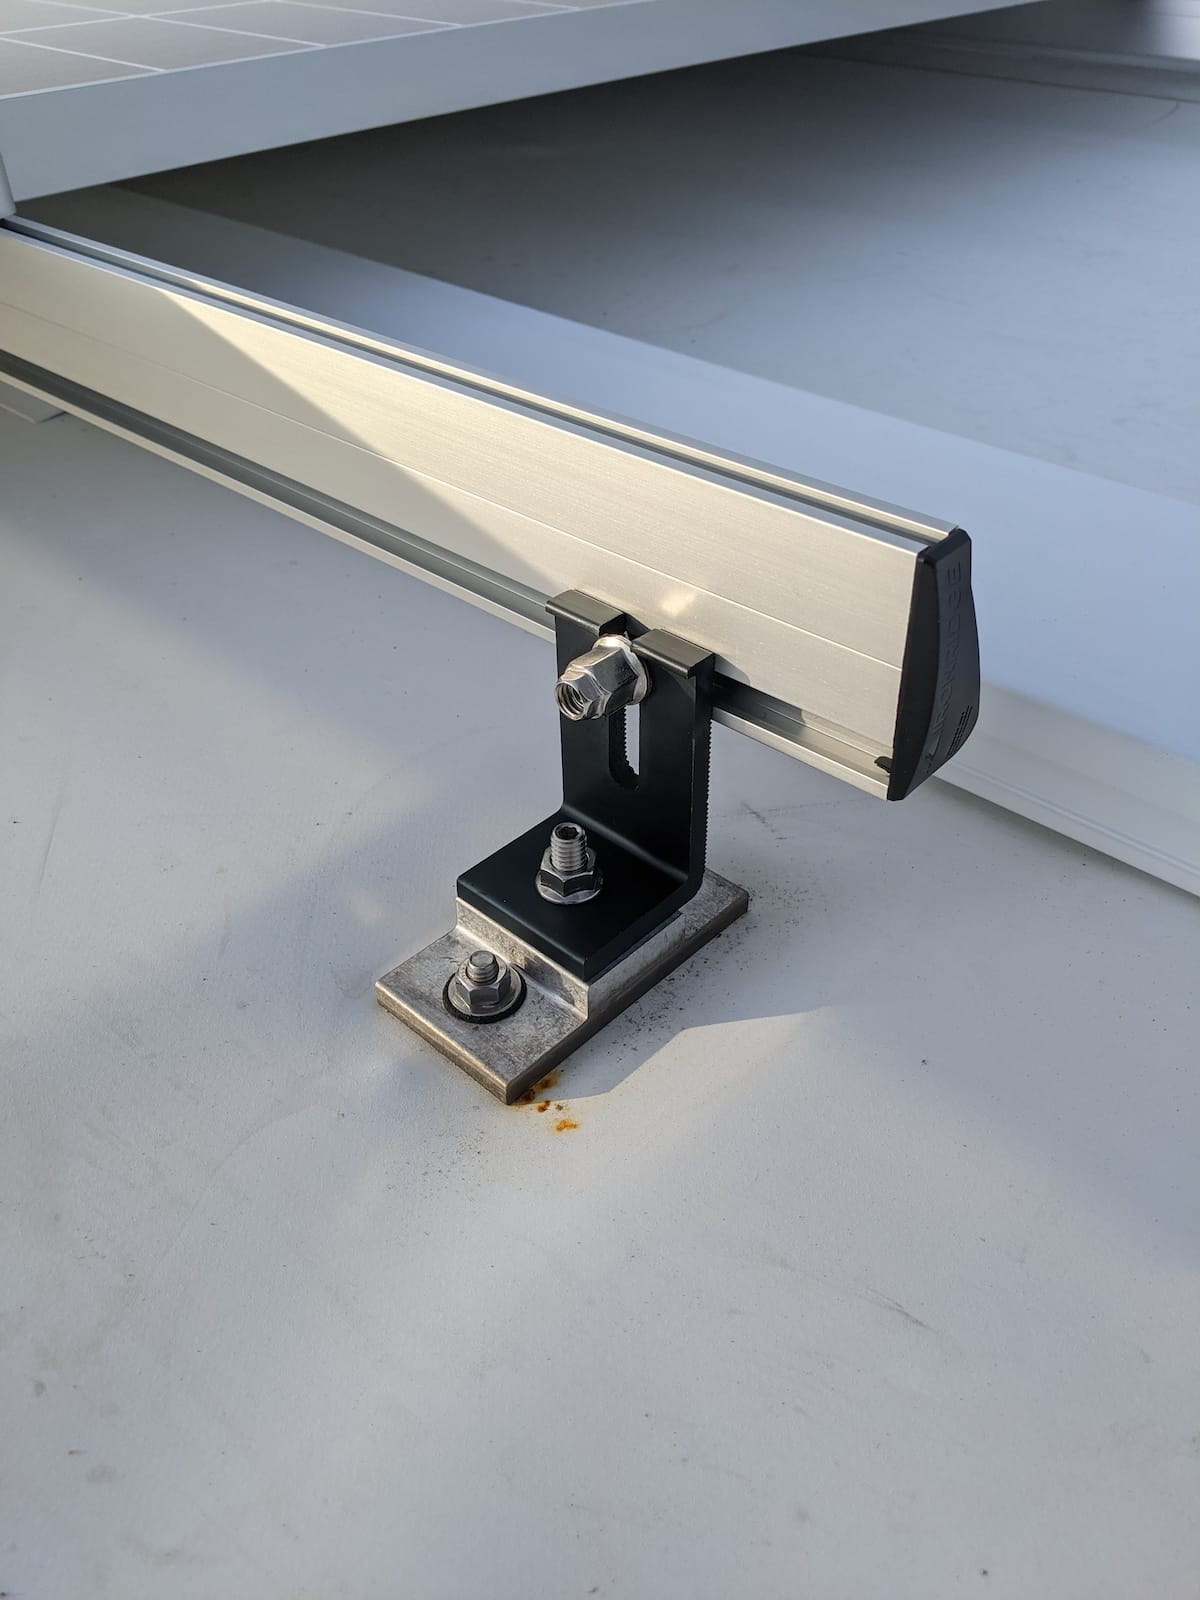
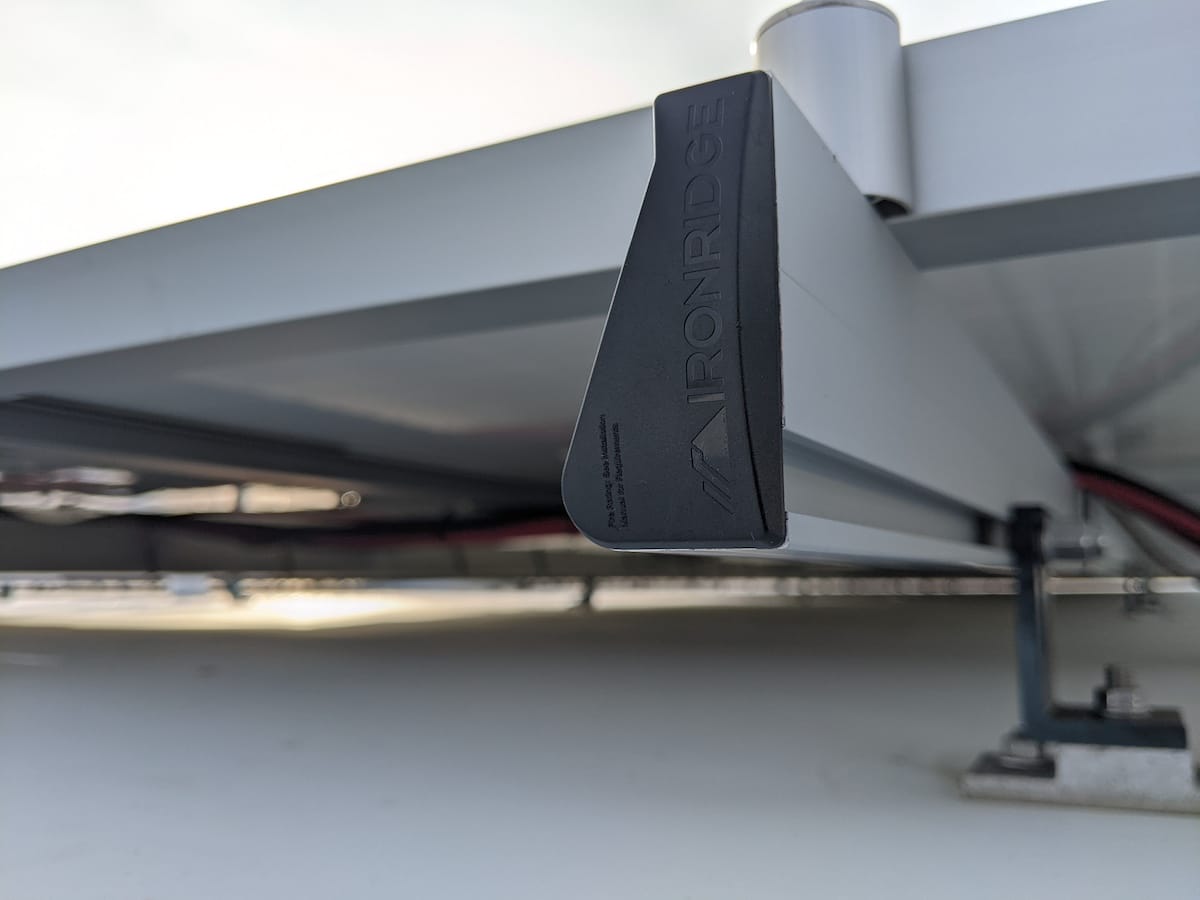
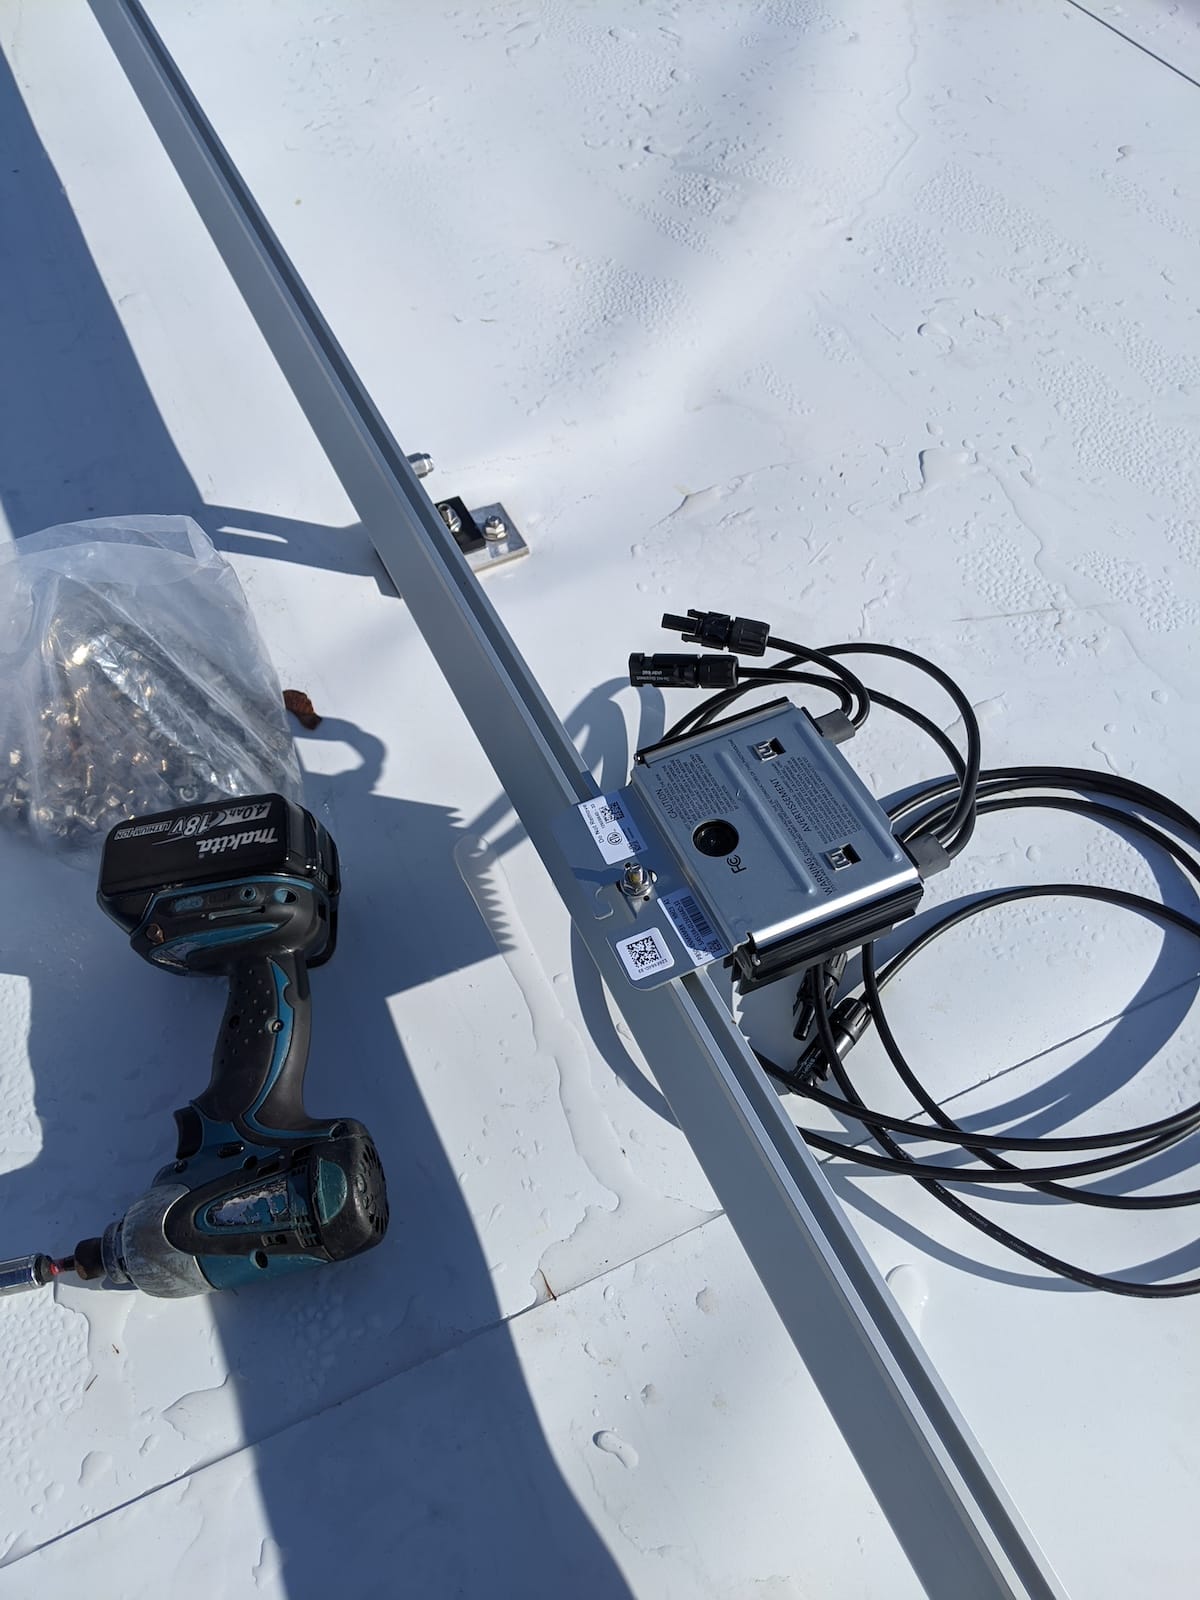
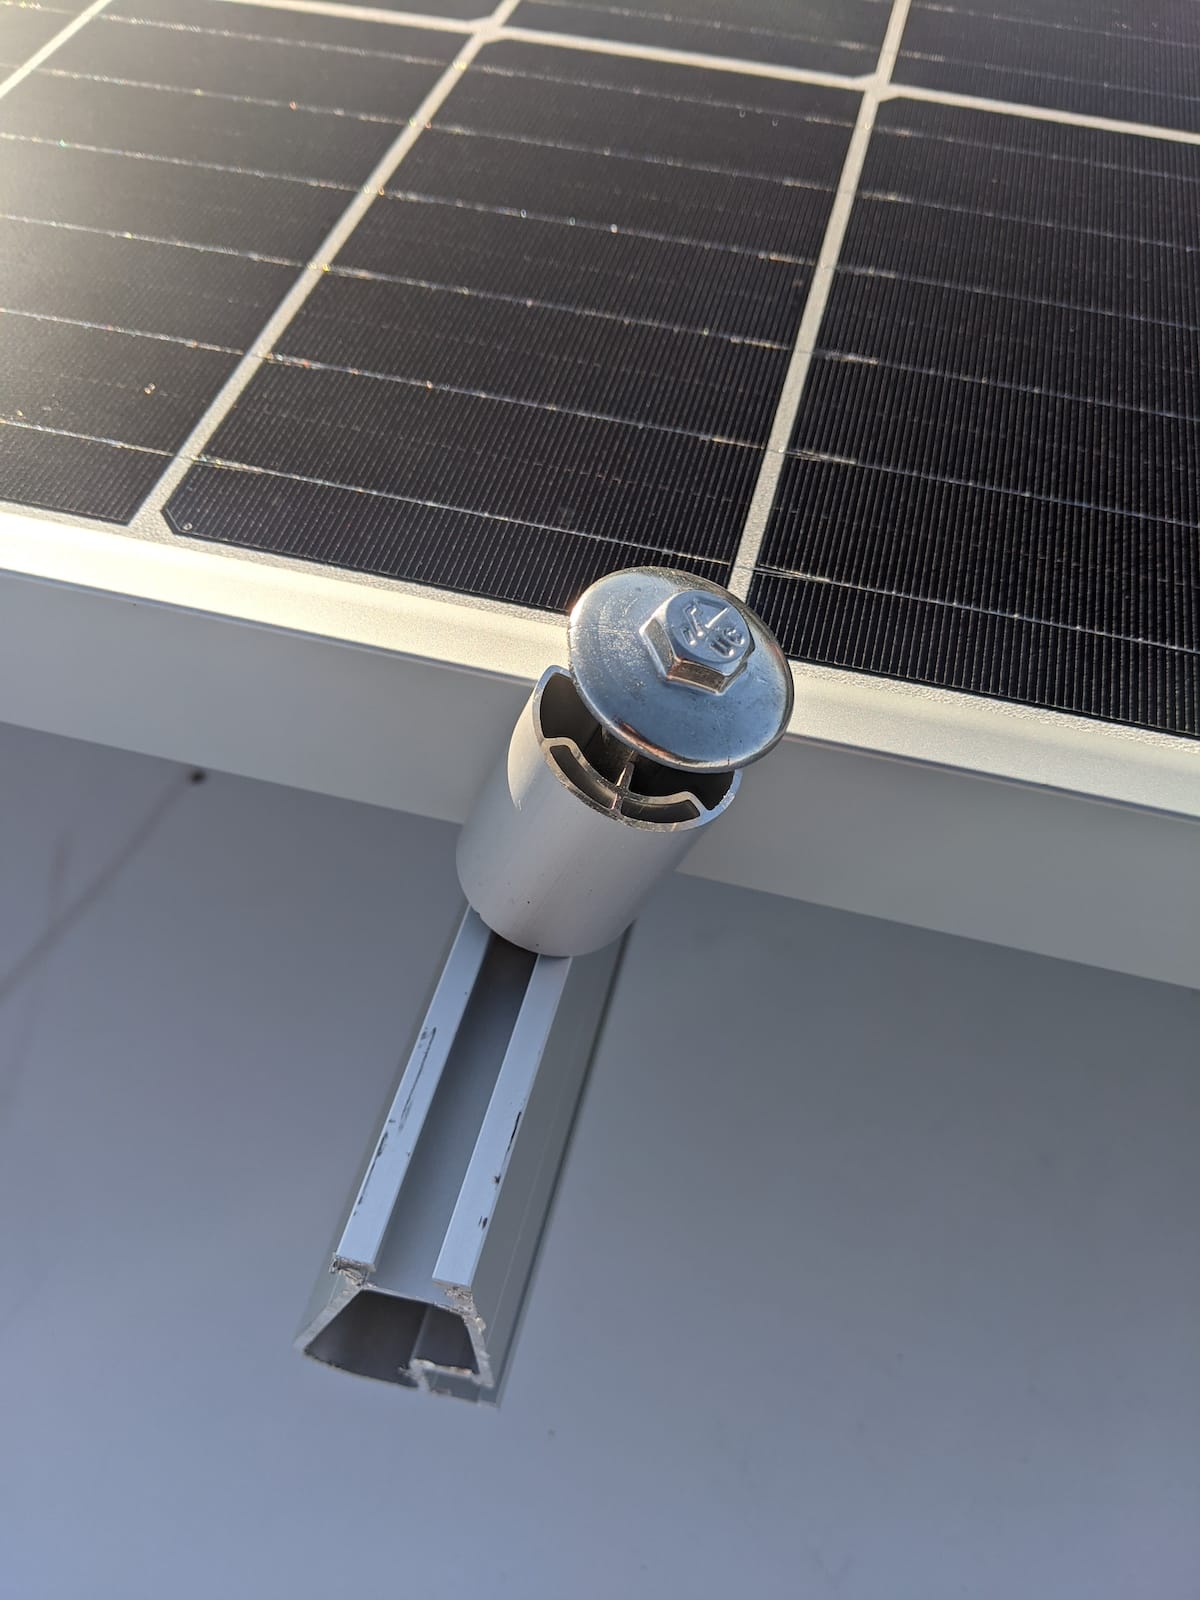
Once the flashing system is securely in place, we commence building the solar racking system. For the Jamestown Distributors project, we selected Ironridge’s solar racking system, known for its high-quality aluminum rails and L feet. The installation begins with the L foot, the black metal component pictured below. It initially connects to the metal flashing, and its vertical segment then attaches to the aluminum rails.
Ironridge’s rails are long sections of extruded aluminum, available in standard lengths but customizable on-site. They are distinguished by a ‘‘signature curve’ designed to resist uplift, prevent buckling, and efficiently transfer loads into the building’s structure. Each rail features two slots that facilitate connections to both the L-foot and the solar modules and optimizers.
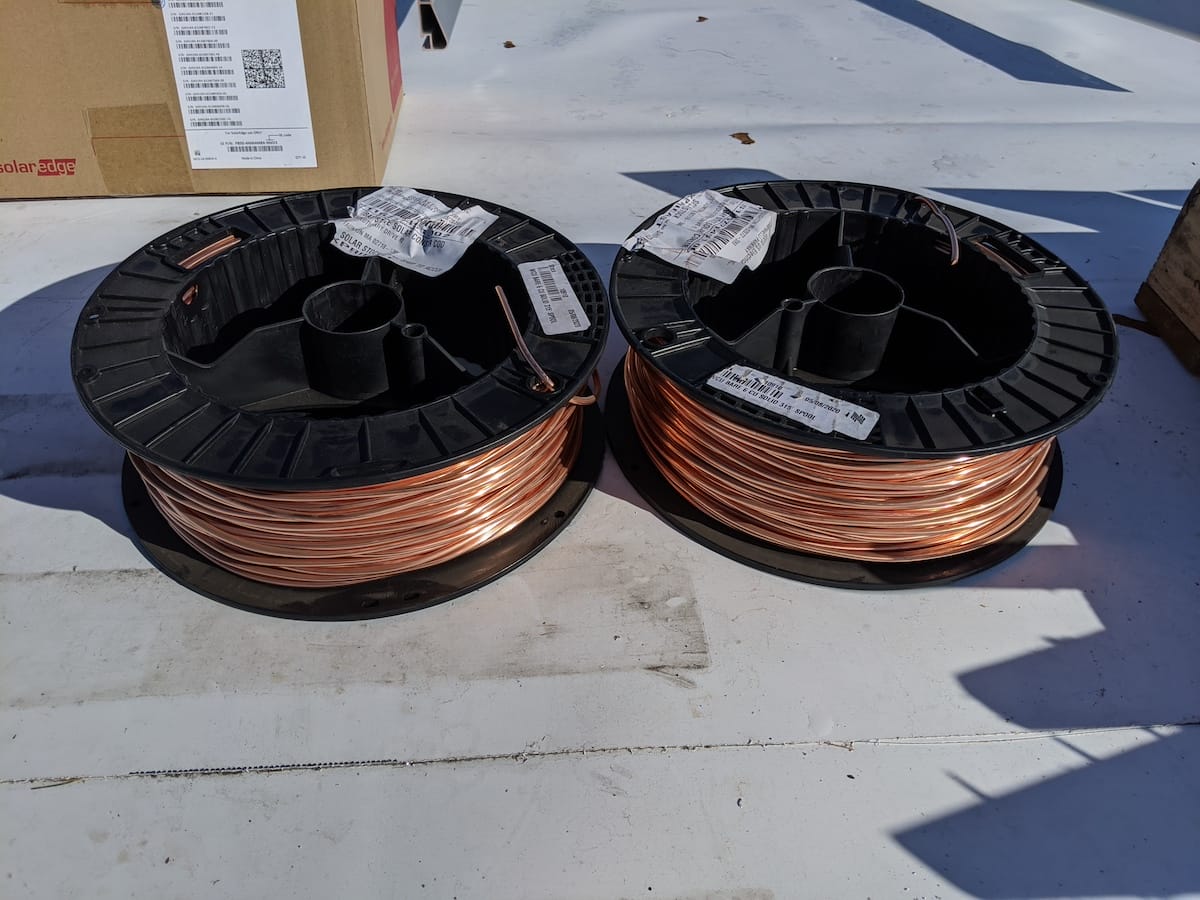
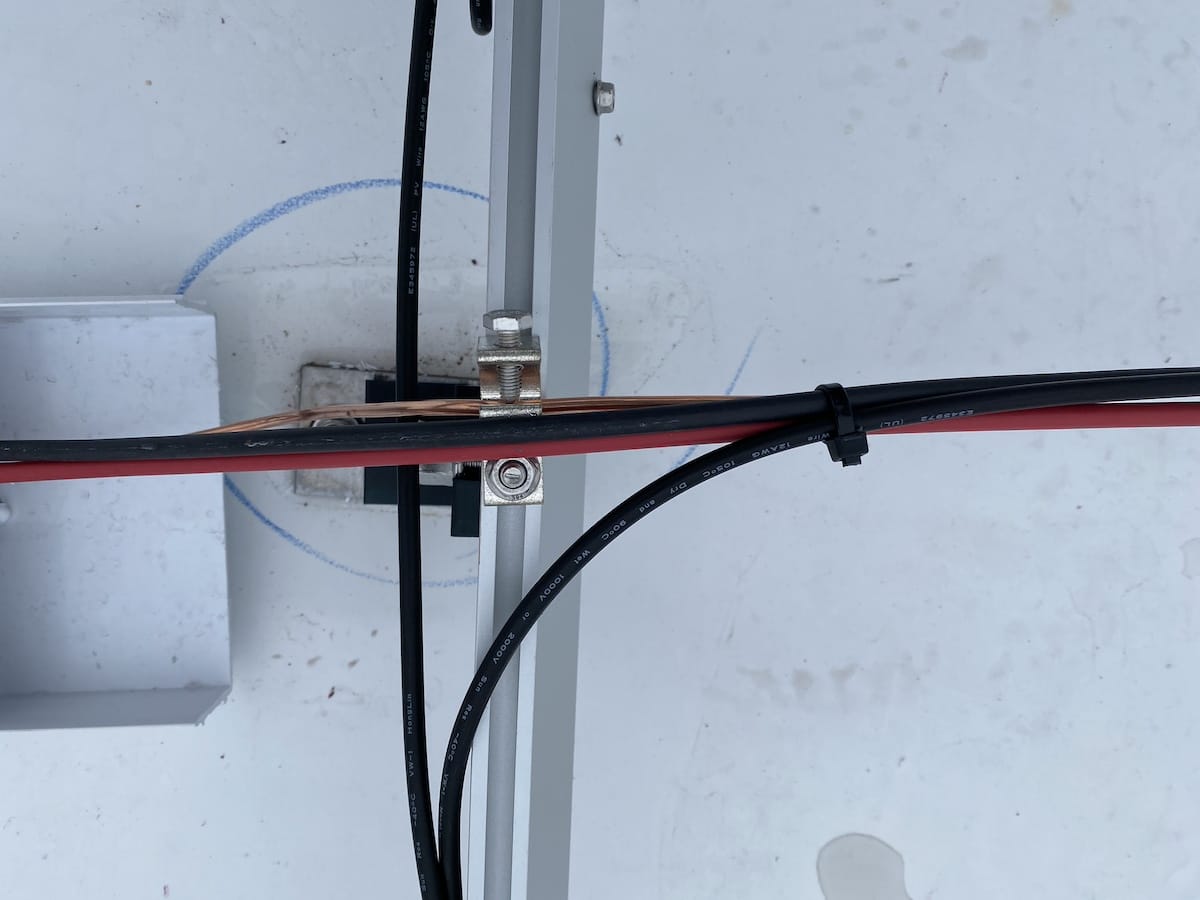
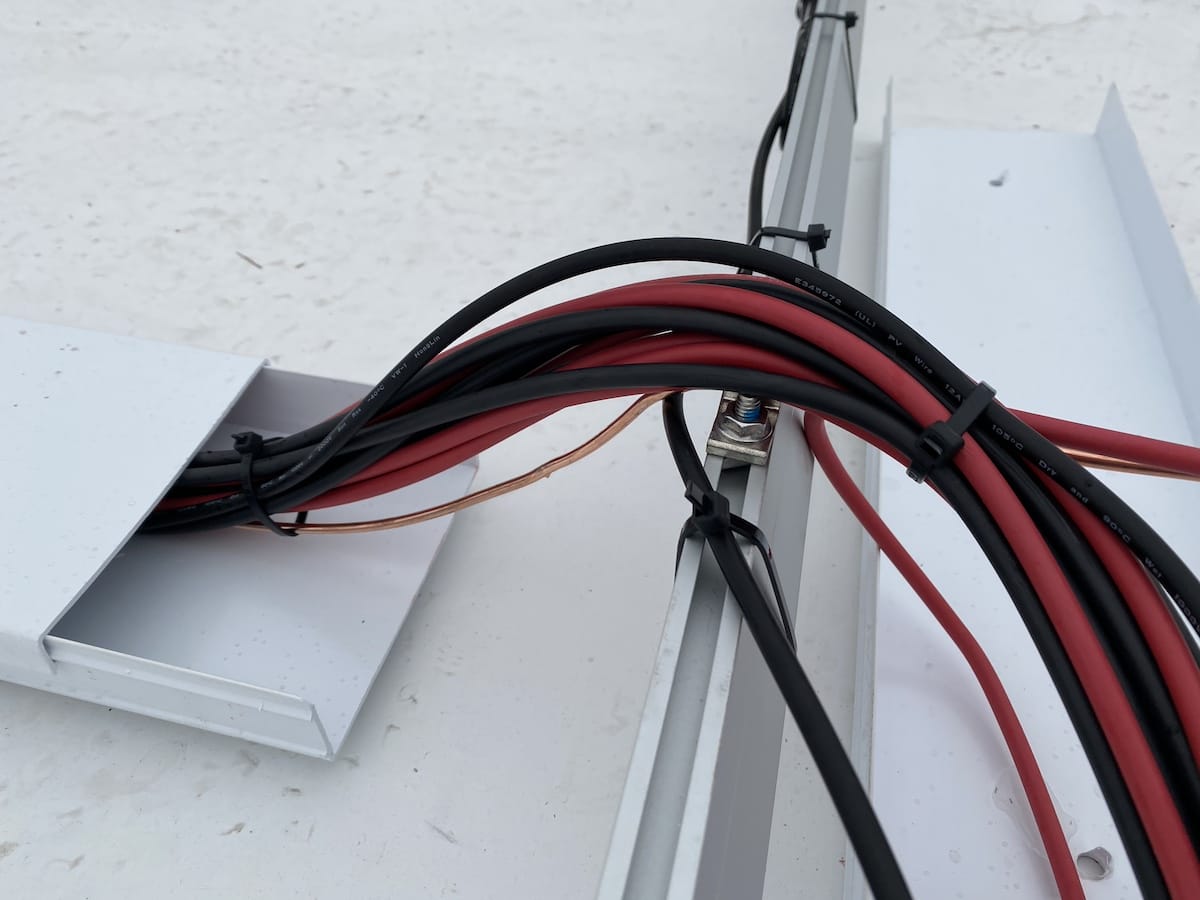
During the installation, we also incorporate copper wiring to ground the system adequately. This essential safety feature safeguards against potential lightning strikes, given the conductive nature of the components.
More Racking

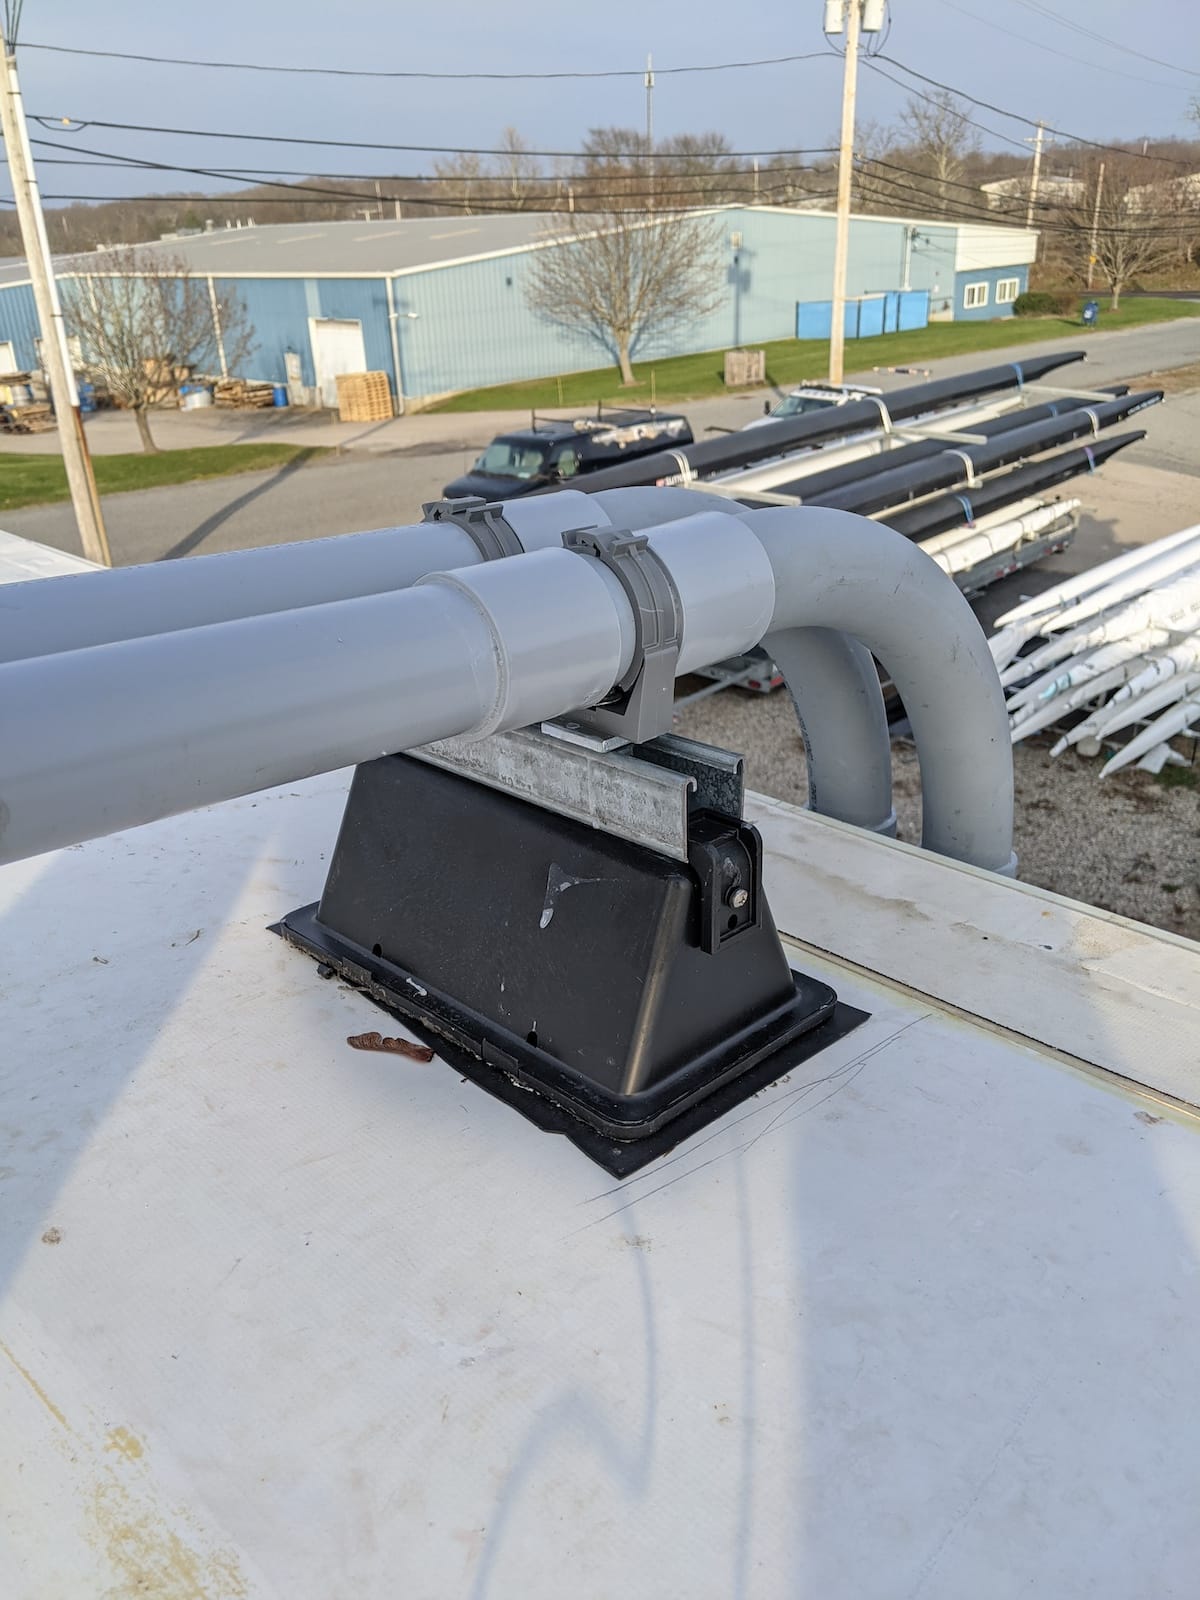
For example, the white wire trays, which are partially obscured by the rail in the top left image, run between rows of solar panels. These trays protect the copper wiring from the elements – and human feet! In the top right and lower left images you can see the PVC conduit that houses the copper wires held in place by triangular black risers.
Optimizers and Inverters
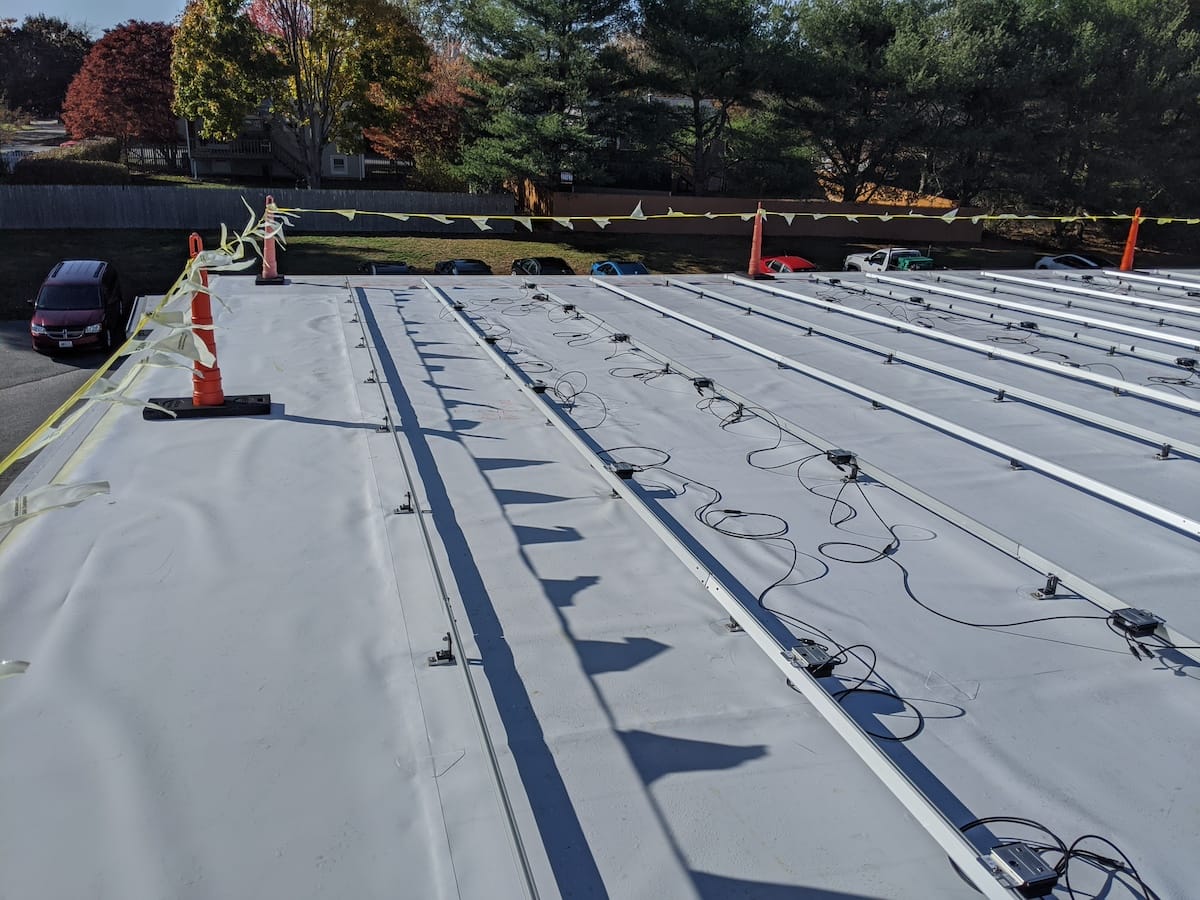
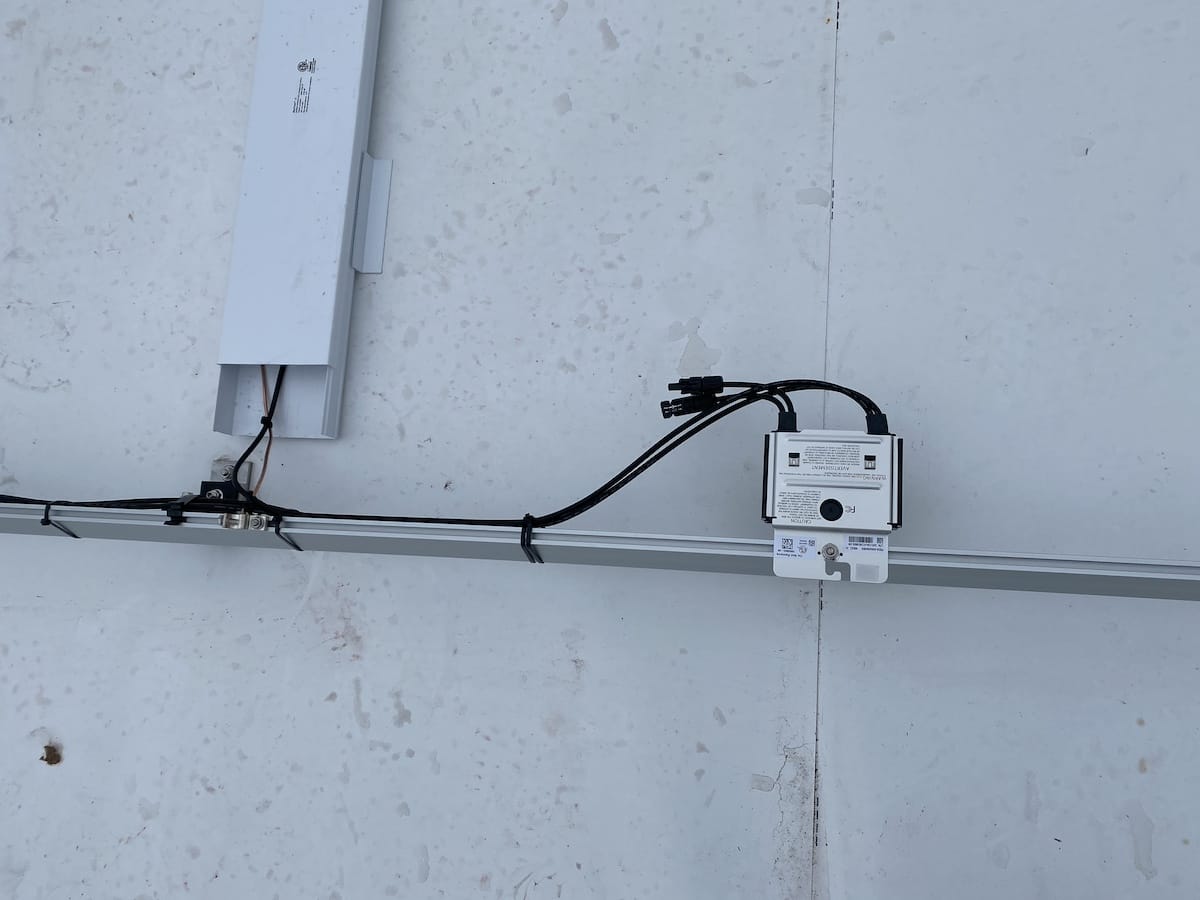
The next step in our installation involves integrating SolarEdge optimizers. Each optimizer is connected to one or two solar modules and linked together to form long ‘strings’ that link to a Solaredge inverter. The images display the small metal box of the optimizer and its attachment to the IronRidge rails within the racking system. We carefully map the location of each optimizer during installation to facilitate easy access during maintenance and to enhance operational efficiency.
Optimizers are essential for safety and performance. They incorporate a vital rooftop rapid shutdown system, which is required for fire safety. Additionally, they address shading issues that arise when one or more panels are partially or fully shaded by obstacles such as trees, buildings, clouds, or debris like leaves on the solar panels themselves. In traditional solar systems without optimizers, even minor shading on a single panel can significantly compromise the output of an entire string of ten to twenty solar modules.
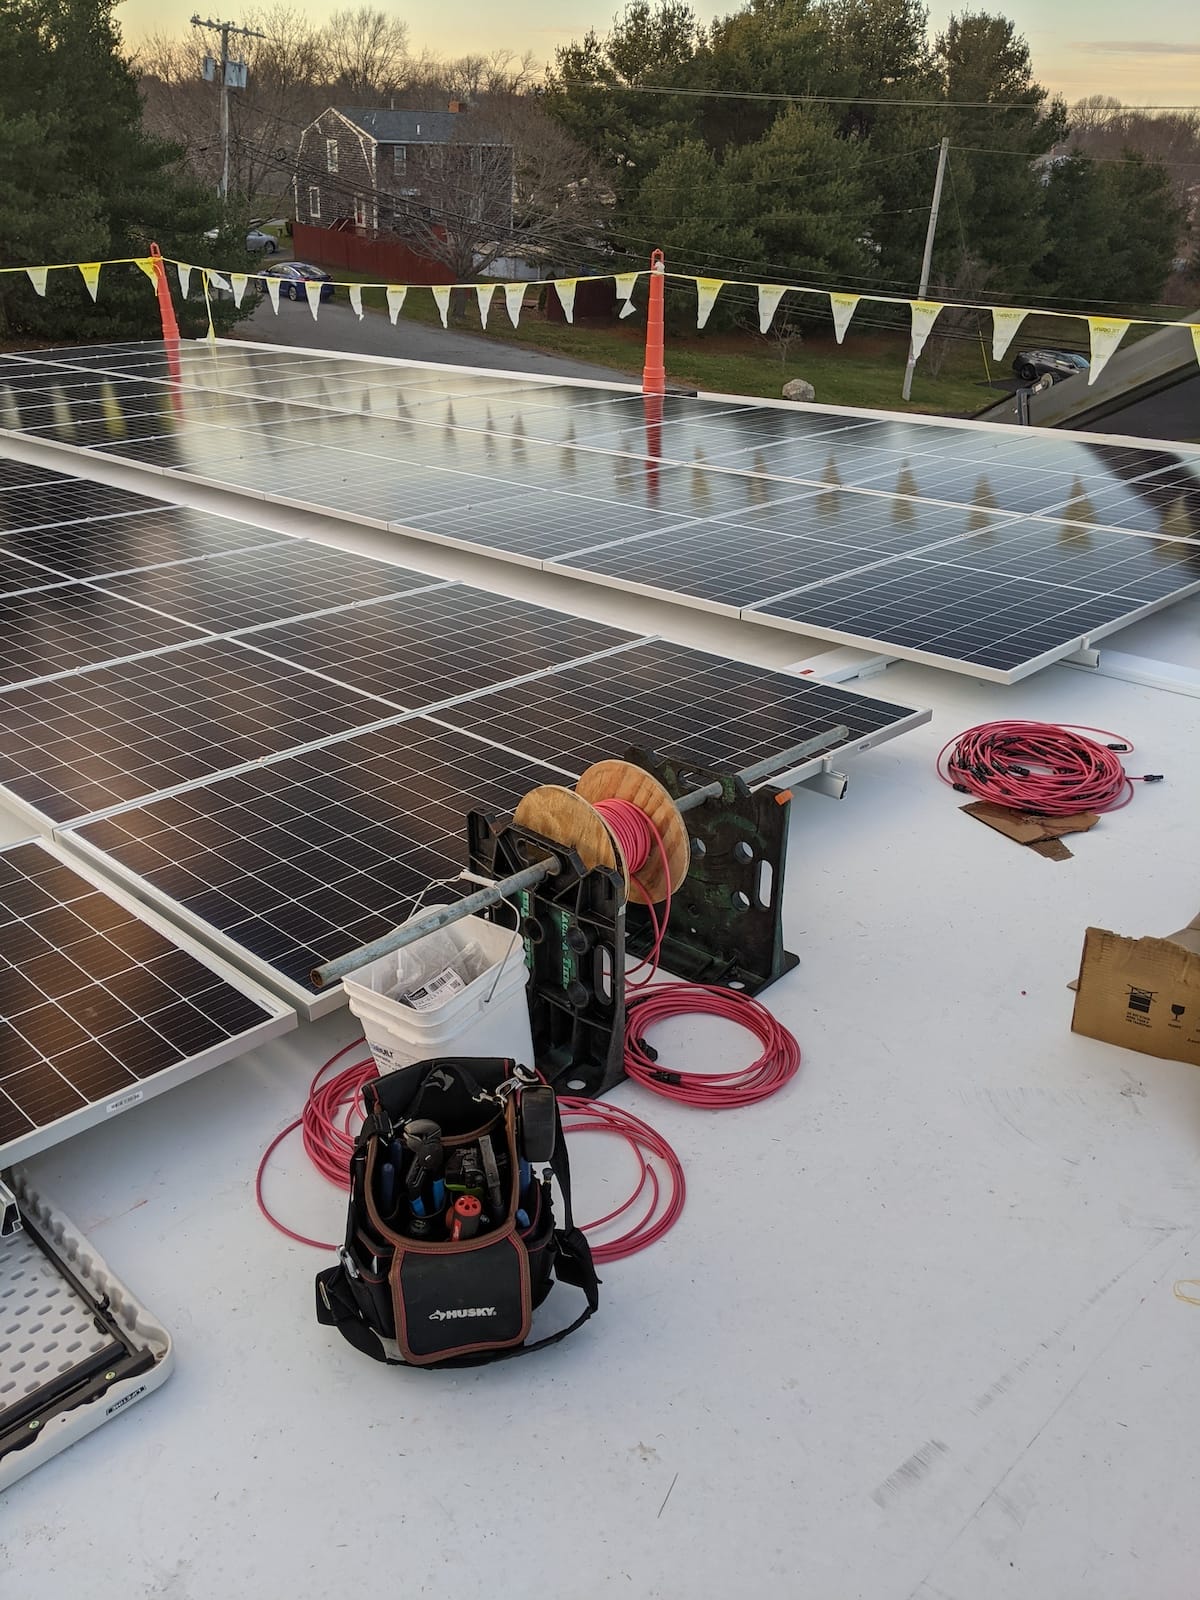
Wiring
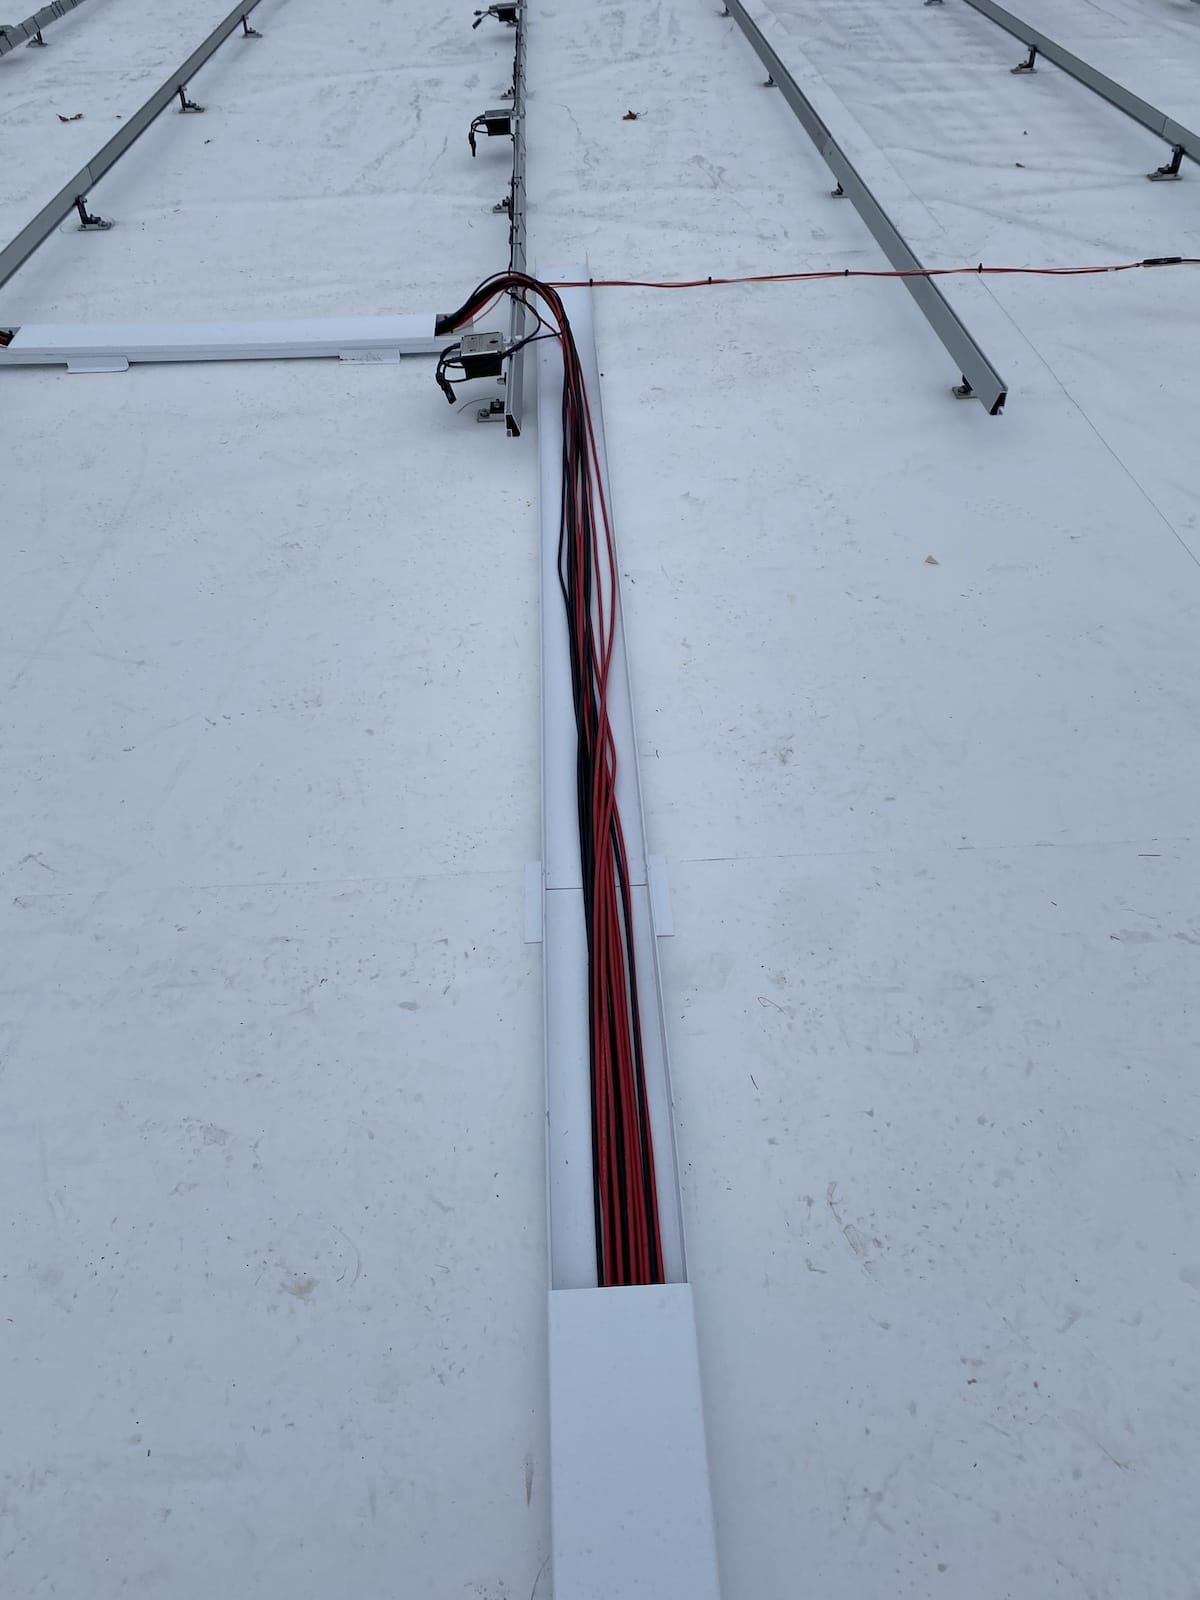
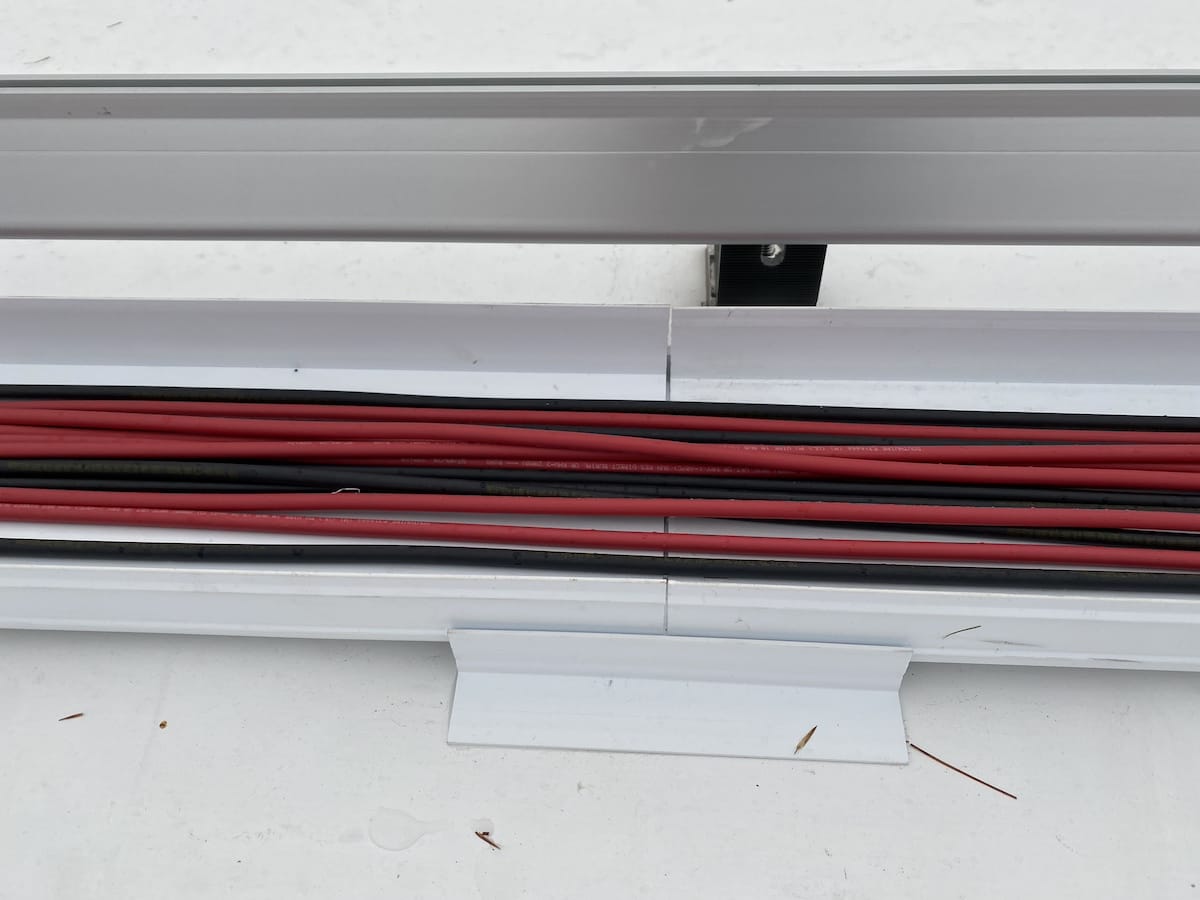
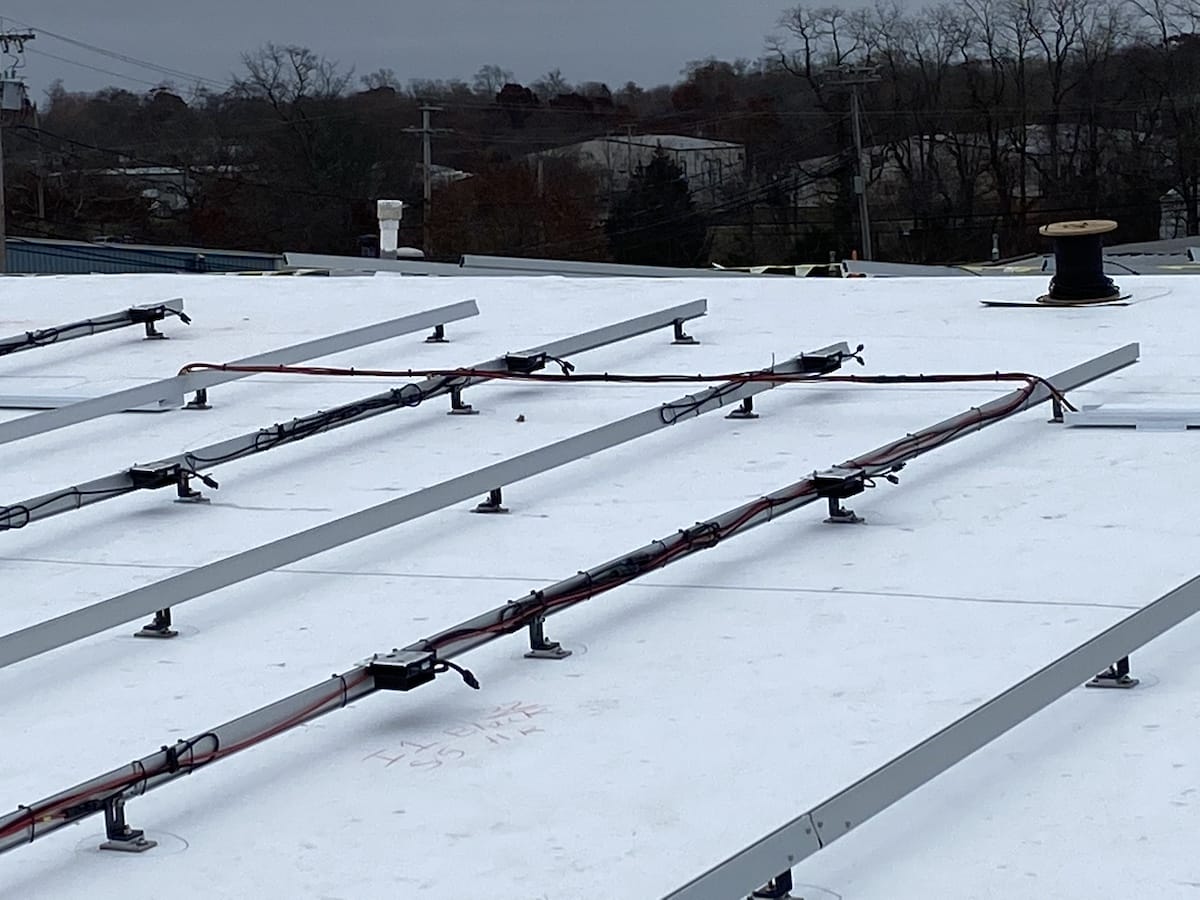
After the installation of optimizers, the next step is to lay out the direct current (DC) wiring, which serves as a copper highway to transport DC electricity from the solar panels to the inverters. The inverters then convert this DC electricity into alternating current (AC), making it compatible with the power grid.
Each string in our solar power system consists of a red (positive) and black (negative) wire, complemented by a copper grounding wire. These wires are either routed within wire trays or along the aluminum rails, secured with HellermannTyton 25-year-rated plastic cable ties. The wires are neatly bundled to facilitate safe and organized transmission of electric current from the rooftop to the electrical switchgear below.
The wiring can be arranged in various ways to accommodate different architectural or environmental considerations: it may be hung, buried, or laid flat on specifically engineered surfaces.

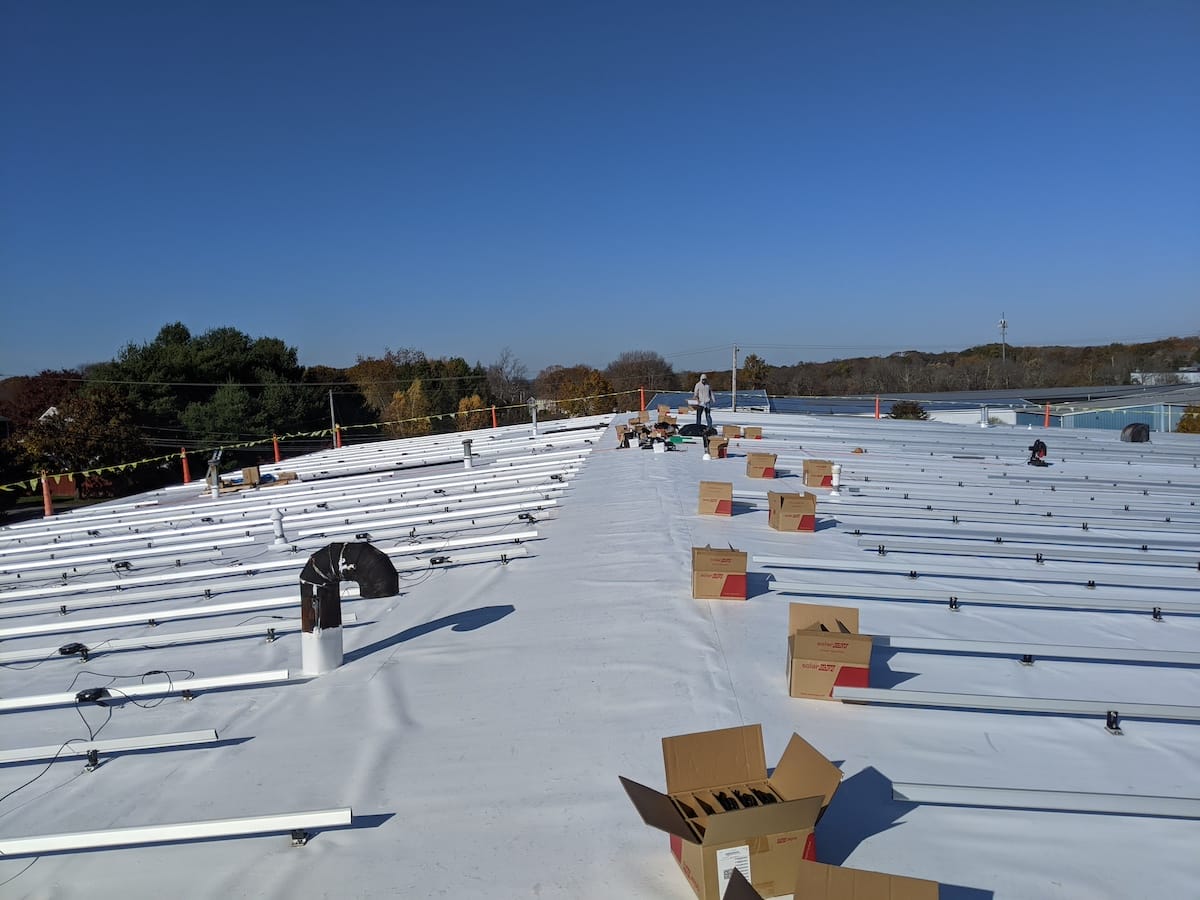
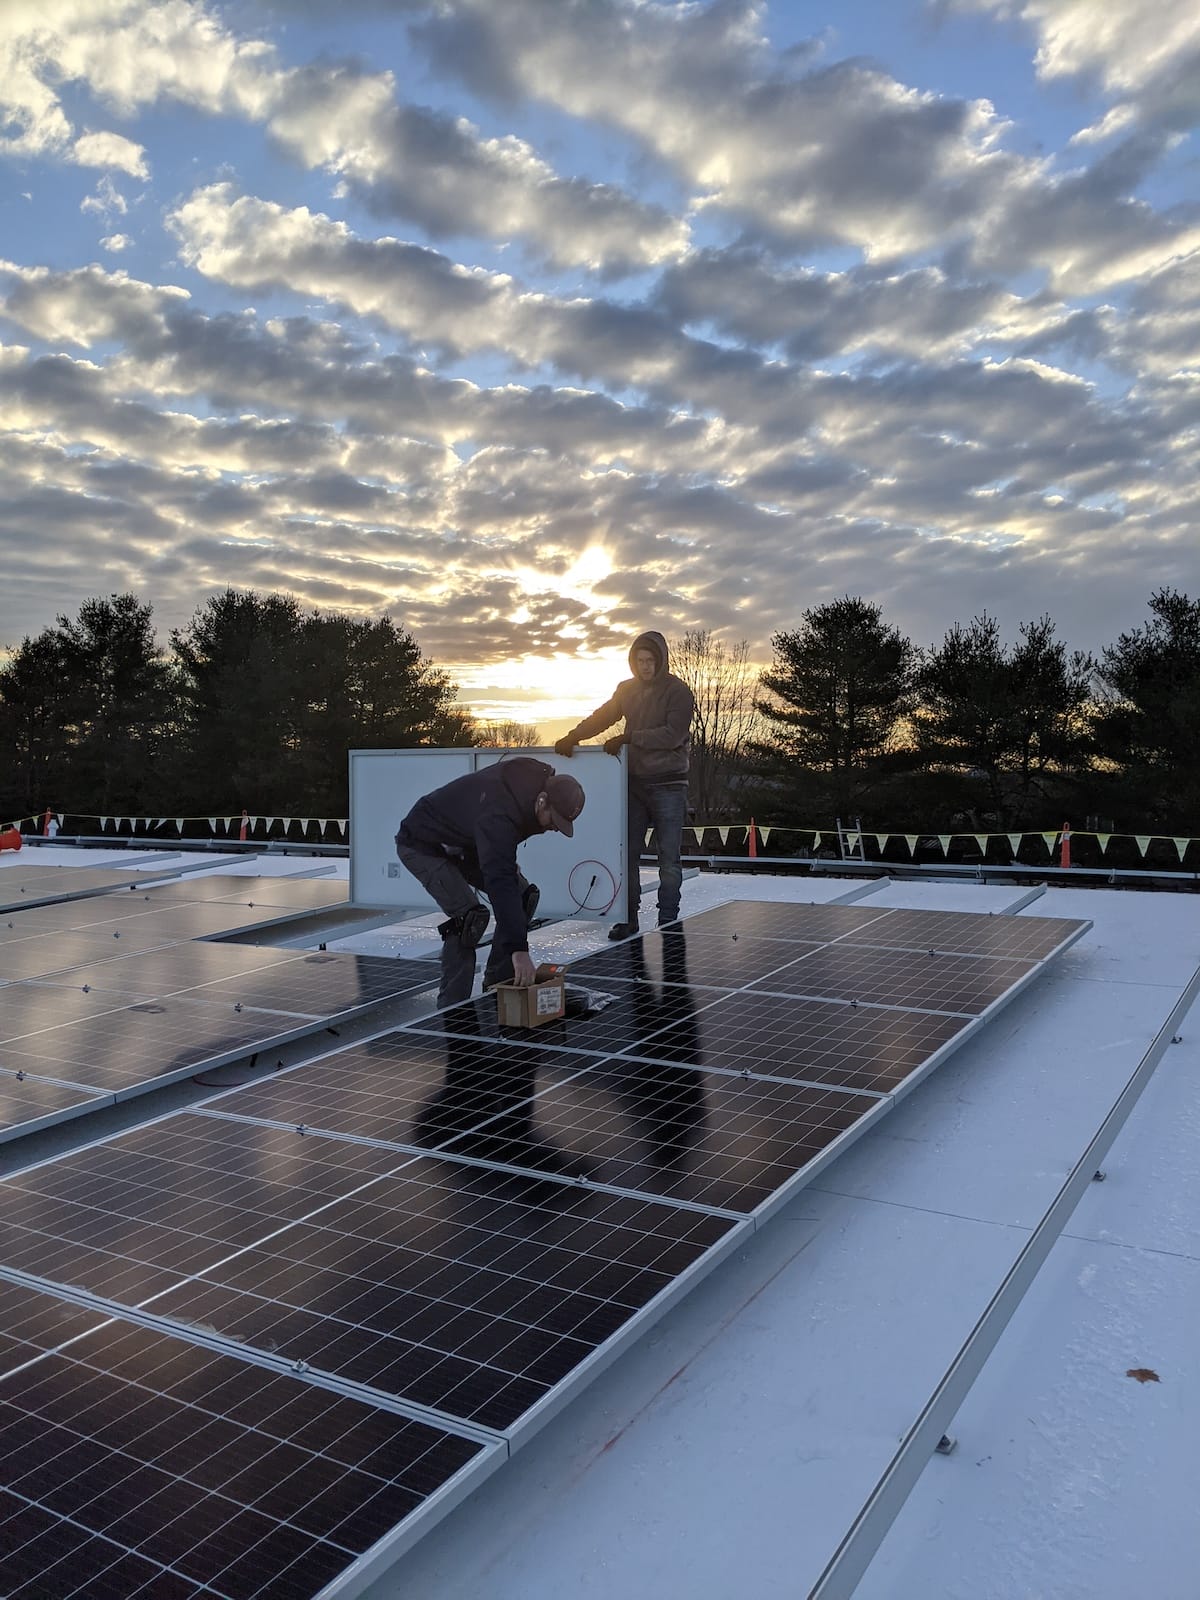
Solar Panel Staging
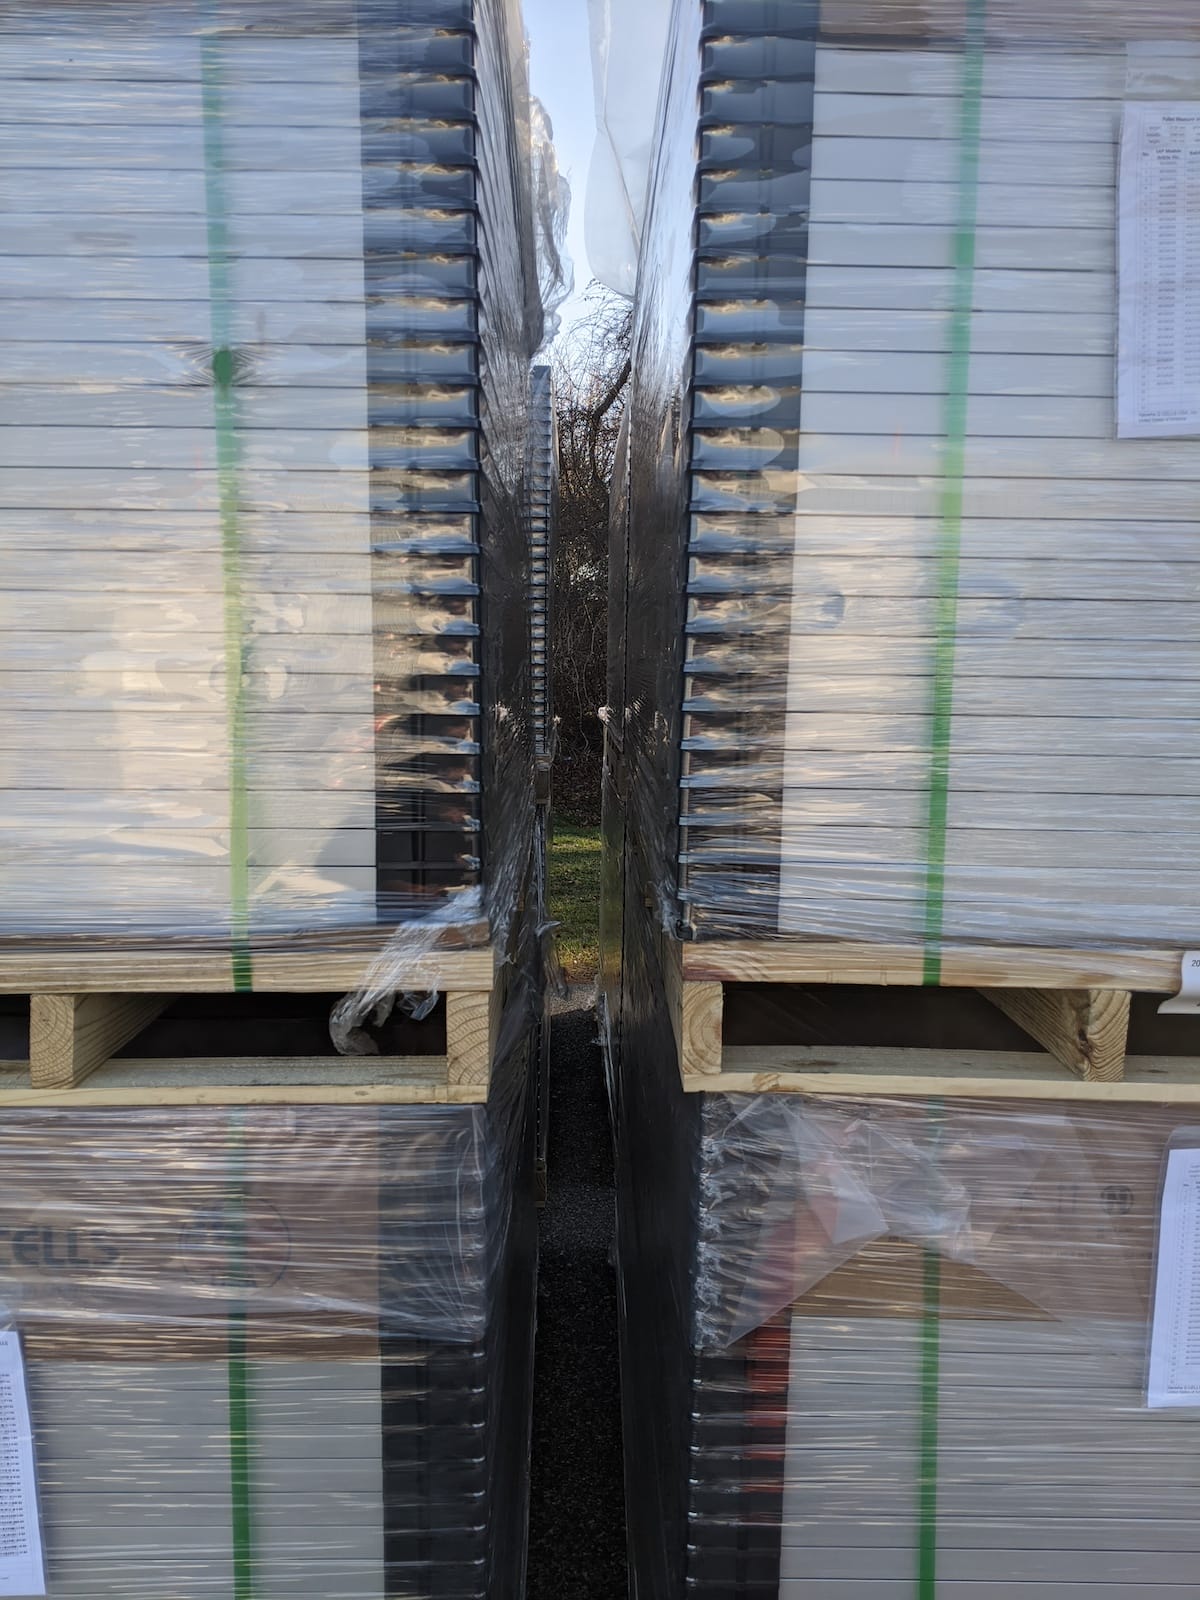
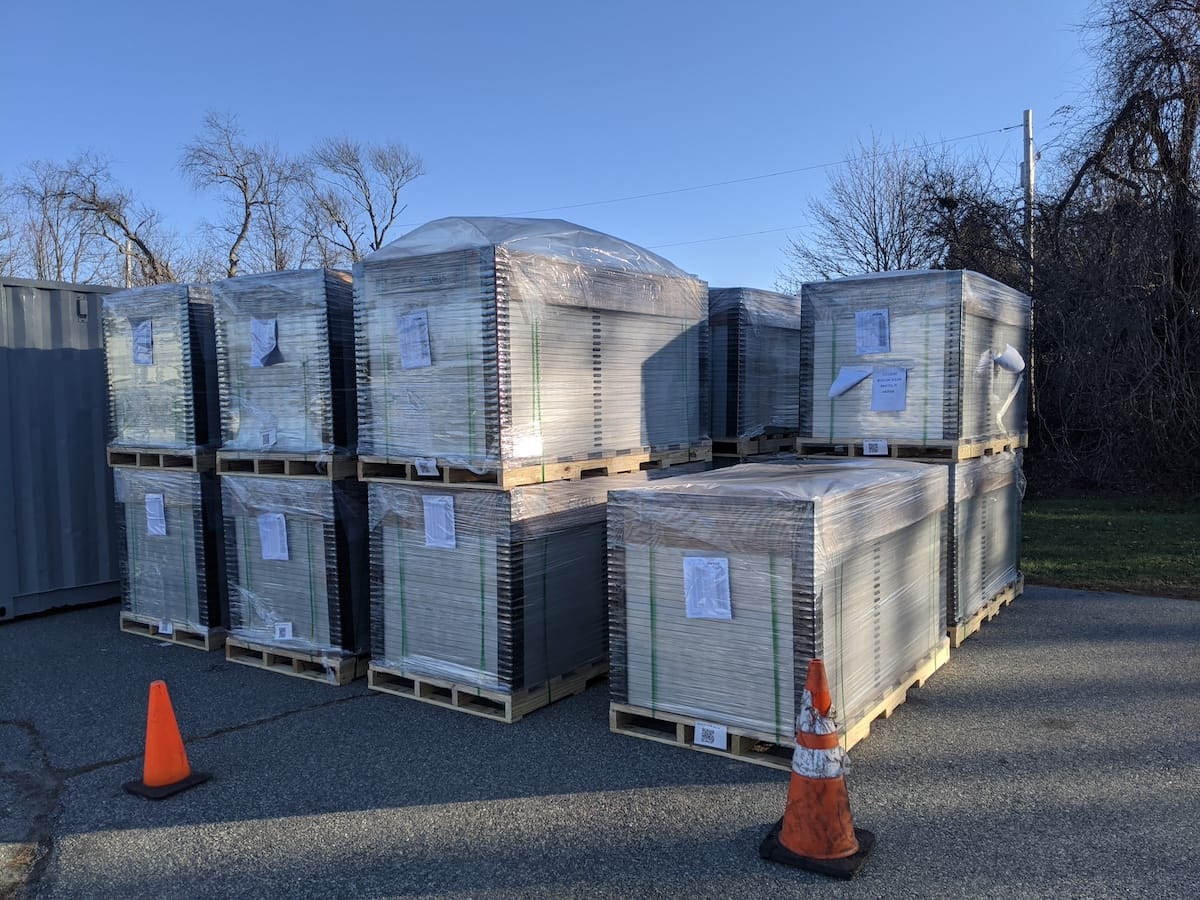
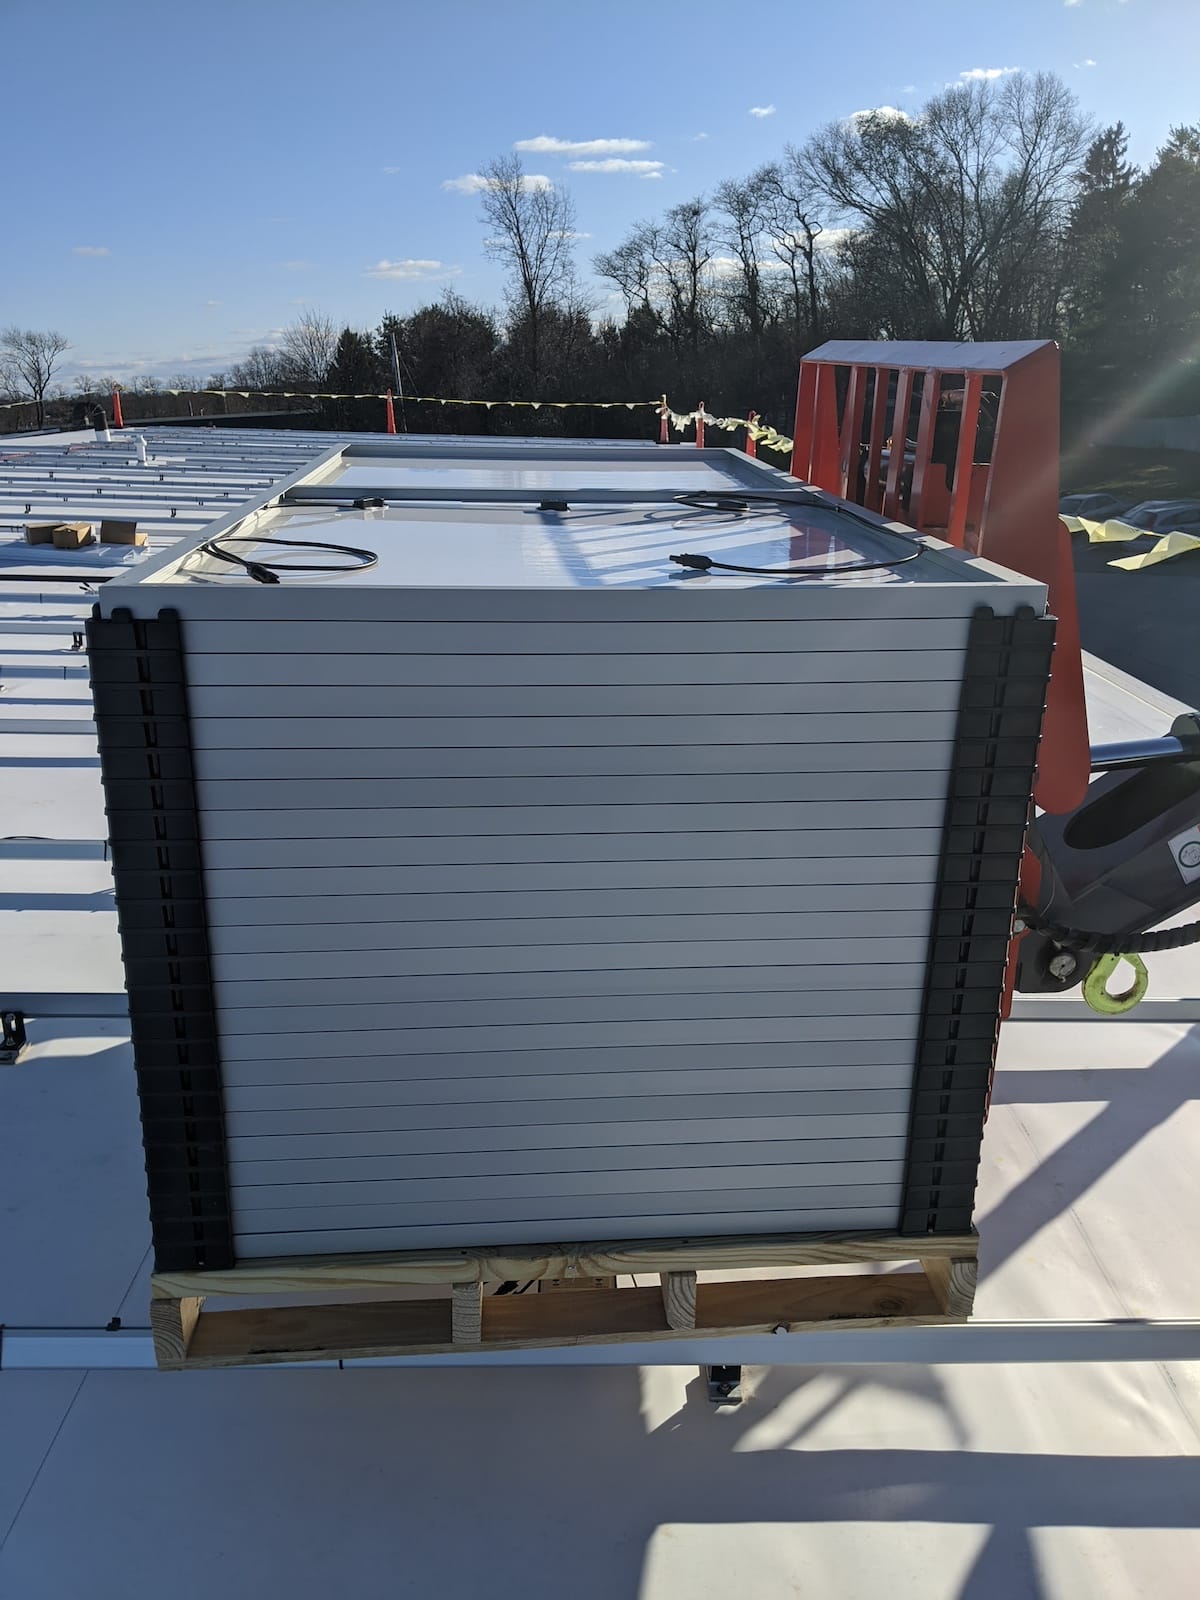
As we transition to the installation phase, we begin by staging and inspecting the solar panels – referred to as ‘modules’ in the industry, similar to how electrical panels contain numerous fuse modules.
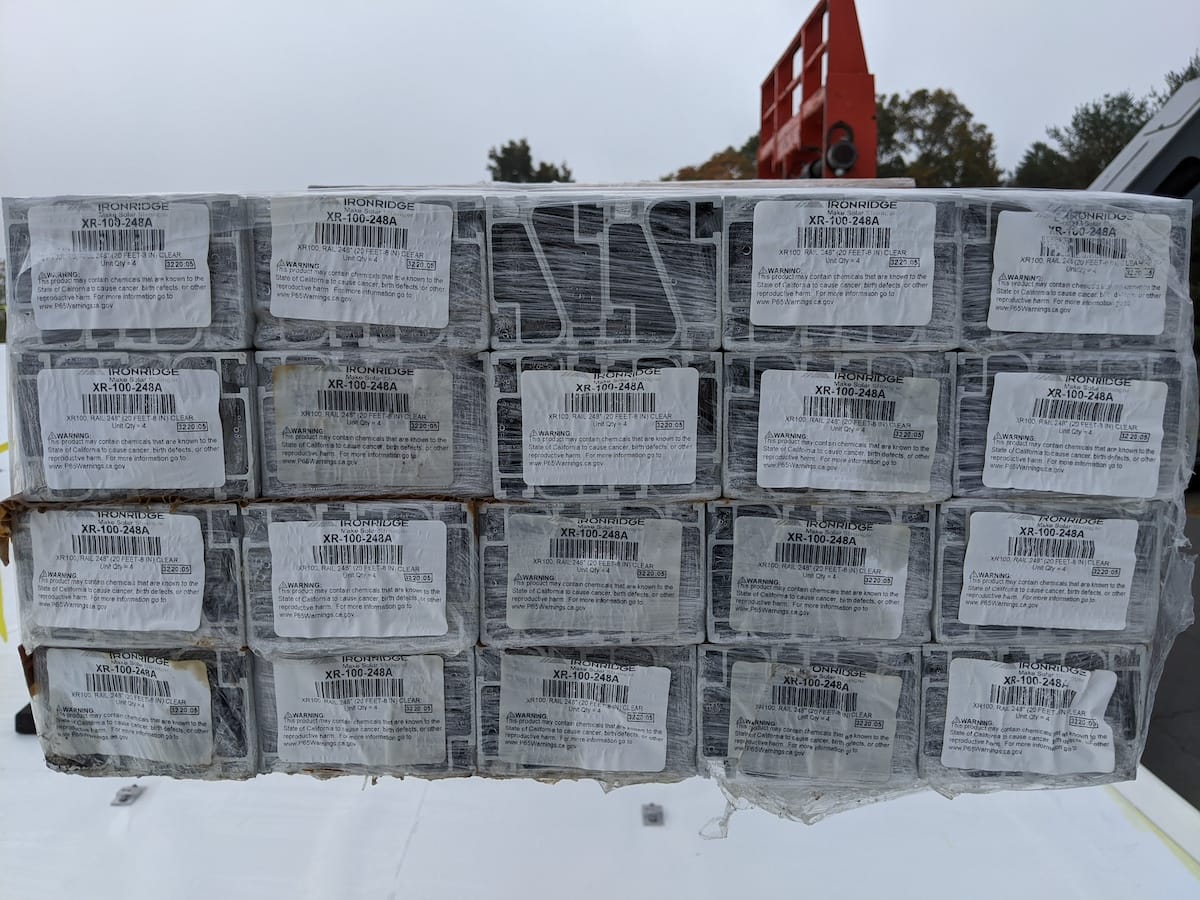
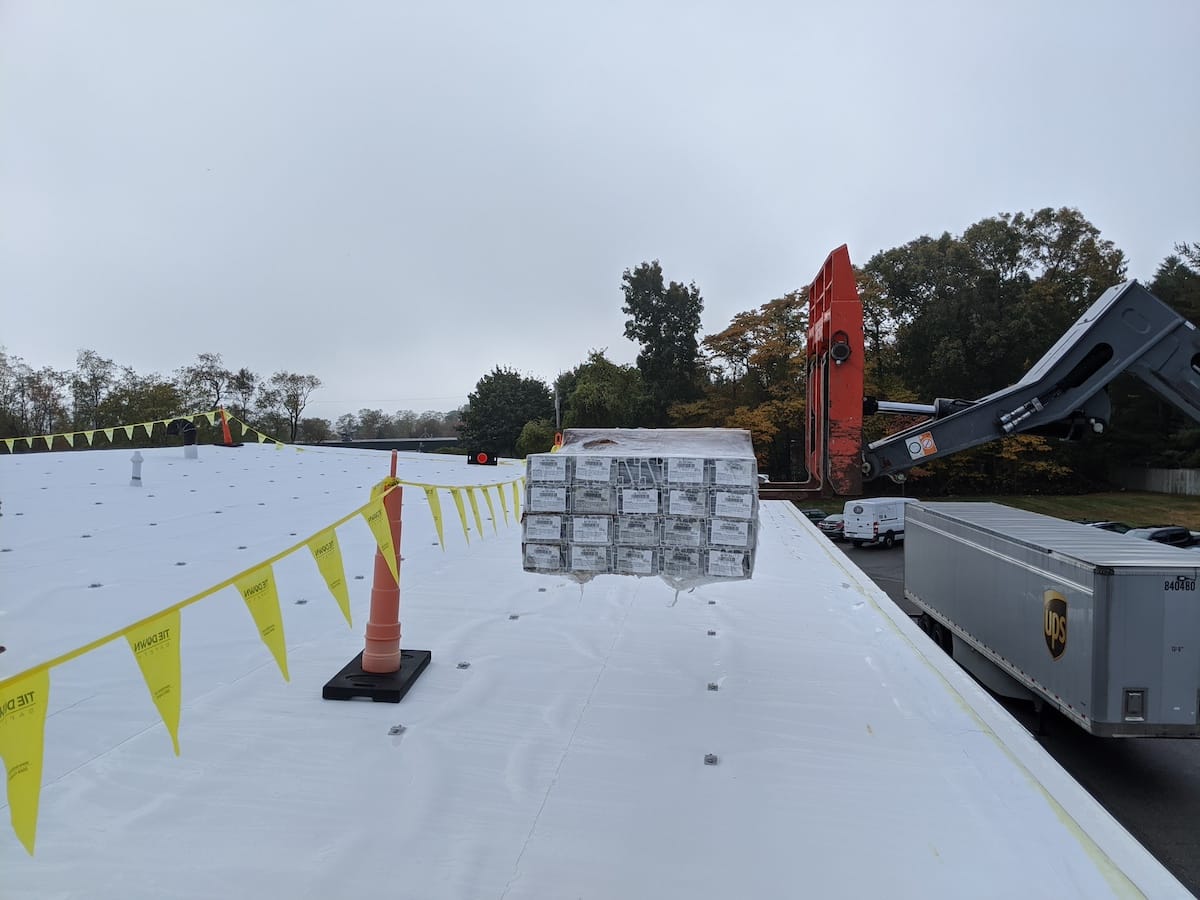
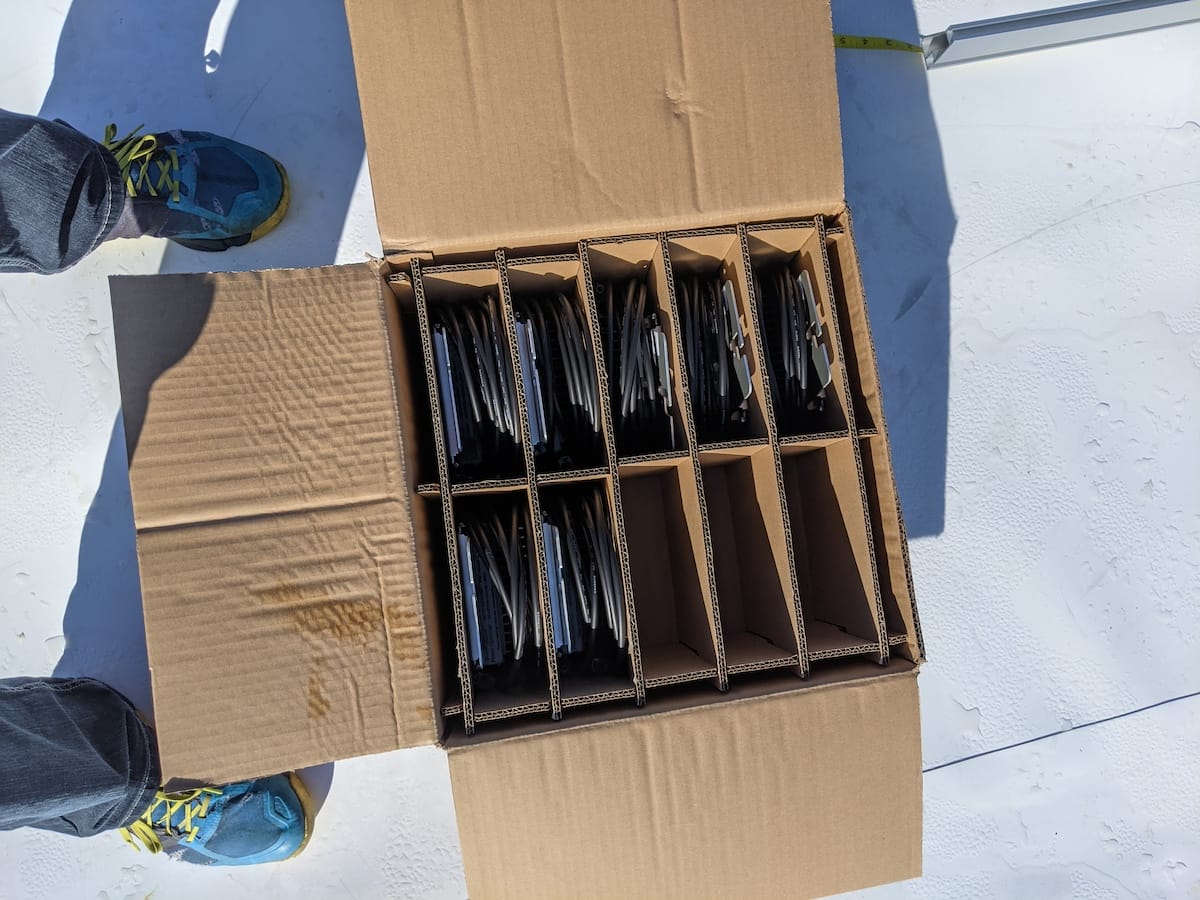
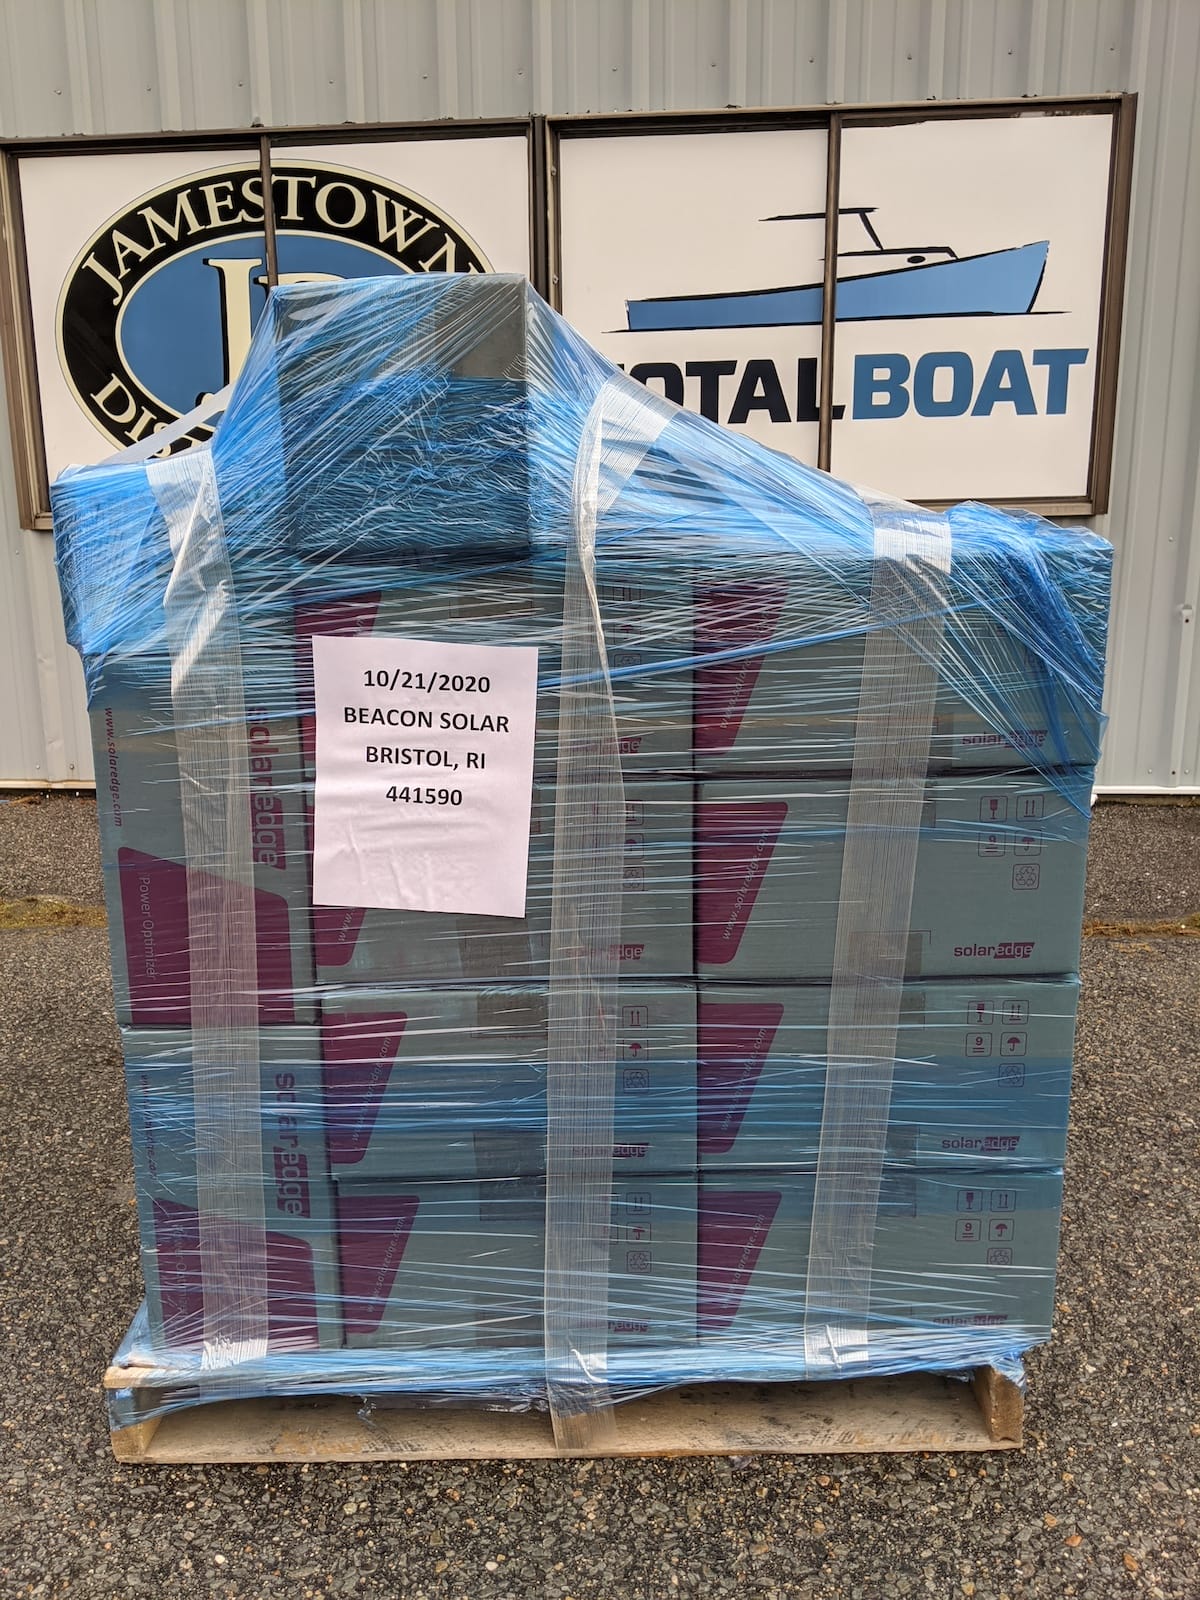
For this project, we have chosen 588 ‘Q.Peak Duo L G6p.2_A 425’ watt solar modules from Q Cell, which are assembled in a factory in Georgia.
Each pallet holds 29 modules, each weighing 64.2 lbs, for a total of 1861.8 lbs. per pallet. Approximately 20 pallets can fit in a 40-foot shipping container or a standard 53-foot semi-trailer.
Installation of Solar Modules

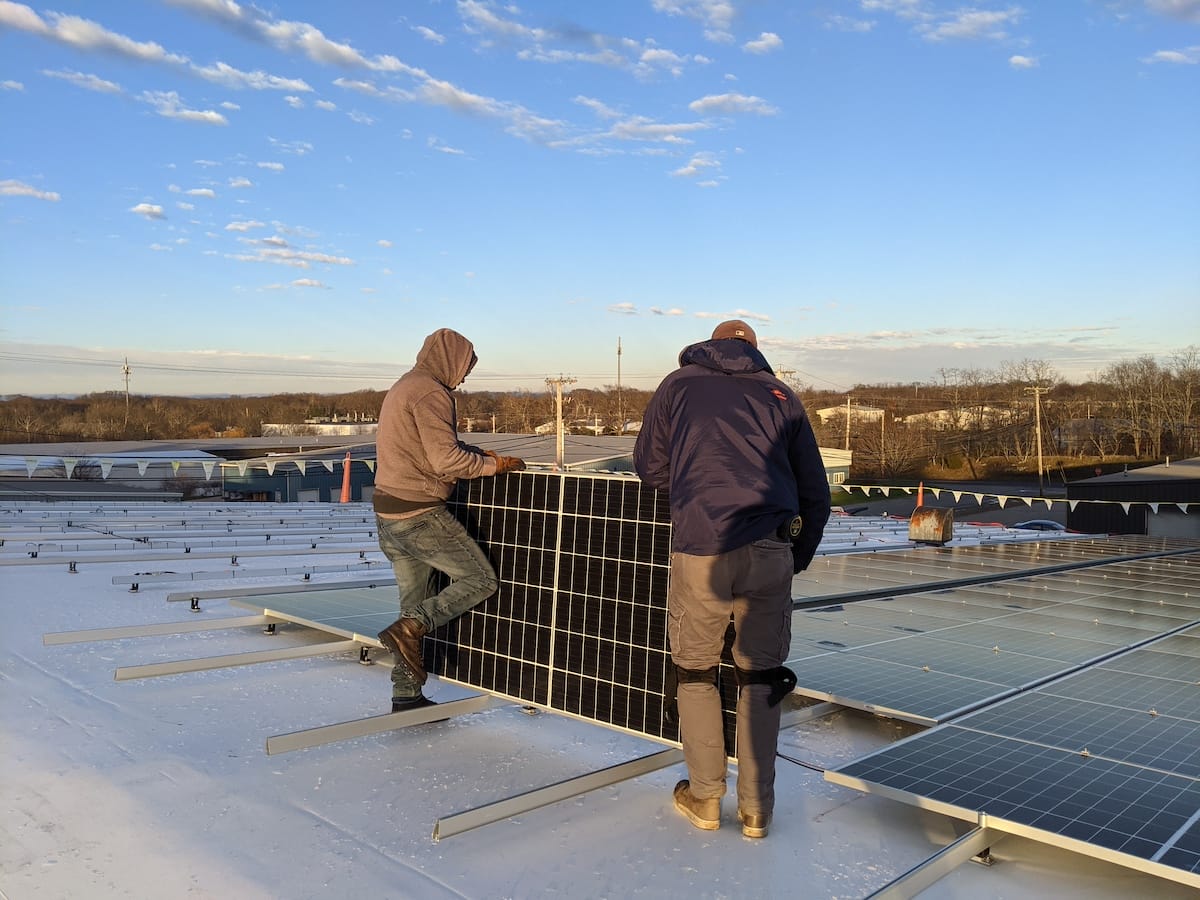
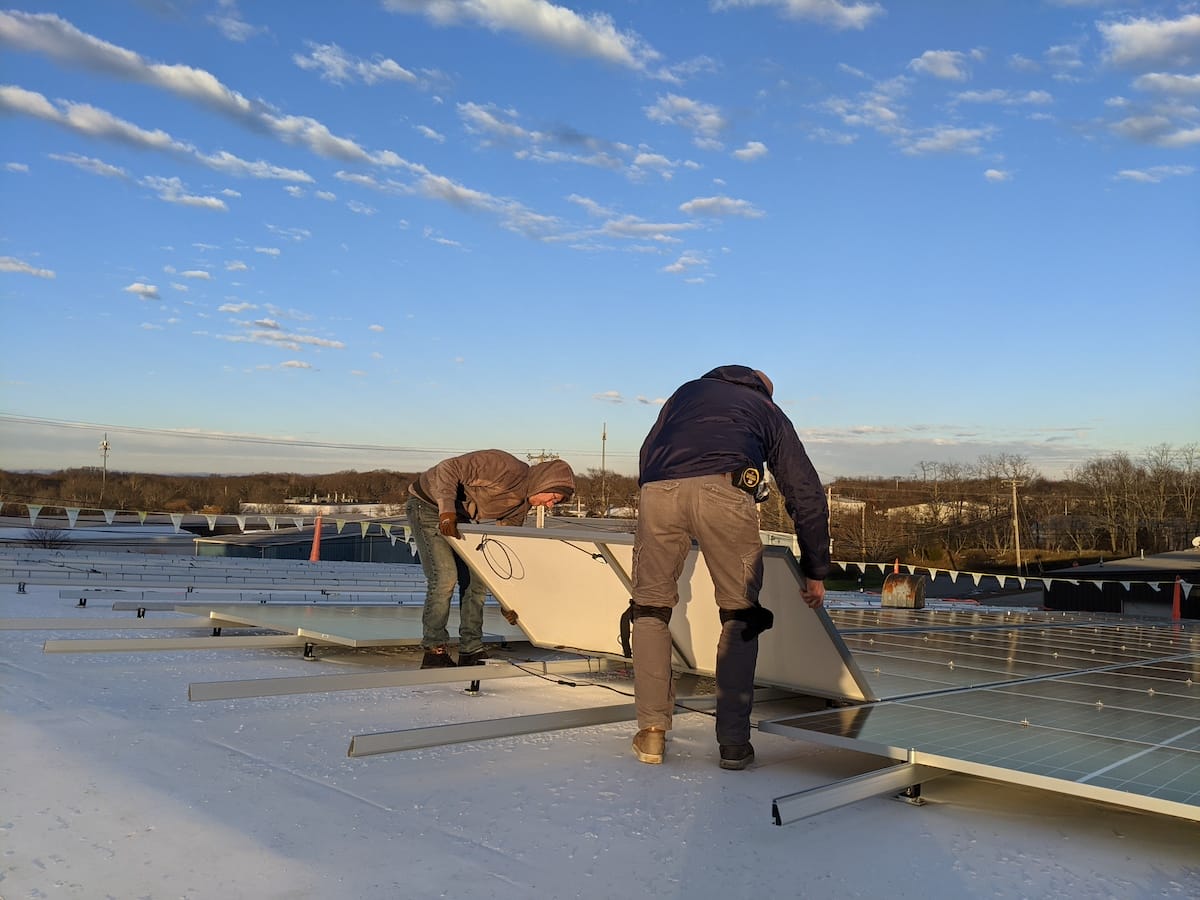
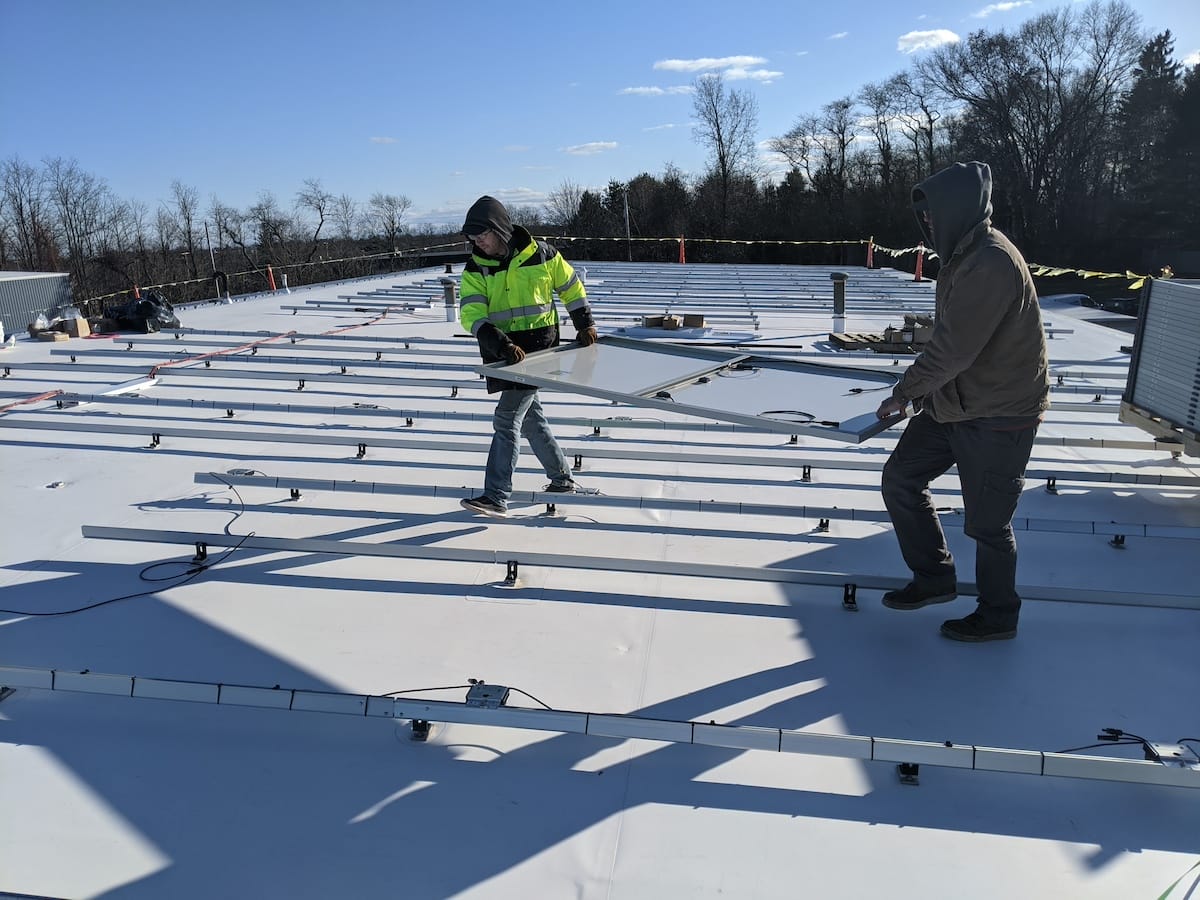
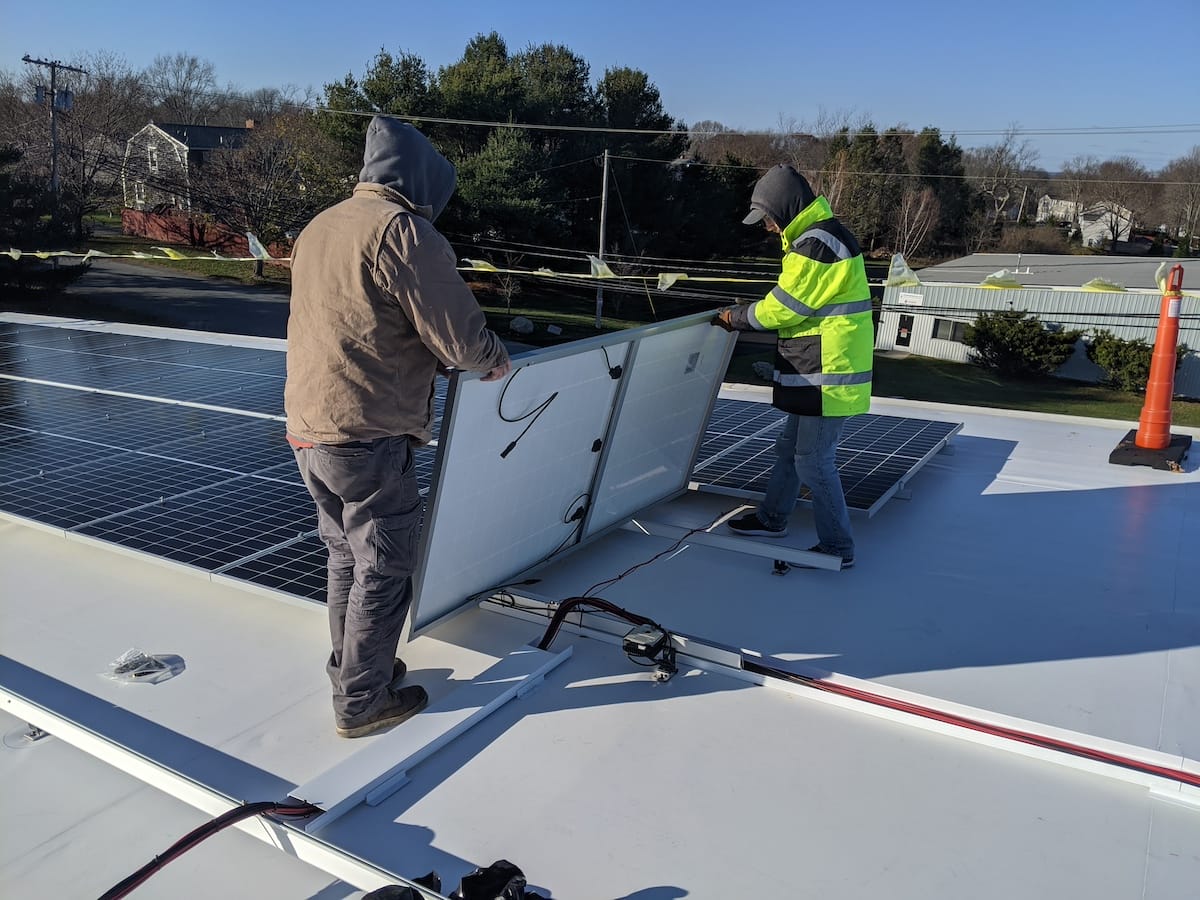
Next, we install and secure the solar modules. This phase is particularly satisfying as we see so much visible progress in a short time. The solar modules, featuring advanced technology that directly converts sunlight into electricity, are the star of the show.
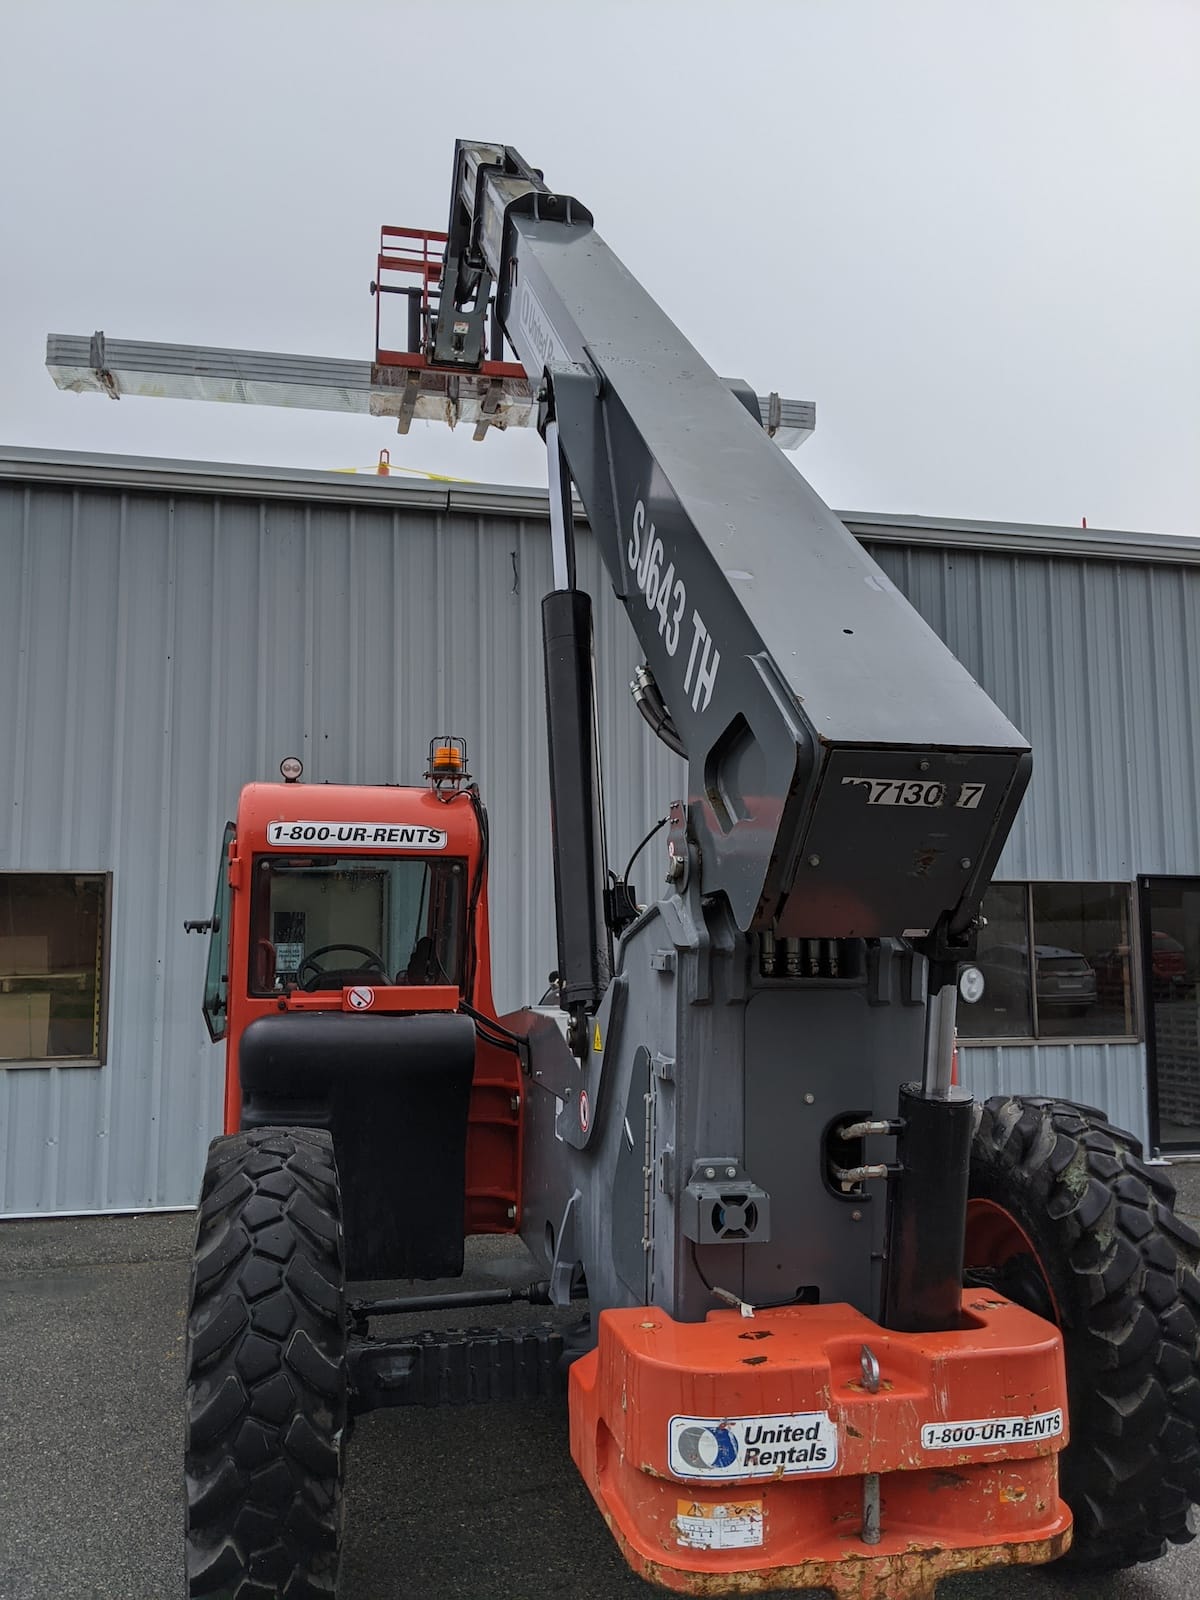
Each solar panel, weighing 64 pounds and measuring 87 by 41 inches, requires two people for handling. The modules are arranged in rows and secured to the Ironridge aluminum rails with end clamps at the row ends and mid clamps between panels.
Given their size, the panels are susceptible to being carried by the wind under the right conditions. This project, located in Rhode island – often referred to as the ‘Ocean State’ and known for its strong winds, especially during hurricanes – required engineering specifications to withstand winds of up to 135 miles per hour. they are sized fairly large – and thus can be carried by the wind in the right conditions. This project is located in a region – Rhode Island is the “Ocean State” known for getting faster winds, generally during hurricanes. For this reason, the engineering requirements dictated the system had to be able to handle up to 135 miles per hour.
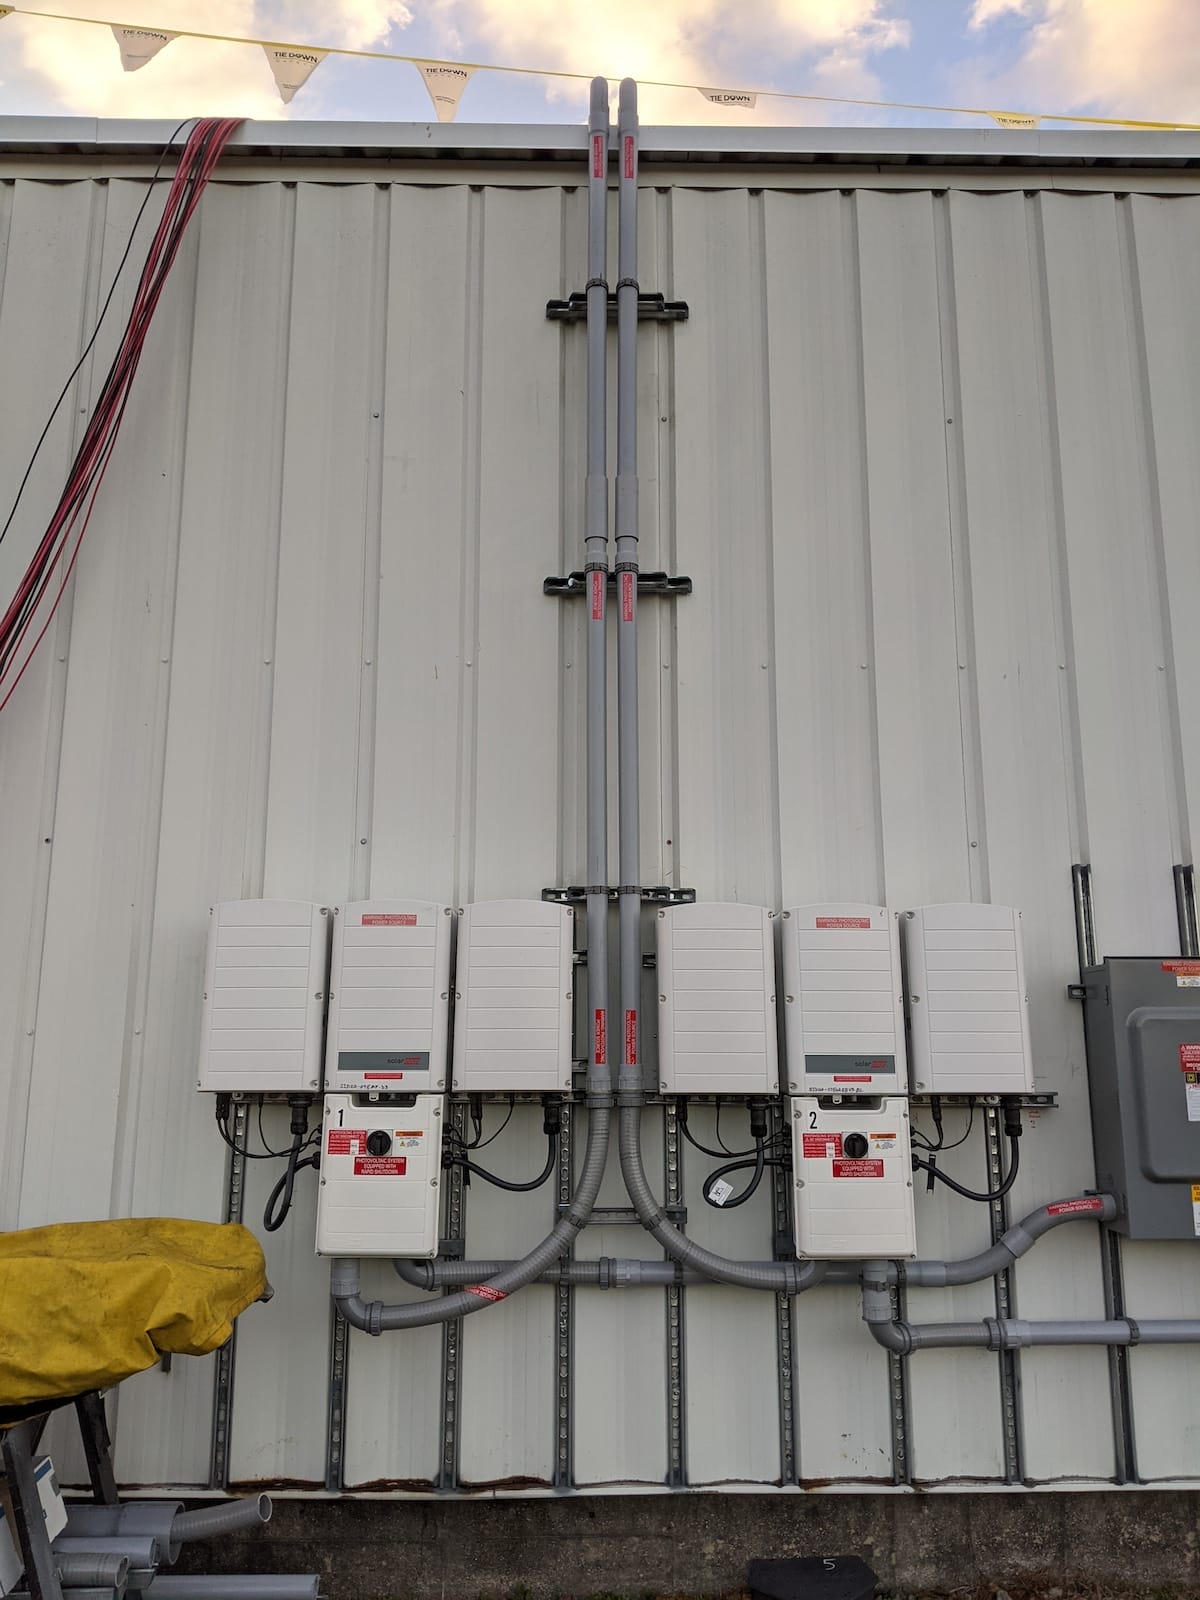
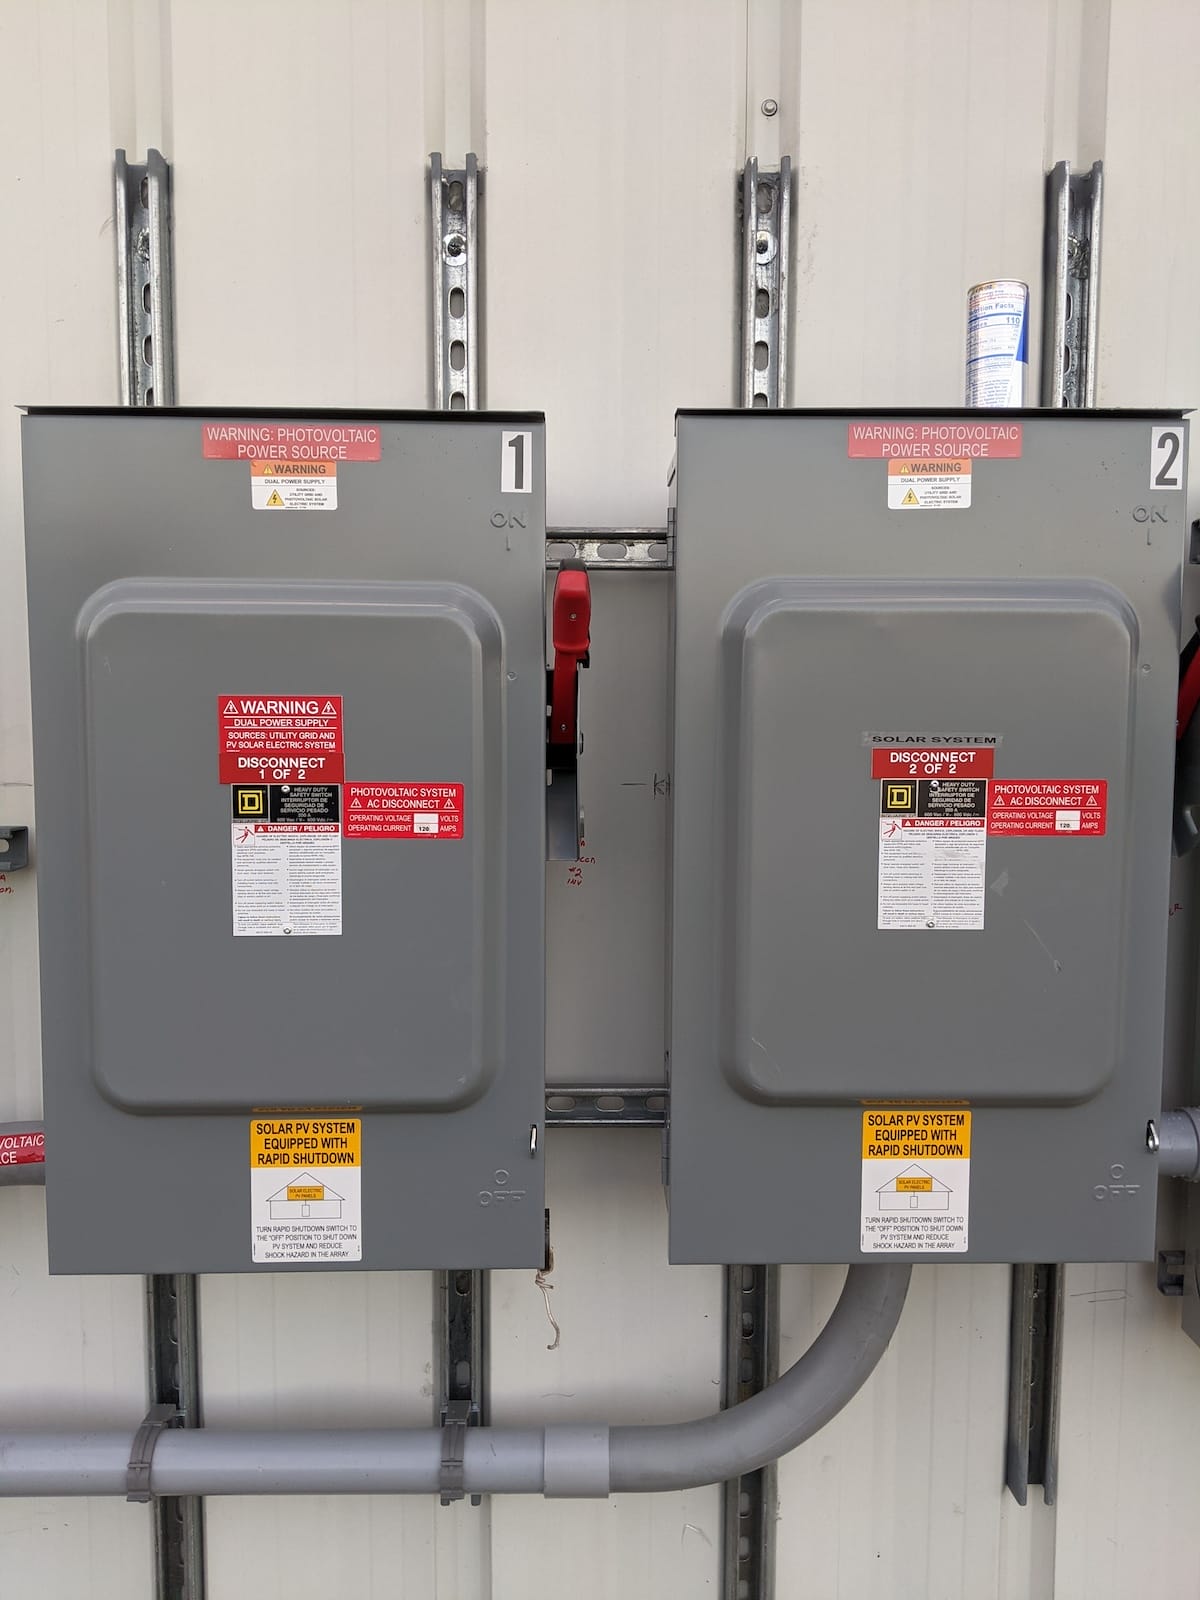
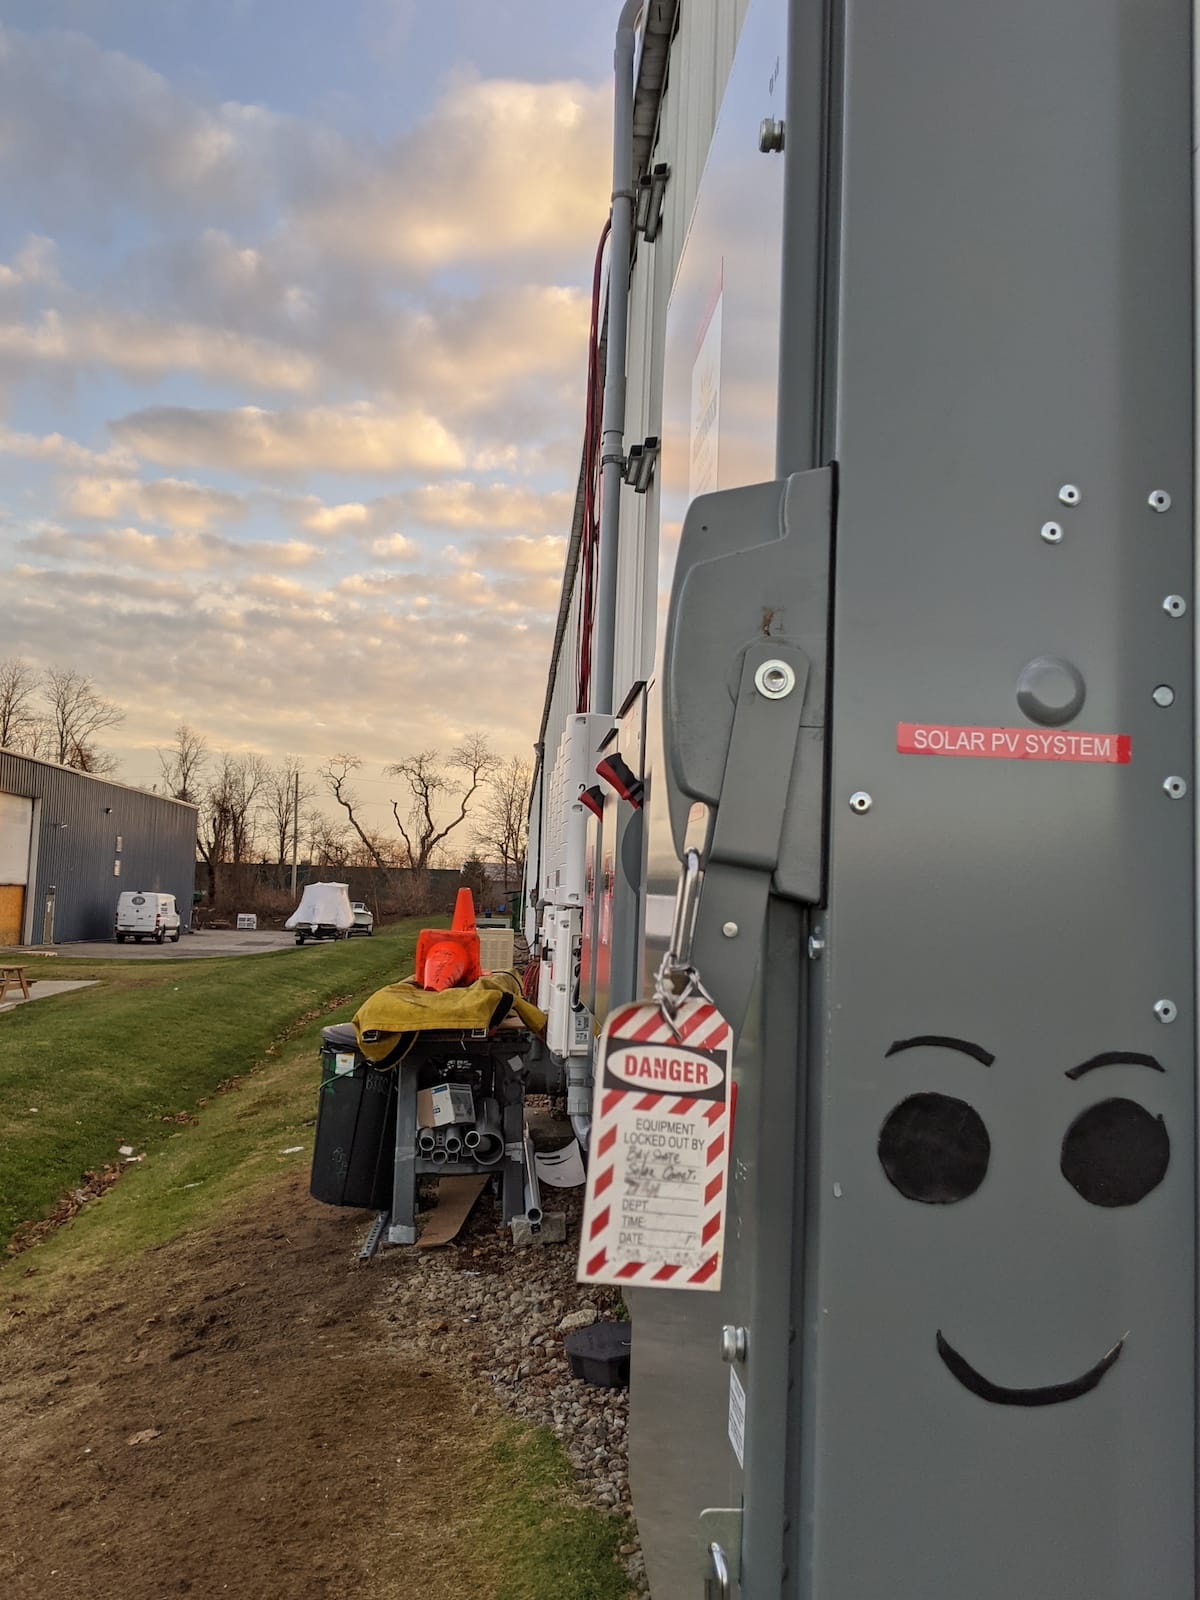
Inverters and Switch Gear
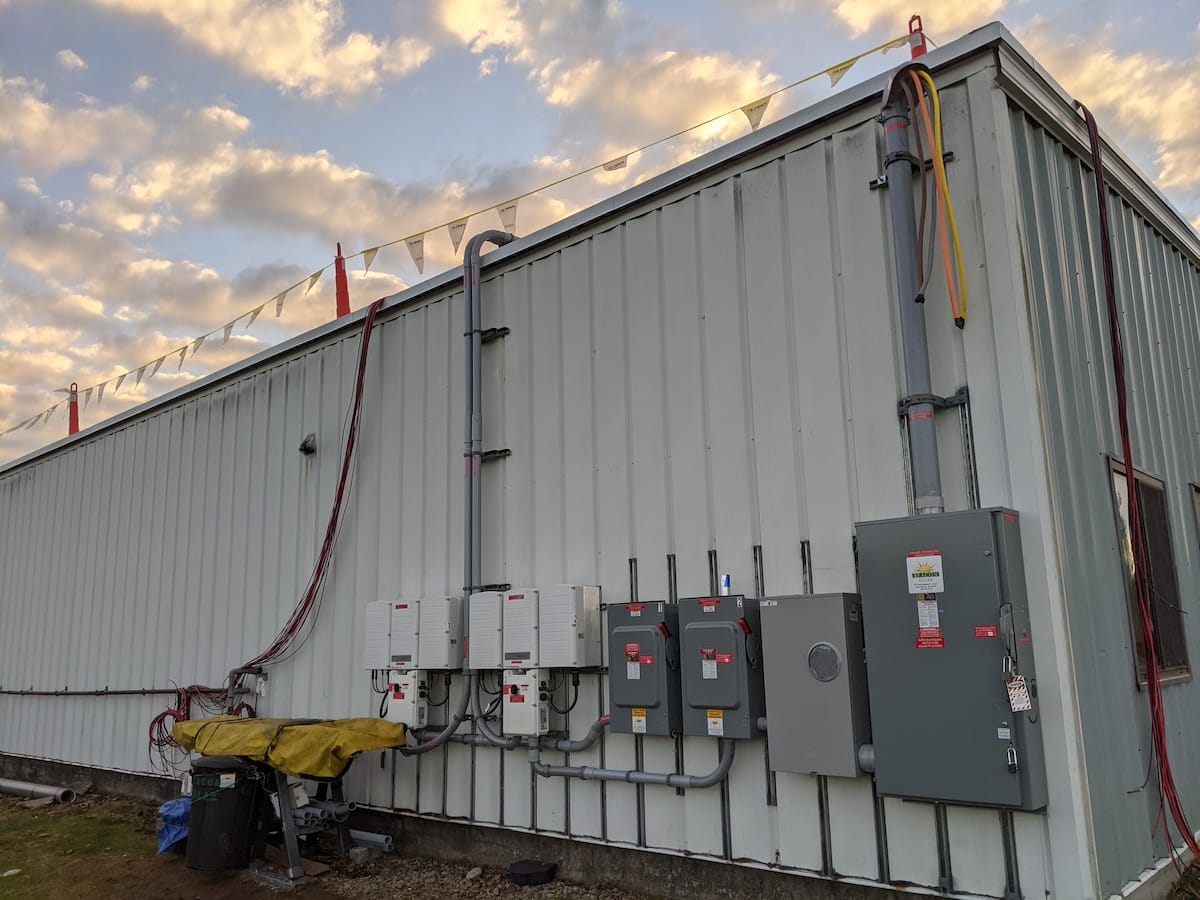
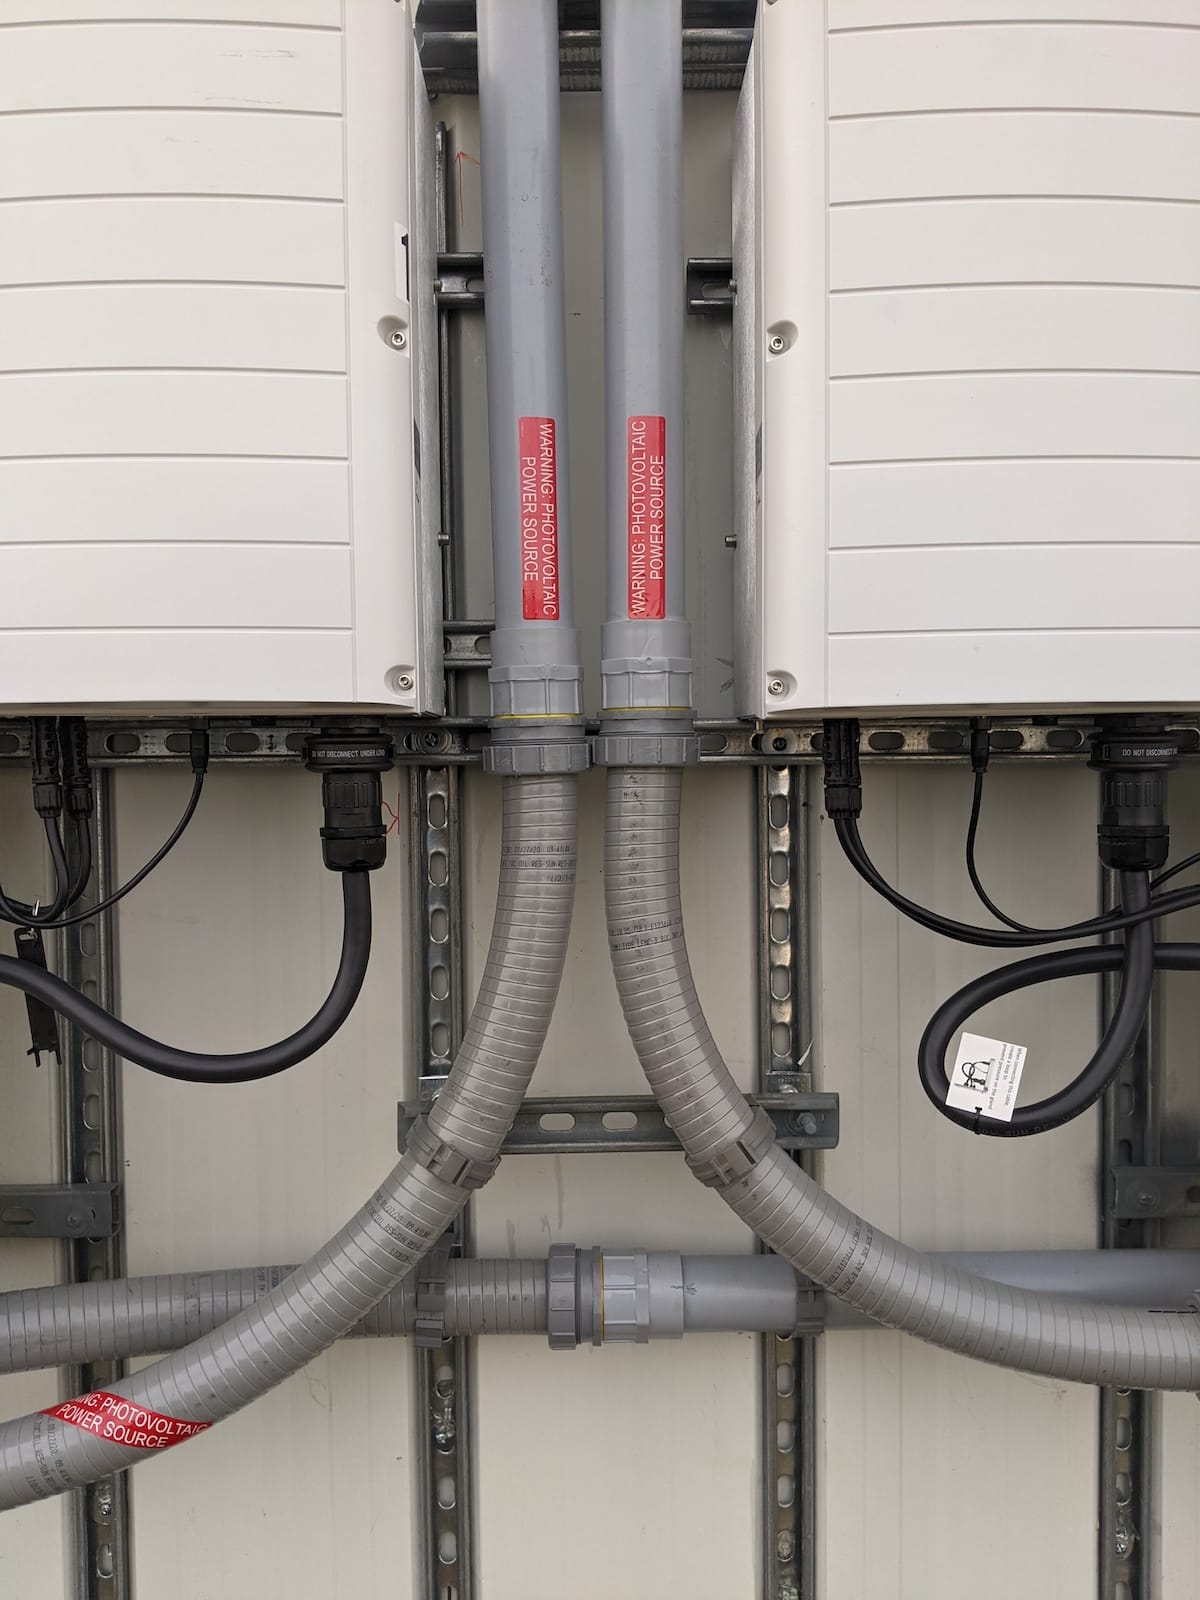
While solar panels often receive the most attention, inverters and switchgear are equally vital to the system’s operation. The top left image displays the key solar equipment mounted on the building. DC wires from the roof feed into the white SolarEdge inverters, each paired with a grey AC disconnect box. These boxes, crucial for fire safety, allow for quick system shutdown in emergencies, preventing hazardous currents from the panels. Between the AC disconnects and the utility disconnect switch lies the utility meter box, awaiting a meter. Wires then lead up to the roof corner, connecting to a transformer before joining the grid via the utility pole.
In the middle image above, two grey conduits house the red and black DC wires from the roof, direction them into two SolarEdge 100kW Synergy inverters. These inverters convert the DC power into AC, which is then fed into the grid. Additionally, the SolarEdge optimizers provide rapid shutdown capabilities at the rooftop level, enhancing safety by offering a secondary disconnect option – this is critical because water using during firefighting can conduct electricity, posing a risk to firefighters.

Your Preferred Contractor for Solar Development
The CommercialSolarGuy is ready to develop, engineer, procure, and construct your solar power solutions. We specialize in installing solar panels on commercial rooftops, parking lots, and smaller ground areas (up to 50 acres).
Our team includes many members with over a decade of experience in the solar industry, alongside seasoned professionals from the construction trades and the families that they support.
To discuss your solar project or for more information, please contact us via phone at 508-499-9786 or through our Contact Us form:

Building the Jamestown Distributors System
Through our collaboration with Jamestown Distributors in constructing a 249 kW solar power system, we contribute to a sustainable future while supporting traditional crafts and industries. Since 1977, Jamestown Distributors has been a cornerstone for makers, offering “Tools and Inspiration for Craftsmen” across various projects, including boat building, woodworking, home restoration, art, and more. We are truly proud of our partnership with Jamestown Distributors and our shared dedication to sustainability and craftsmanship.